WYSIWYG - “What You See Is What You Get”
WYSIWYG is a content editing tool which allows you to see precisely how content will look after posting it. It helps you to set and organize your content.
To edit your content, you can find a feature bar above the input container. Each feature is explained below (see below image 1):
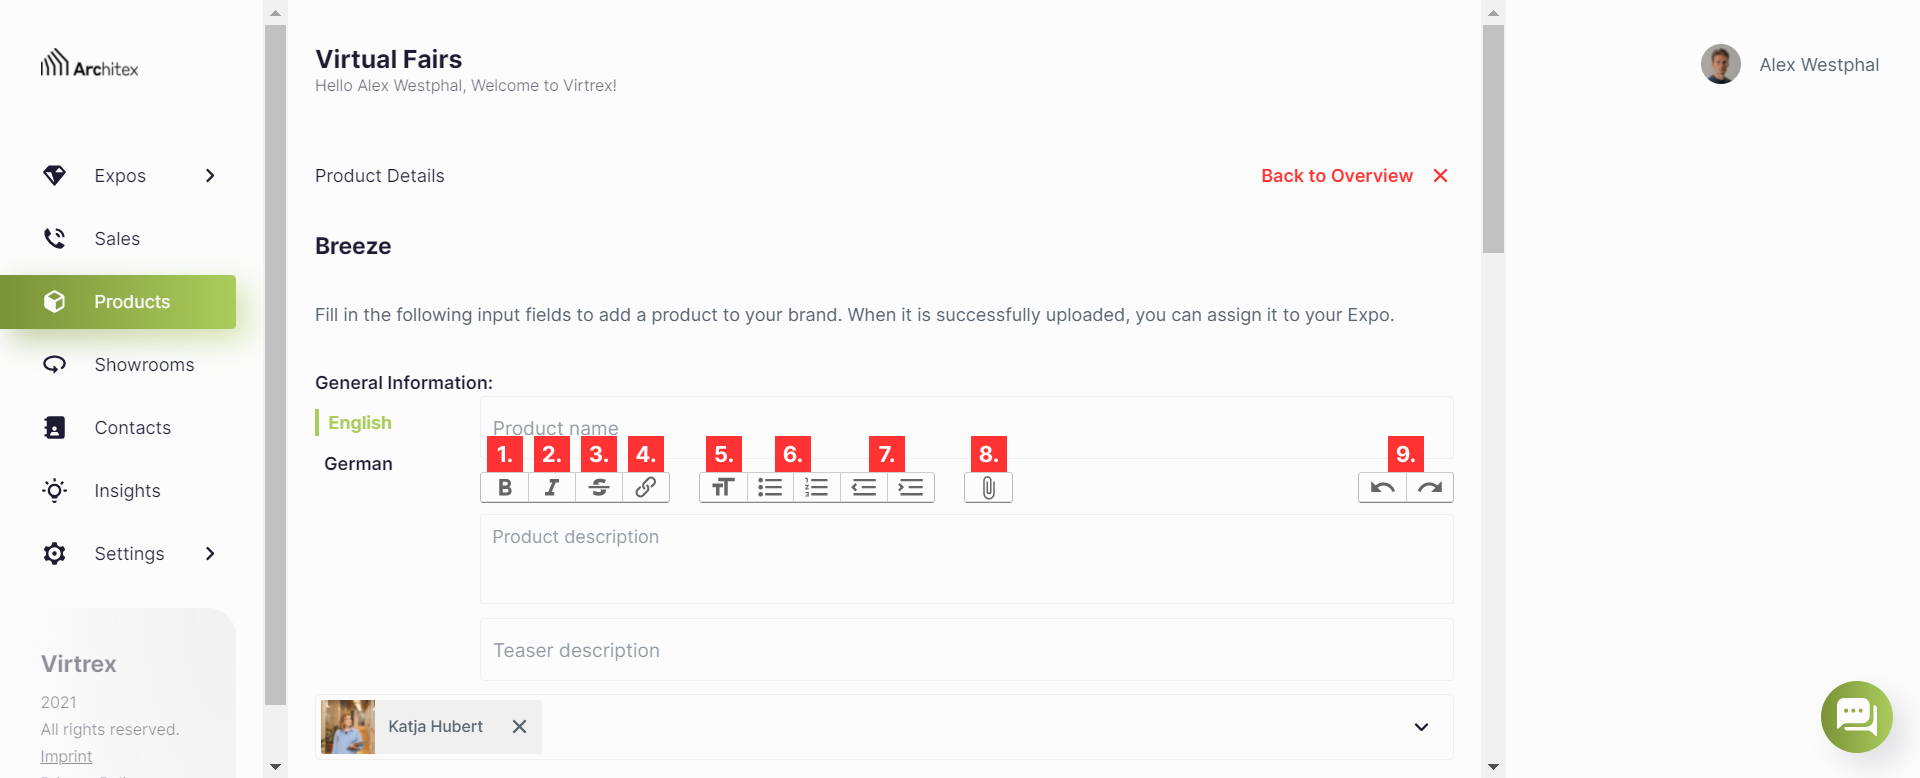
Image 1: Here you see the overview of the WYSIWYG-editor.
The first 3 action buttons are for the text font:
Press “B” to make the text bold (see above image 1.1.).
Press “I” to make the text italic (see image 1.2.).
Press “S” to strike through the text (see image 1.3.).
The fourth button in the block will let you insert external links, ie. links to other websites (see image 1.4.). This is helpful if you want to include documents or videos in your product description. To do so, upload the preferred files to a cloud provider of your choice first and make them freely available. Then you can insert the link to your files here.
The button with “T” is for the title, and makes the text, bold and bigger (see image 1.5.).
Use the “reduce indentation” button to align your text further to the left and the “enlarge indentation” button to align it further to the right (see image 1.6.).
Use the “list” button to create a bullet list and “enumeration” to create a numerated list (see image 1.7.).
With a help of “clip” button you can attach an image (see image 1.8.).
The “undo” button is responsible for going a step back and the “restore” button for going forward (see image 1.9.).
Note: Please note that you cannot add images via copy-paste, but have to add them by the "clip" button (see image 1.8.) or by drag and drop.