Quickstart
Your Expo in 6 steps
In this article, we will show you how to create your Expo in just 6 steps. Please read the relevant articles in the "Introduction: Features and Functions" section of our Virtrex Academy for more detailed information.
1. Complete your profile
To edit the details in your profile, click on your name in the top right corner. In this section, you can change the credentials you have entered and complete your profile. Please note, if you are added as a team member of the Expo, visitors will not be able to view your complete profile information.
2. Adding your team
Click on "Settings" in the admin panel on the left and then on "Team management" to add employees to your team via the "Invite" button. Afterward, they will receive an email to register for Virtrex. You can also create team roles in order to control which permissions individual employees have across the various areas of the Admin Panel. For more information on this topic, please read our article "Team Management".
3. Create Expo
To create a new Expo, click on "Expos" in the Virtrex Admin Panel on the left. This will redirect you to the overview page where you can see all existing Expos. Here you will find the "Create Expo" button on the right. Then enter all the required information (see image 1 below). After you have successfully created your Expo, you must first enter all other data such as products, showrooms, and events. You will find out how to do this and what options you have in the course of this article.
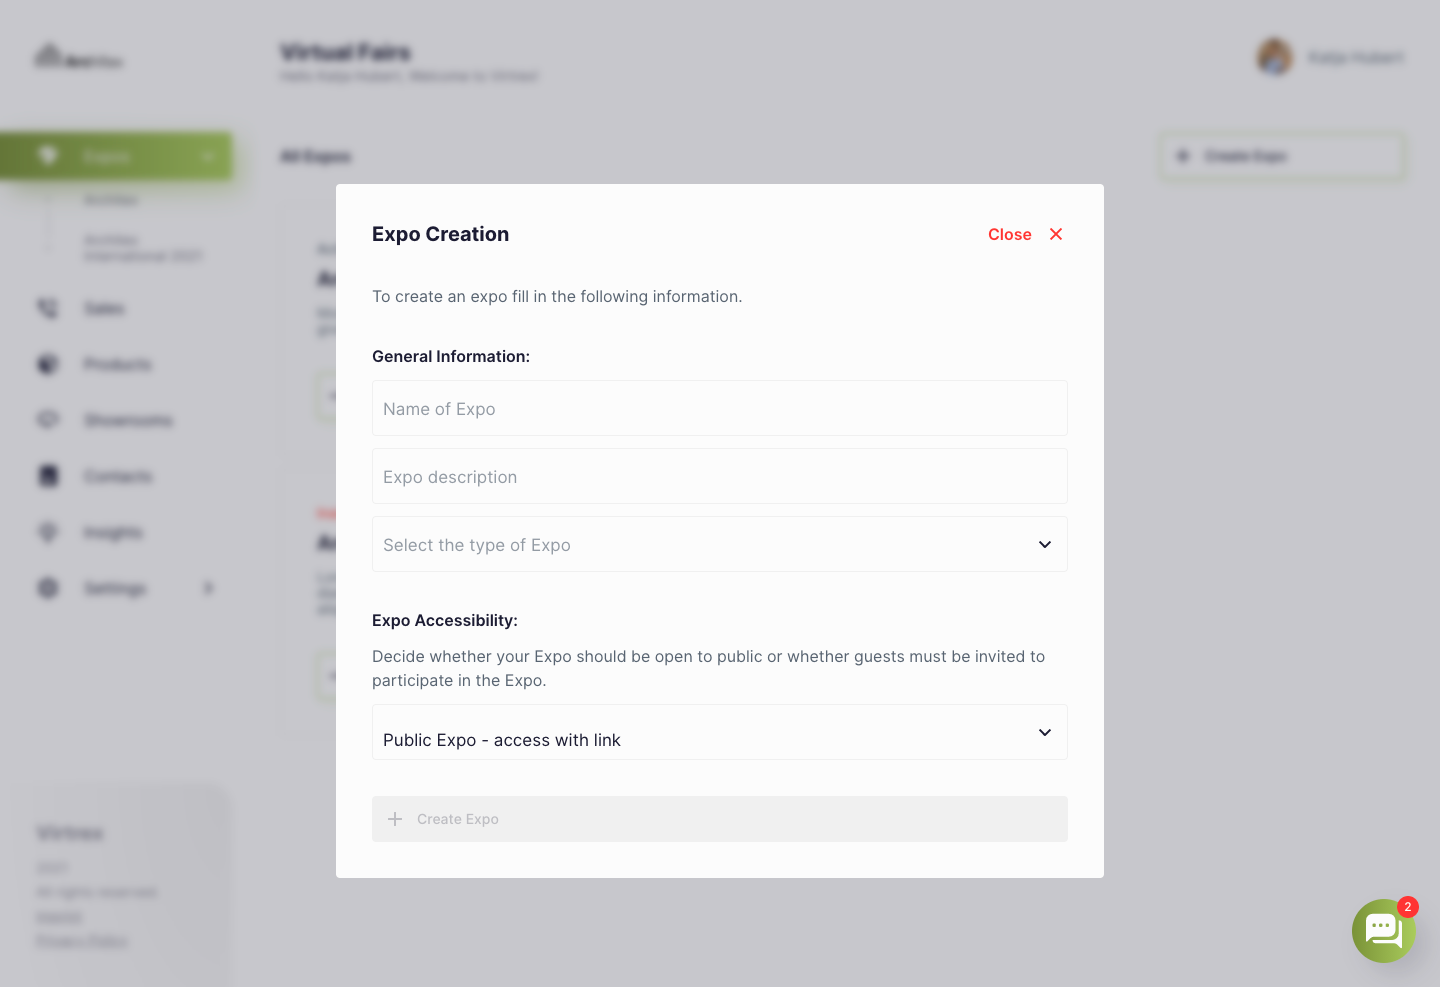
Image 1: This menu is displayed as soon as you want to create an Expo. Enter all relevant information and create your Expo.
4. Adding events
Click on "Expos" in the Admin Panel on the left and enter the Expo for which you want to create events.
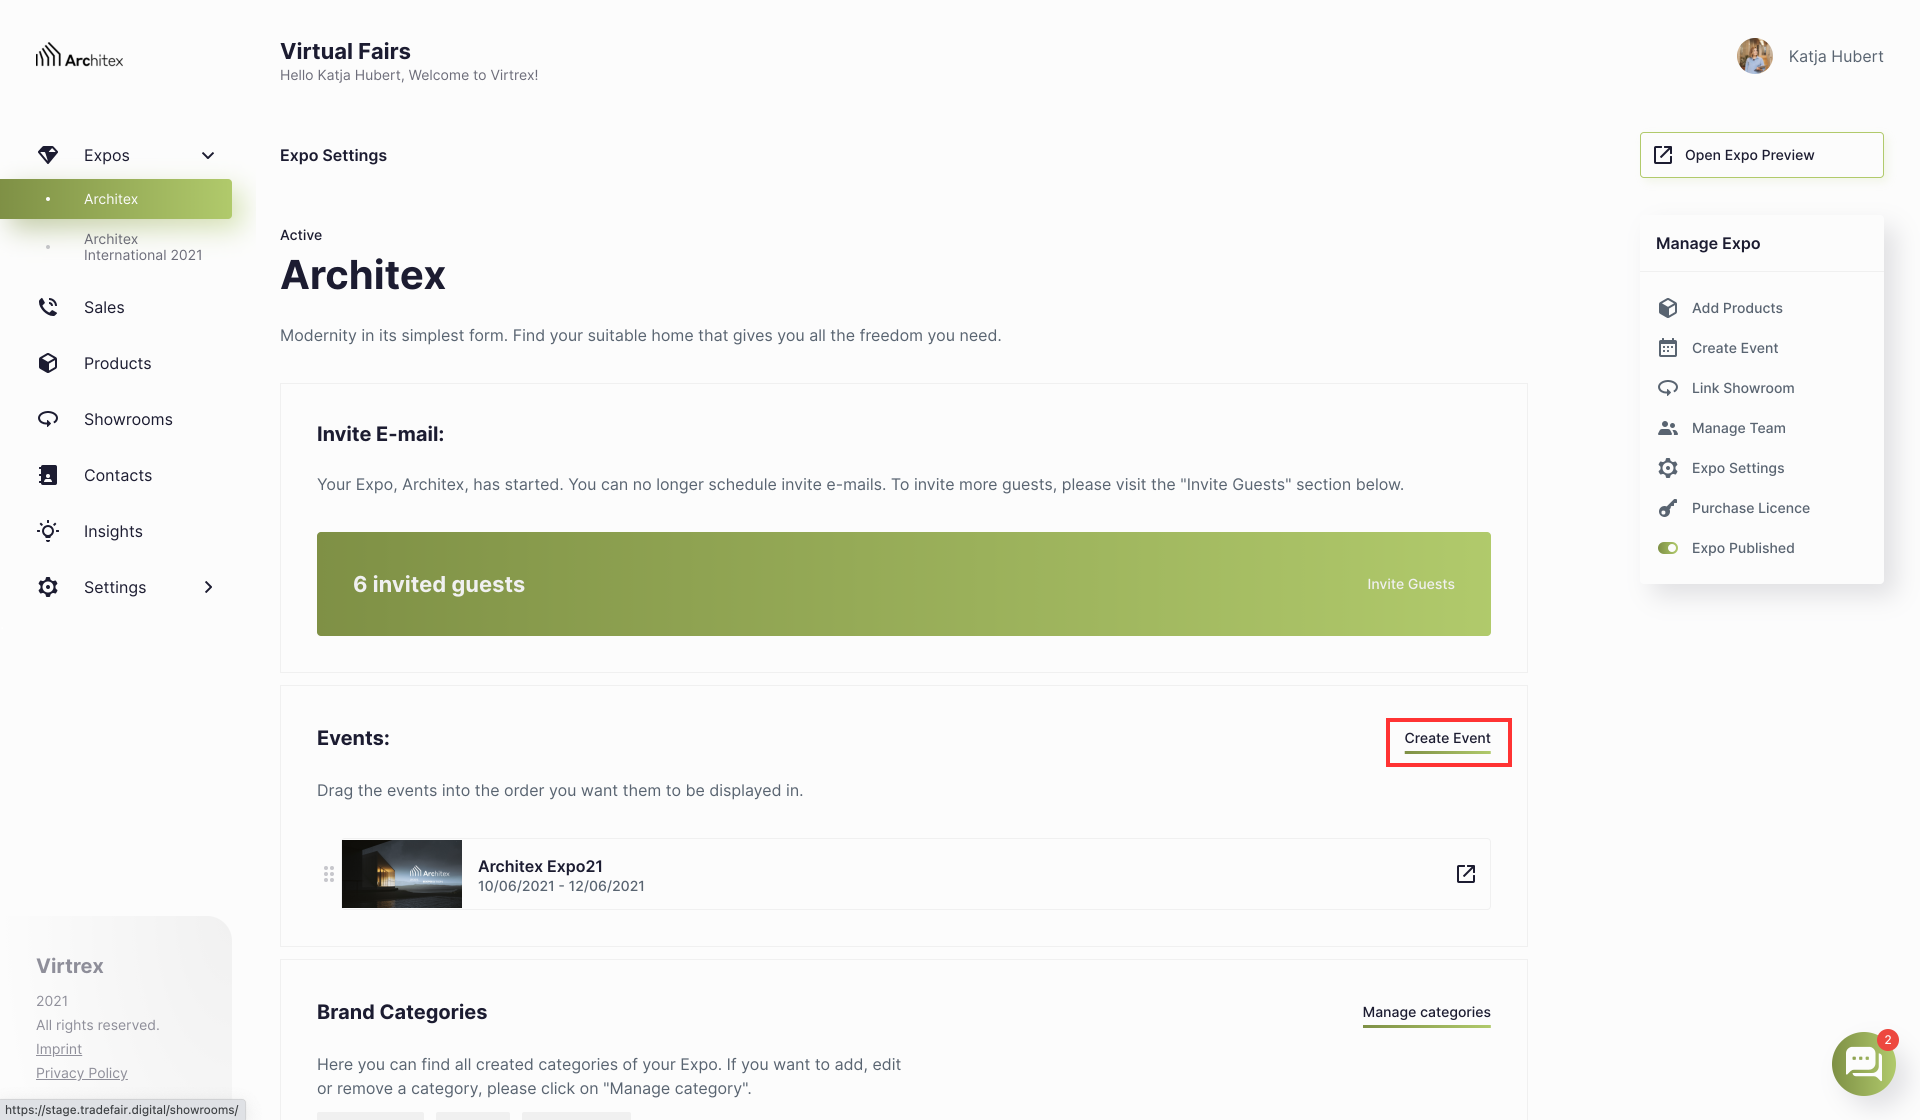
Image 2: Here you can see the event overview in your selected Expo.
Then click on "Create event" (see image 2 above), enter all the required information, and then save your entries. After creating an event, you will need to create stages. Stages are a digital place where all of your streams and panels will take place. Once you have created a stage, you have the option to create individual posts and thus give your event a timeline. For more detailed information, please read our article "Create and manage events".
5. Adding products
Click on "Products" in the Admin Panel on the left. In this section, you will see products that have already been created. In order to create new products, click on "Add product" in the upper right corner. Then fill in all the required fields and confirm your entries by clicking on the "Save details" button (see image 3 below).
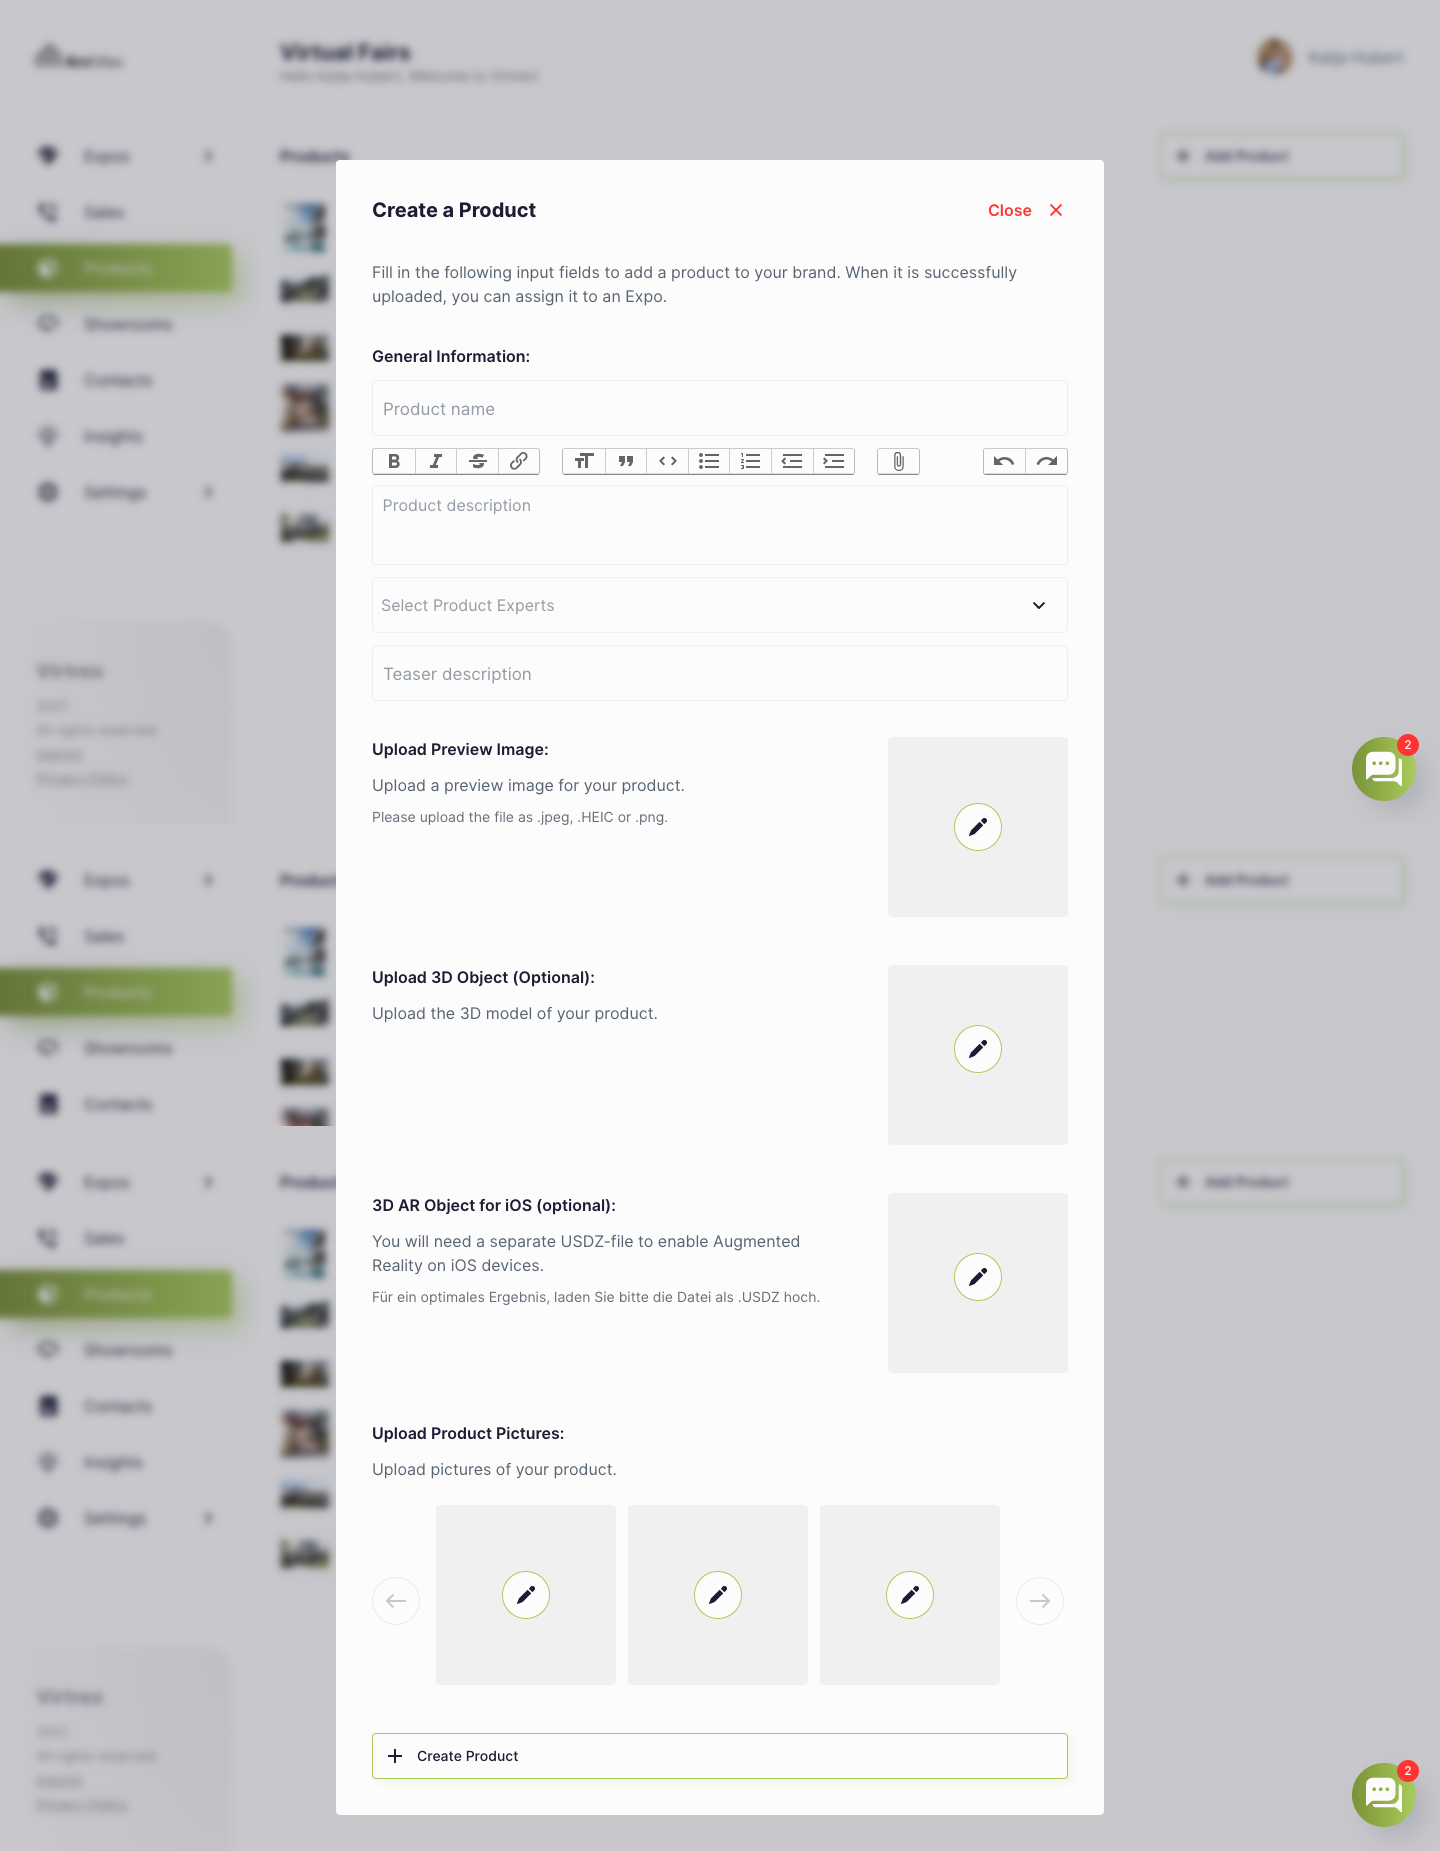
Image 3: This menu is displayed as soon as you want to add a product. Enter all relevant information and create your product.
You can also edit your products afterward. To do so, click on the product and then on "Edit product" on the right-hand side. For more information, please read the article "Products: Add and manage".
6. Adding contacts
To be able to invite visitors to your Expo, you must first enter the relevant contact details. To do this, click on "Contacts" in the Admin Panel. Here you will find your digital contact list. If you want to add additional contacts, click on "Add contacts" in the upper right corner. Now you have the choice of importing your contacts via an Excel file or adding them manually. Please read the corresponding article on this topic "Add contacts".
Publishing an Expo
Simply creating products, showrooms, associates and more does not mean that these will automatically appear on your exposition. For this you have to enter an exposition by navigating to the “Expo” tab, enter an Expo, and scroll down the page. In order for guests you have added in the address book to receive an invitation to your Expo, you have to add them by clicking "Invite Guests" (see image 4.1. below). In the section "Manage products" (see image 4.2. below) you can decide which previously created products should be displayed at your Expo. The same applies to showrooms as well (see image 4.3. below). Under "Manage Team Members" (see image 4.4. below) you can control your sales force and other employees who will be present during the Expo. These team members will also be those whom visitors will be able to contact.
You can preview your Expo at any time in the Admin Panel by clicking the “Preview Expo” button in the top right-hand corner of your screen. For more information, please read our articles about the Expo.
After all, this has been done, it is time to finally publish your Expo and share it with your invited guests. To publish, navigate to the “Publish Expo” button in the right-hand control panel (see image 4.5. below).
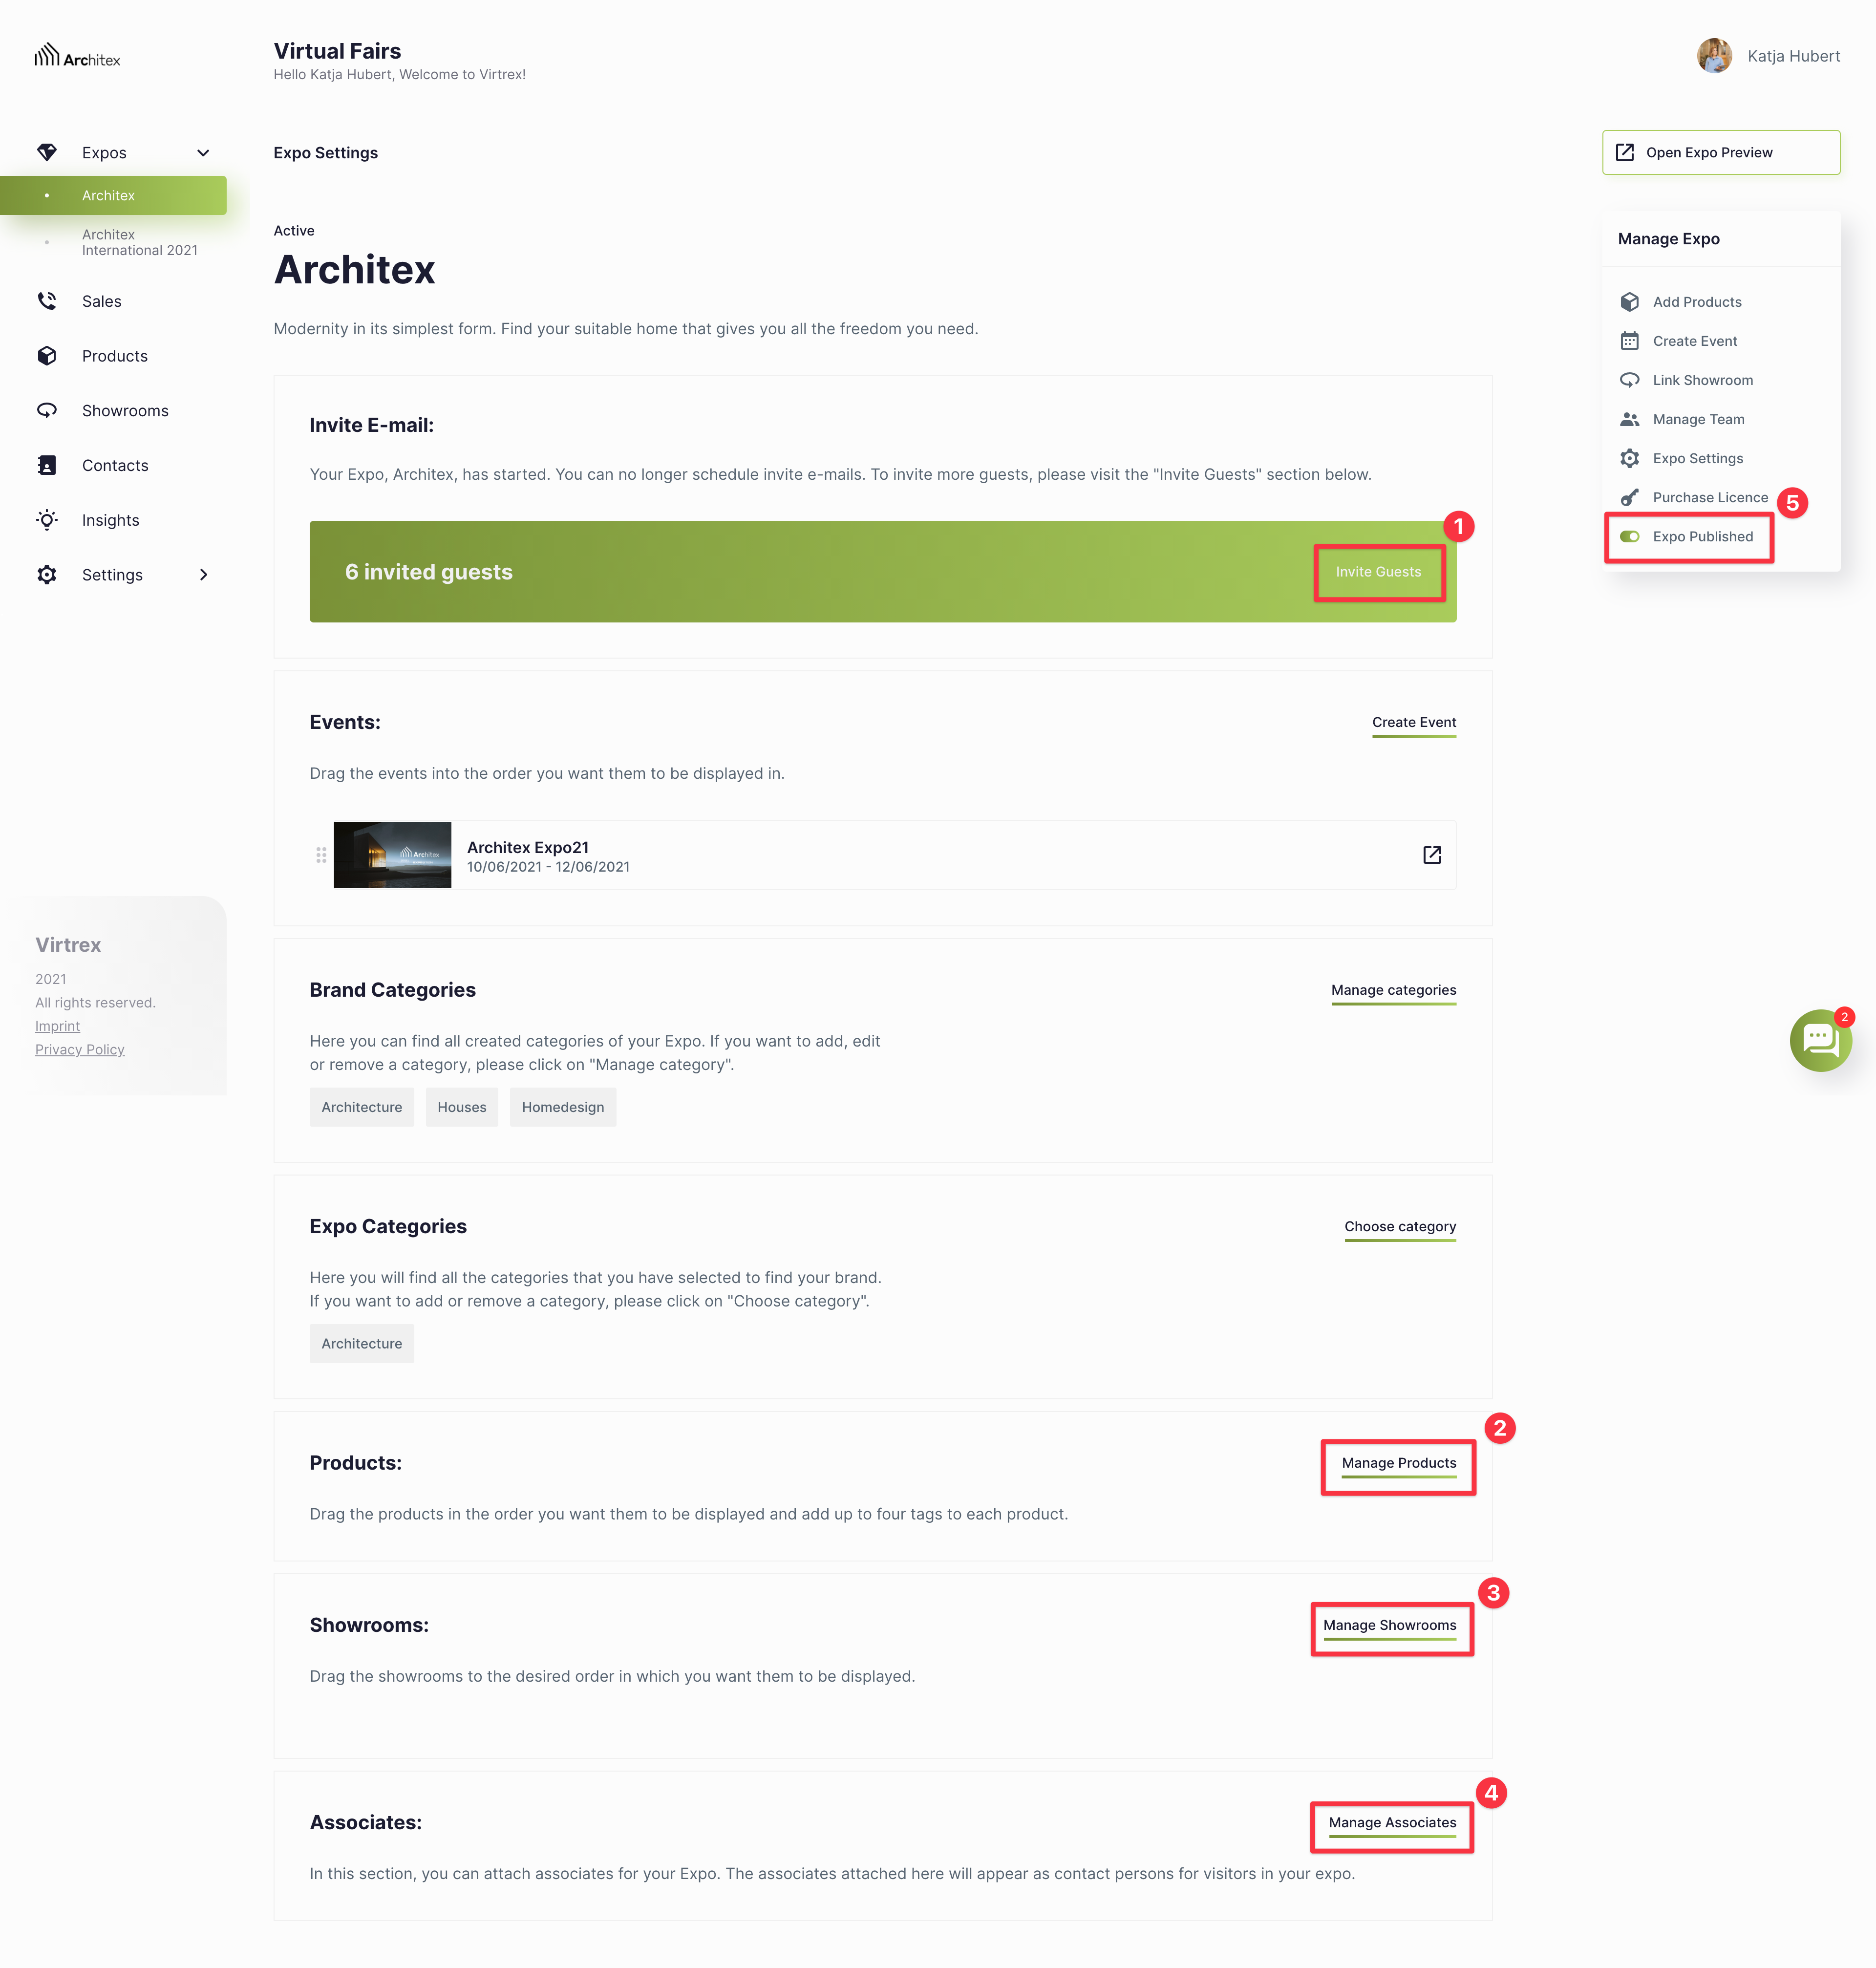
Image 4: Here you see the overview of your Expo in the Admin Panel.