How do I create a new Expo?
1. Create a new Expo
If you click on the “Expos” area in the left menu bar of your Virtrex Admin Panel, the overview area of all expos will open. Here you will find the button “Create Expo” on the right-hand side. If you click this button, a pop-up window will open (see image 1 below) and you can start creating your Expo.
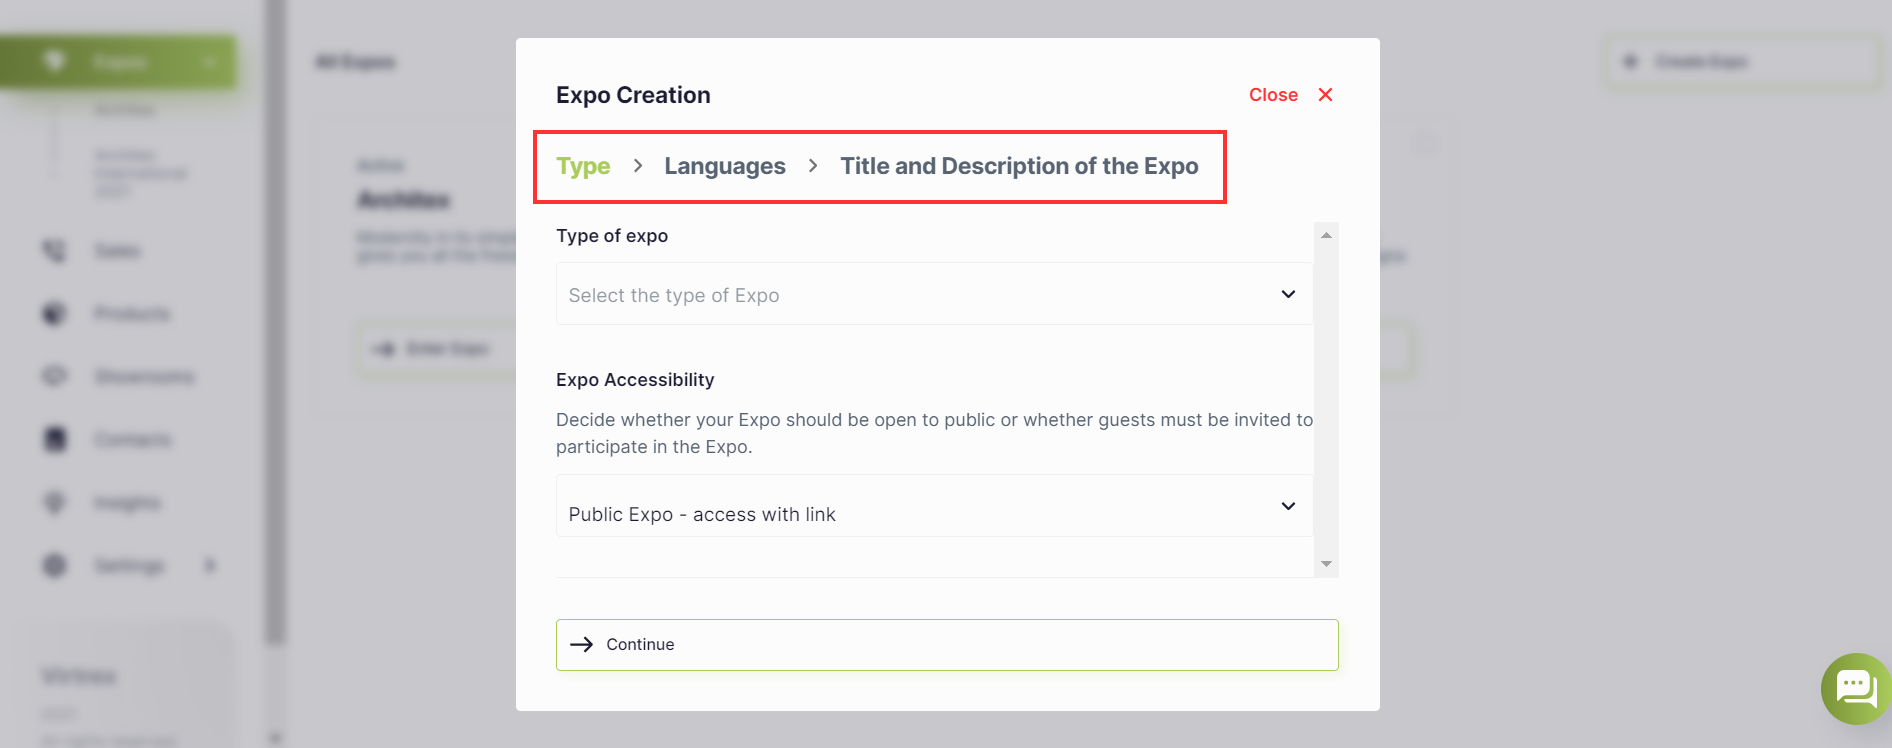
Image 1: Create your Expo by entering all relevant information.
To create your Expo, you will need the following information:
Expo Type: Select what type of Expo you want to create. Please note that you cannot change this after you have created the Expo.
Expo with one brand: an Expo for your brand only; you cannot invite other brands to the Expo.
Expo with other partner brands: an Expo to which you can invite other participating brands.
Visibility: select whether the Expo landing page should be private or public.
Private: the Expo is only accessible with a personalized invitation.
Public: the Expo is freely accessible with a link.
Languages: Select the languages you would like to provide the visitors of your expo. Please note that you also need to add this language to your brand profile.
English, German, French, Spanish, Italian, Dutch, Polish.
Expo name: This name will be displayed on the Expo landing page. Please make sure to add it in all selected languages.
Expo description: This description will be displayed to your visitors when they enter the Expo. Again, please make sure that you specify this in all selected languages.
Note: You can change any of this information after you create the Expo (see image 2 below), but not the type of Expo.
Once you click “Create Now”, you can start completing your Expo.
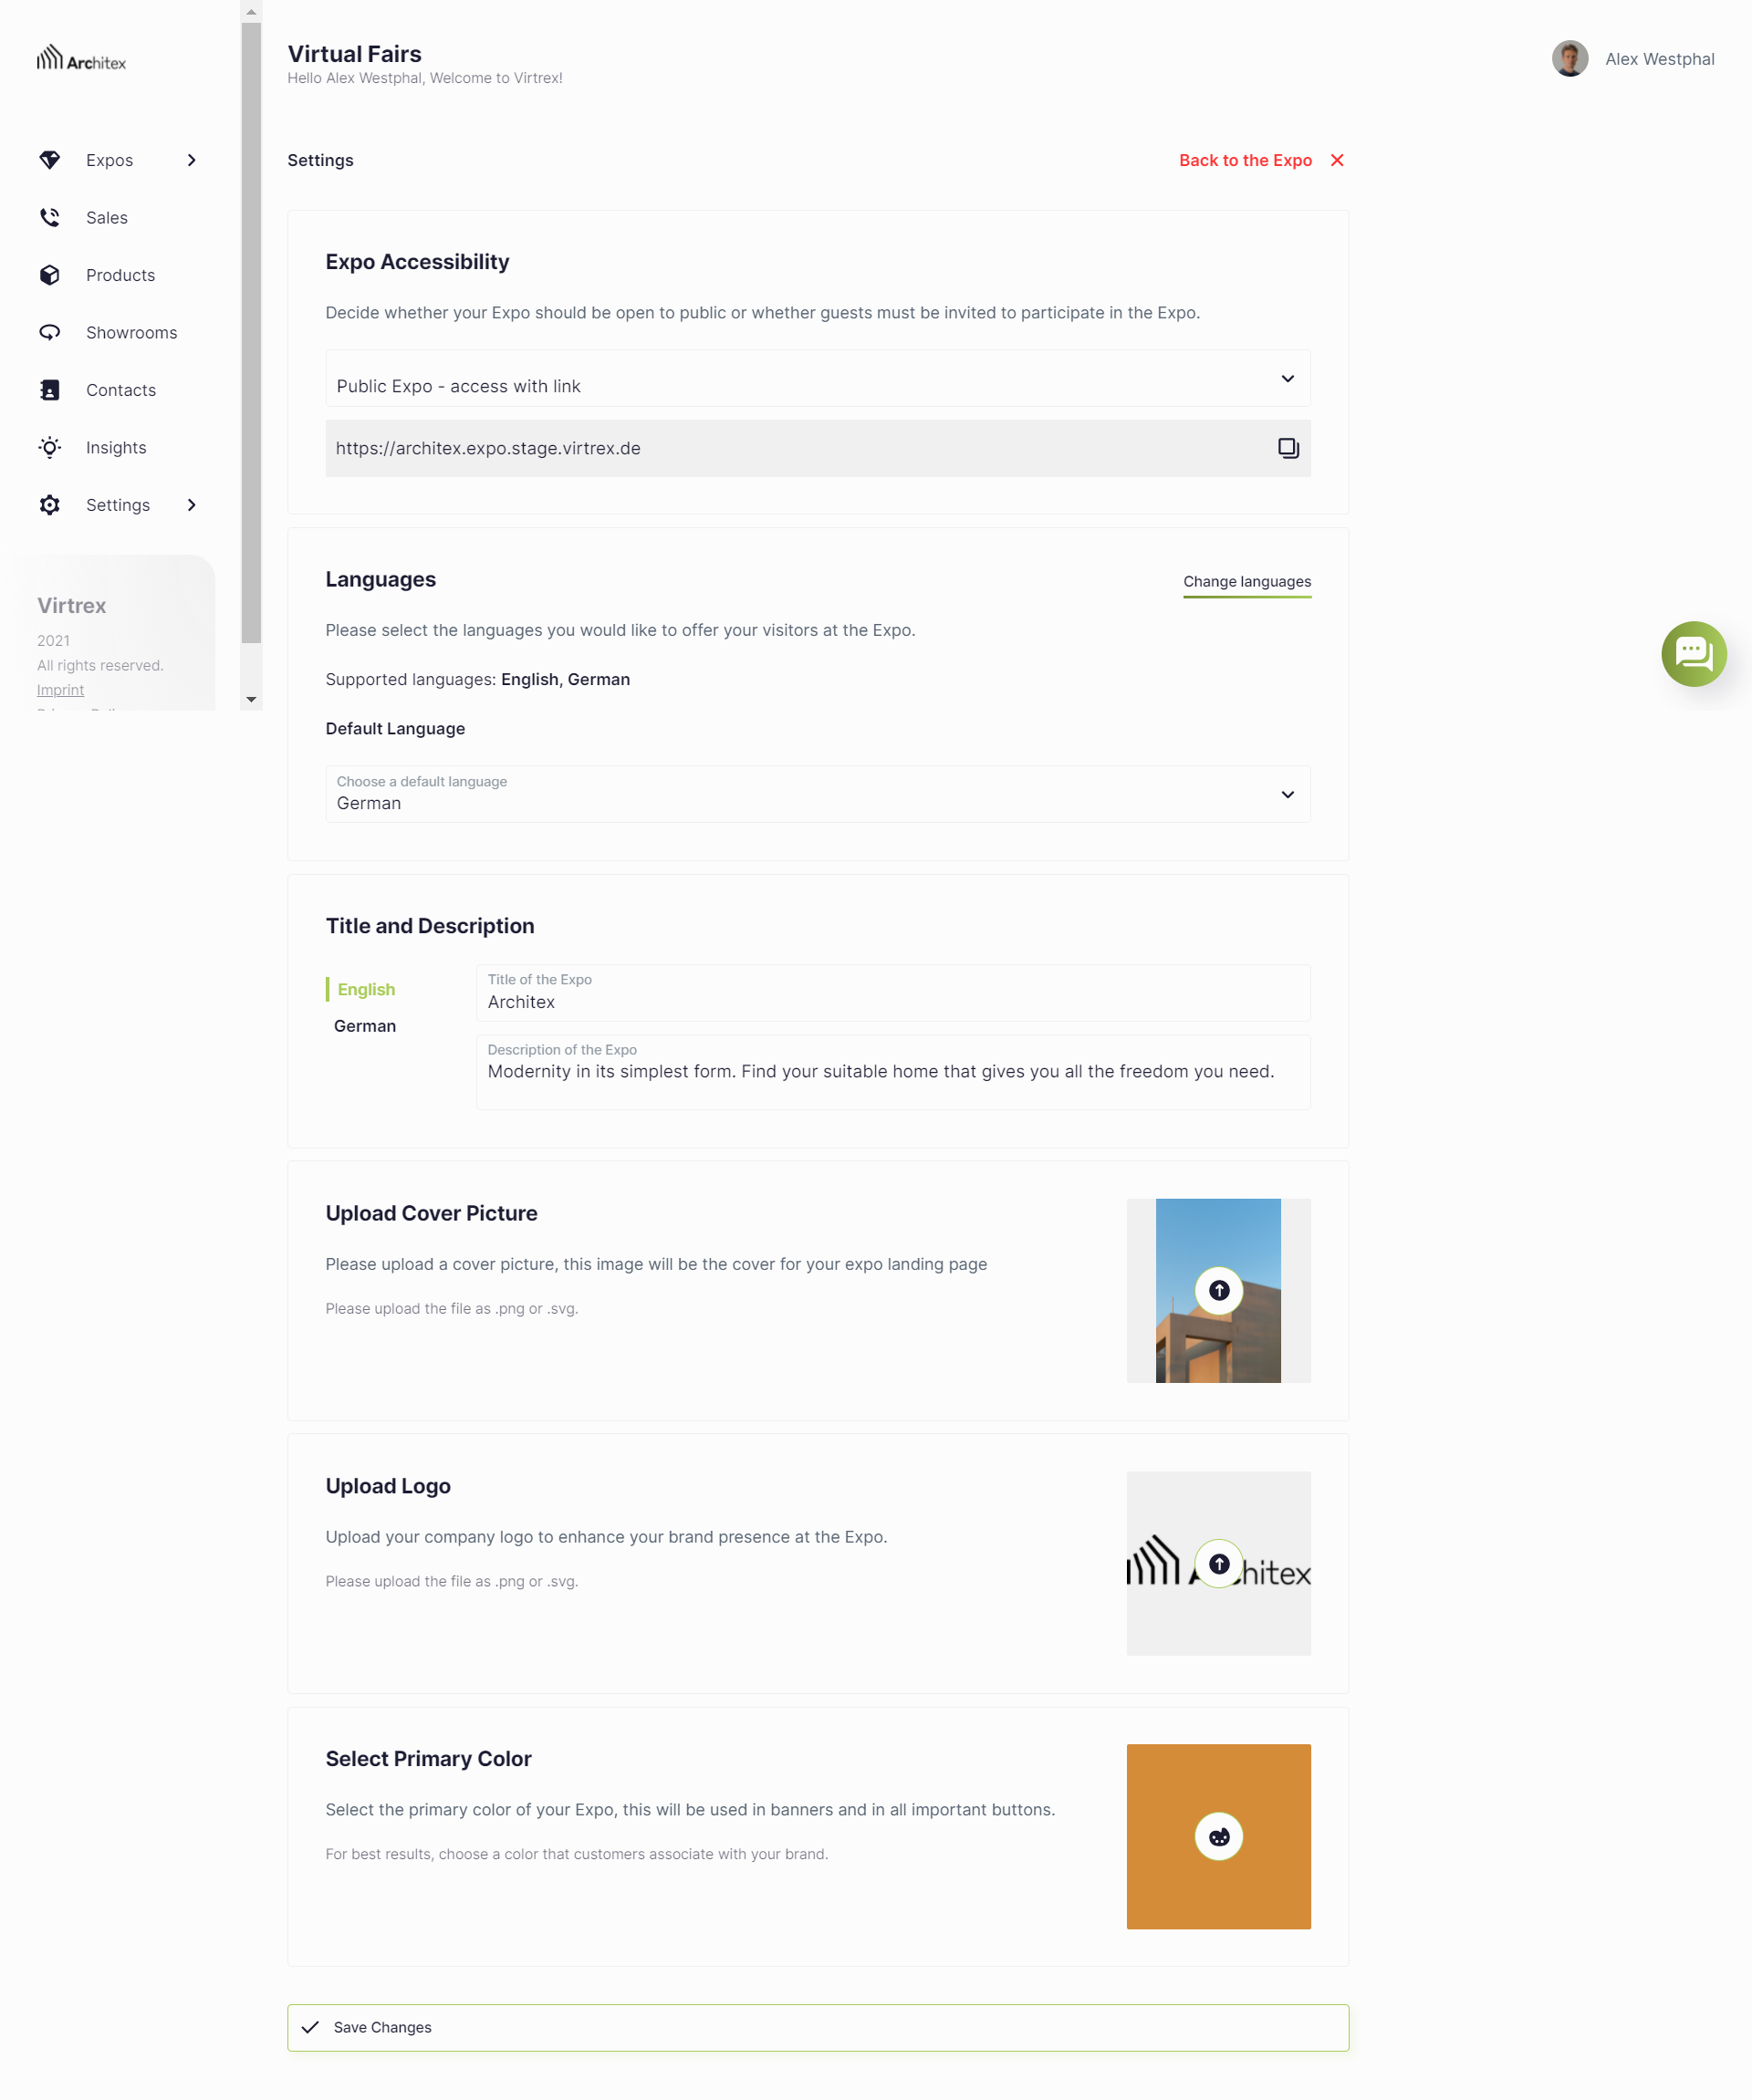
Image 2: In the right menu bar under “Expo Settings” you can manage the relevant information.
Fill your Expo
After clicking “Create Now”, you will be redirected to the overview of your Expo with the following sections (see image 3 below):
Expo Preview
Website teaser for your Expo
Invited guests (number)
Brands (only for Expo with additional partner brands)
Events
License packages (only for Expo with additional partner brands)
Expo categories
Brand categories
Products
Showrooms
Associates
Manage Expo
Note: If you do not have a license, you can request one in the Admin Panel (see below image 3.12. “Purchase Licence”). If all requirements are fulfilled, you can publish your Expo (see below image 3.12. “Expo Not Published”).
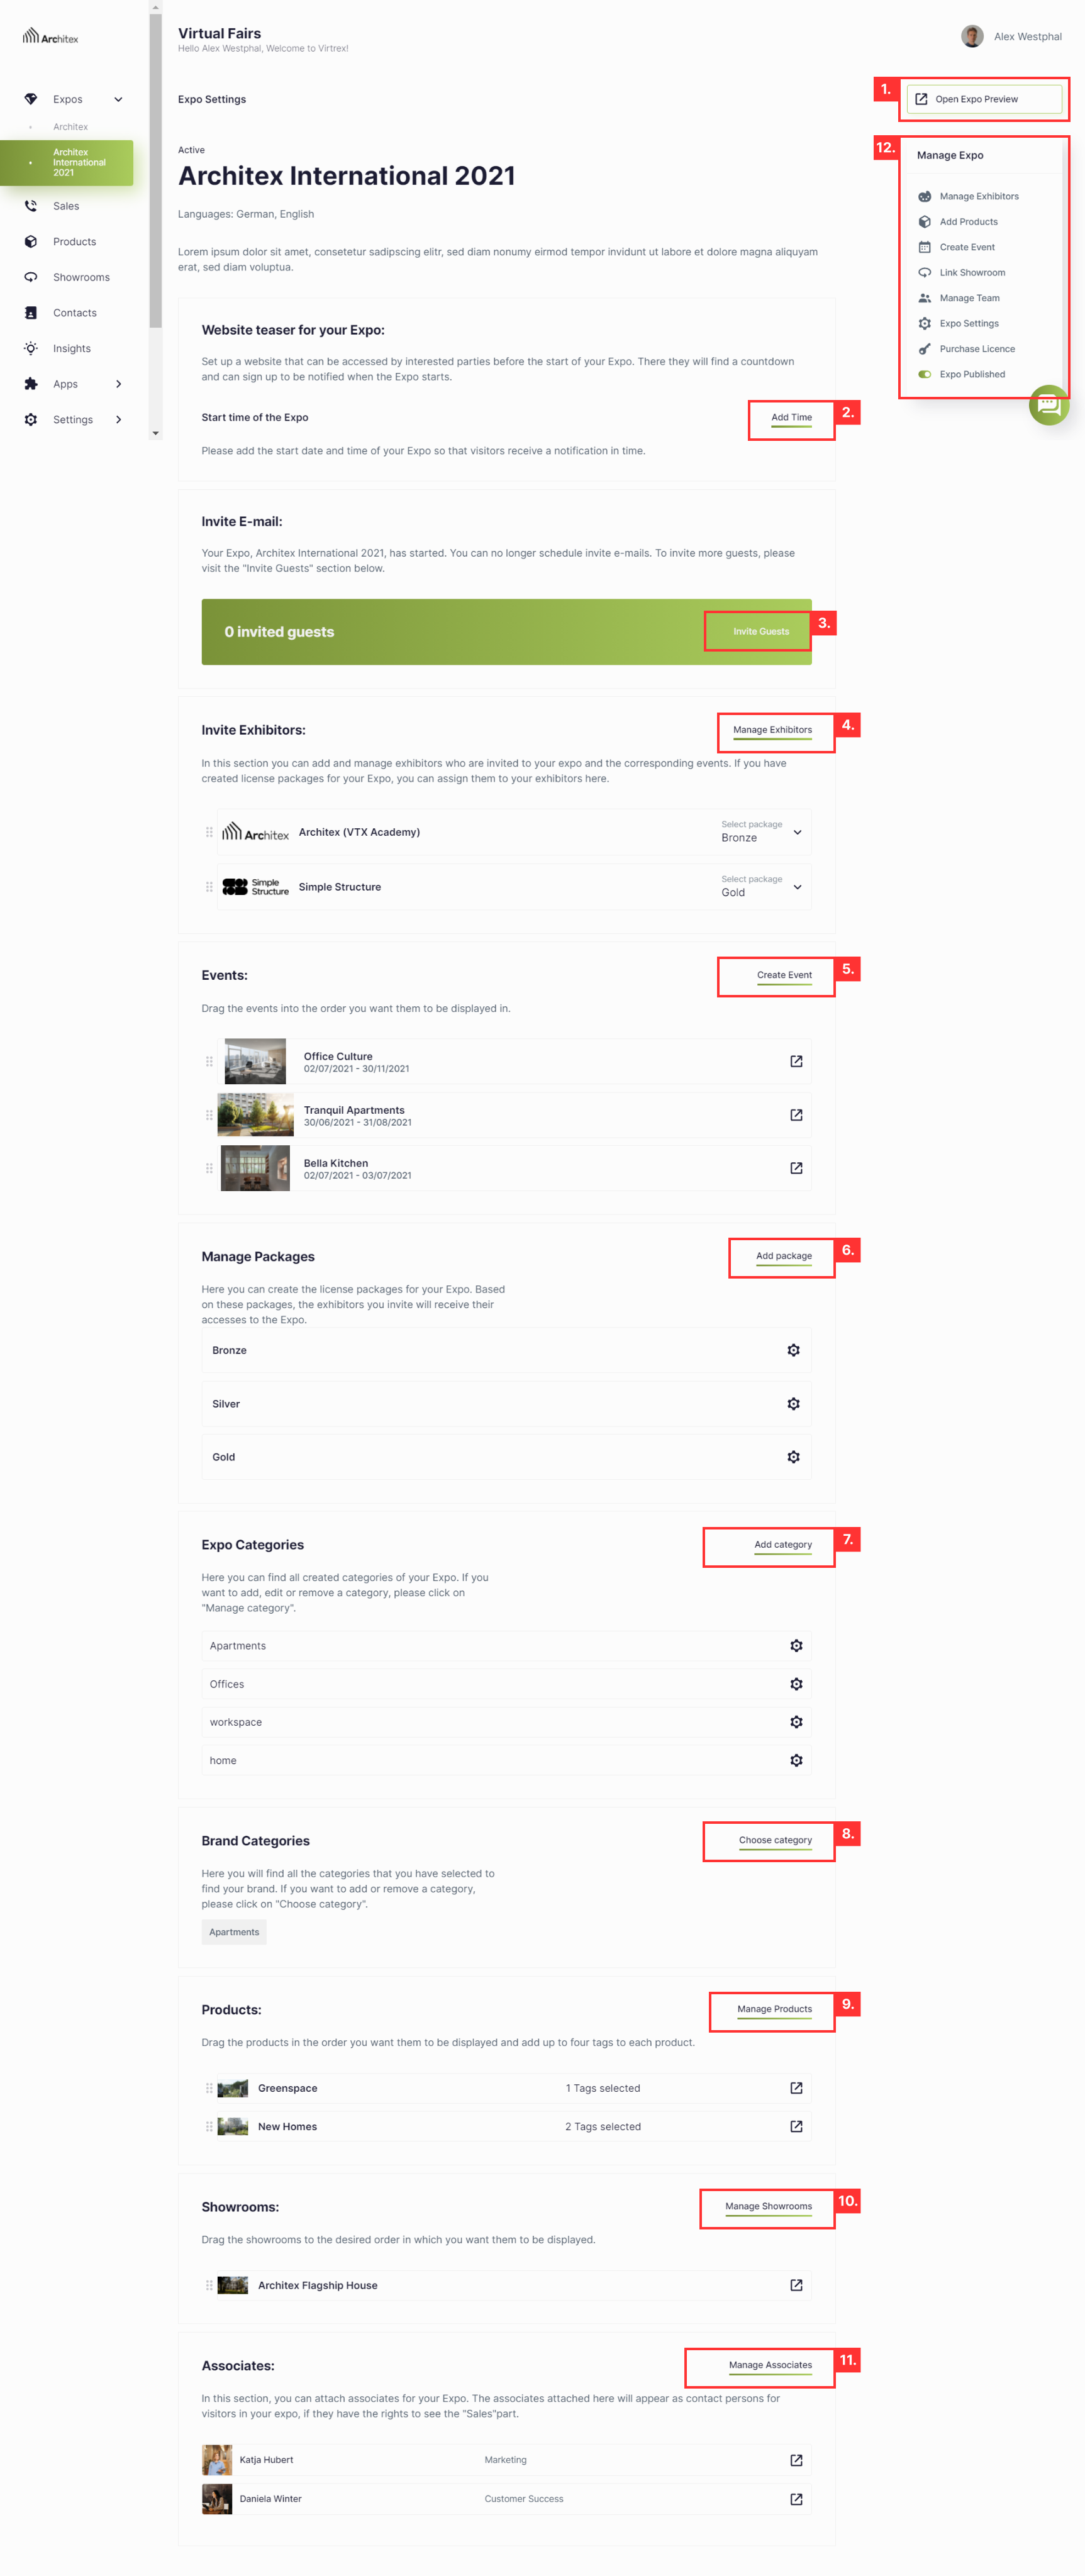
Image 3: Here you can see the overview of your Expo in your Admin Panel.