Team Management
To get started, click on the tab “Settings” in the left sidebar, and choose the “Team Management” section (see below image 1).
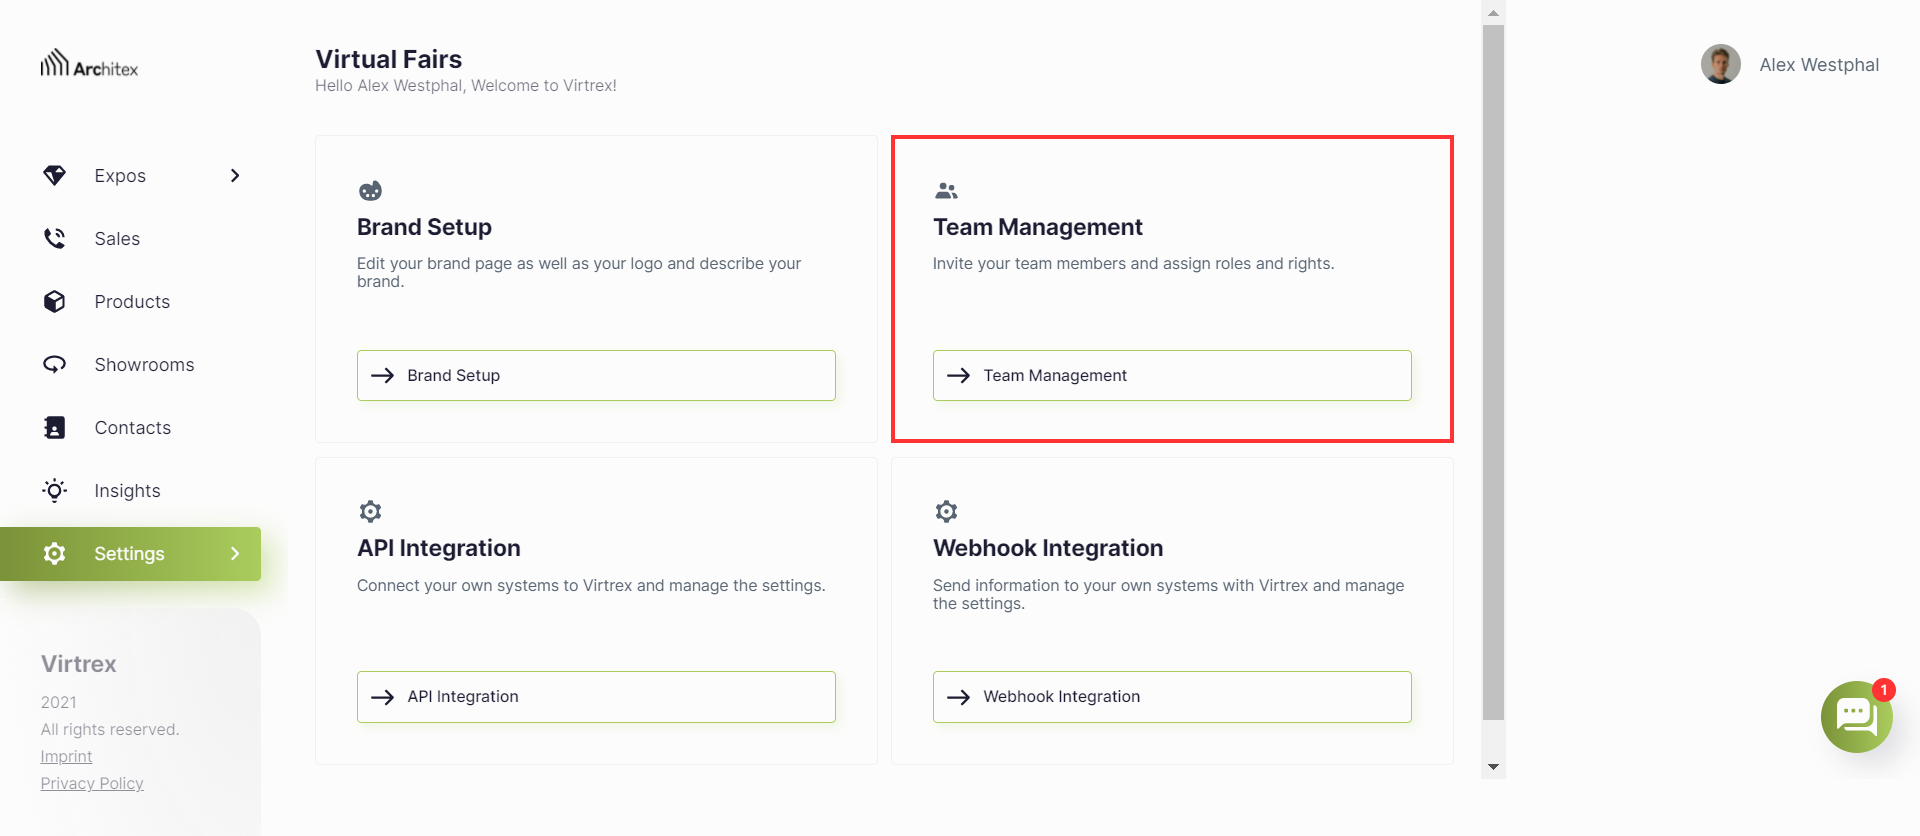
Image 1: Here you can see your settings overview.
The team overview page consists out of two areas:
Role Management
(see below image 2.1.)
Here, you see an overview of all created roles and how many people are assigned to them. You can also see the interaction buttons to delete or edit a specific role on the right side of the table. To create a new role, click the button in the right corner of the area to open a popup (see below image 3). In the popup, you will have to give the role a name and set its permissions. We give you a choice to adapt the permissions for every specific section of Virtrex. If at any point you want to delete an existing role, click the trash icon on the right side of the table. Please be aware that if people are not assigned to a role, they will be given the default role.
Team Management
(see below image 2.2.)
Here, you see an overview of all invited team members and which role they have been assigned. You can change the roles of a member by clicking on the dropdown menu on the right side of the card. To invite a new team member, click the button in the right-hand corner of the area to open a popup. In the popup you have to enter the email address of the person you want to invite. Please note, the invitation will be bound to the team member’s email address and cannot be forwarded.
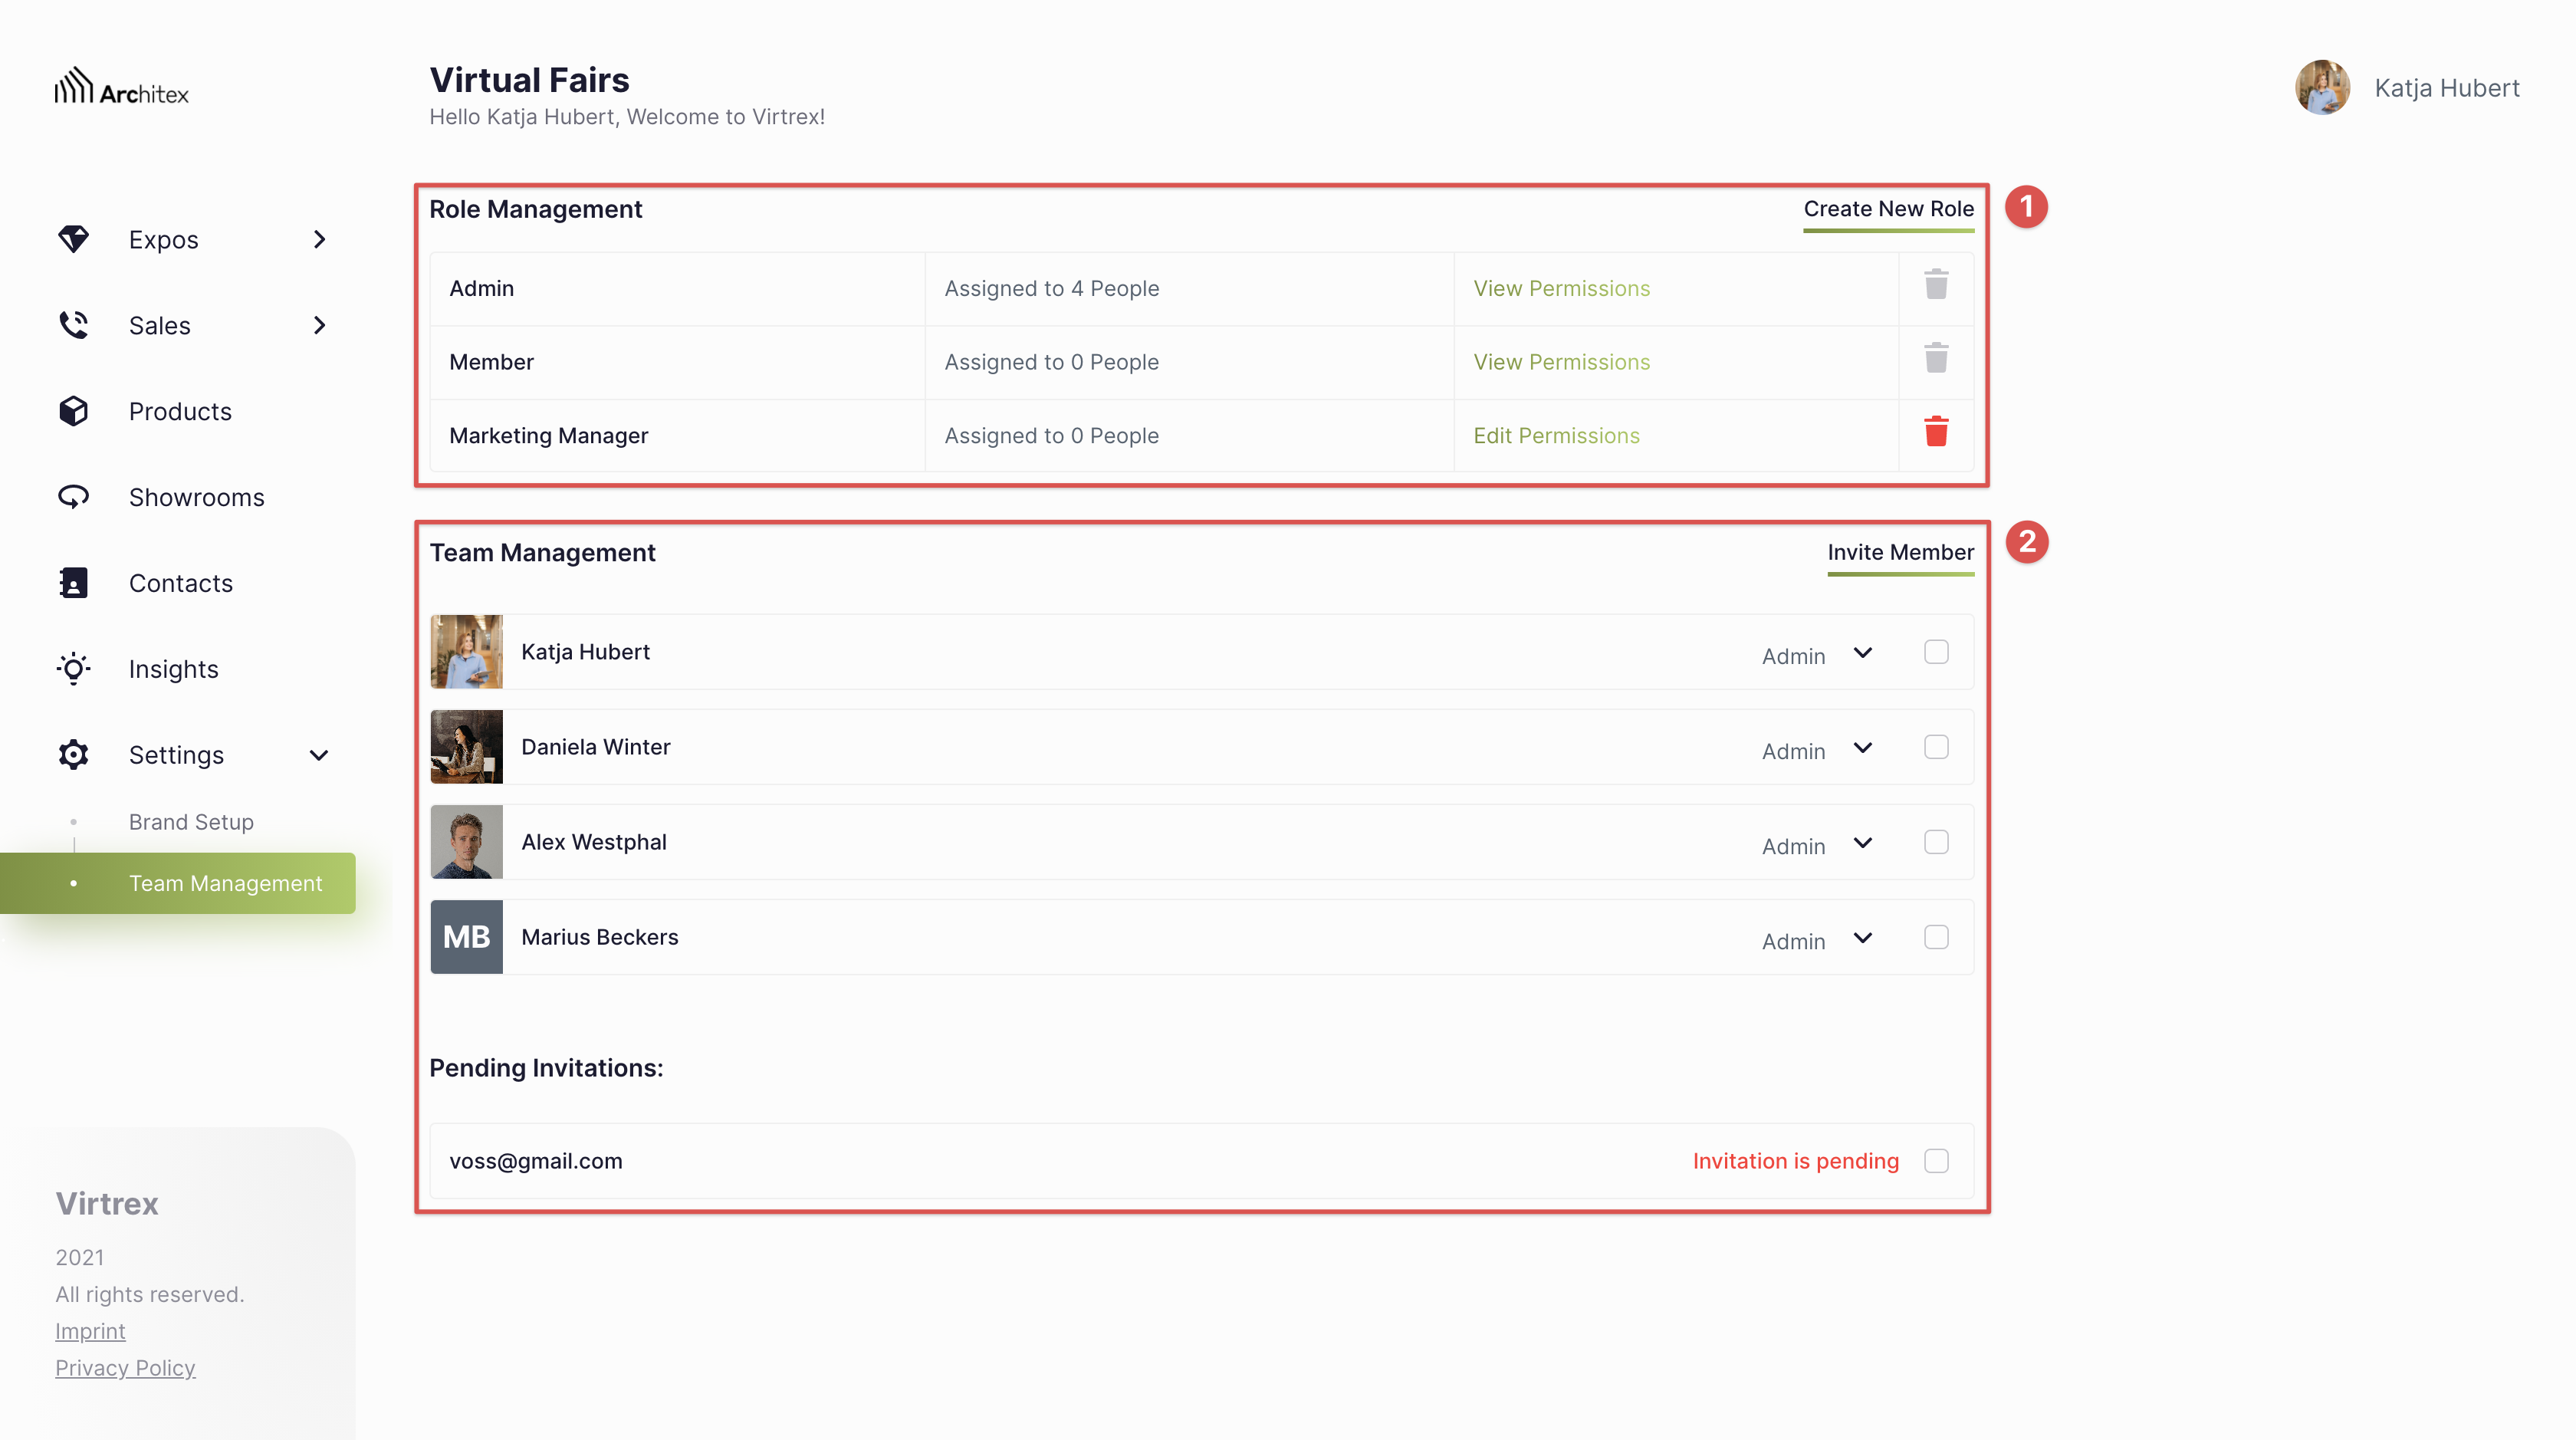
Image 2: Here you can see your team overview.
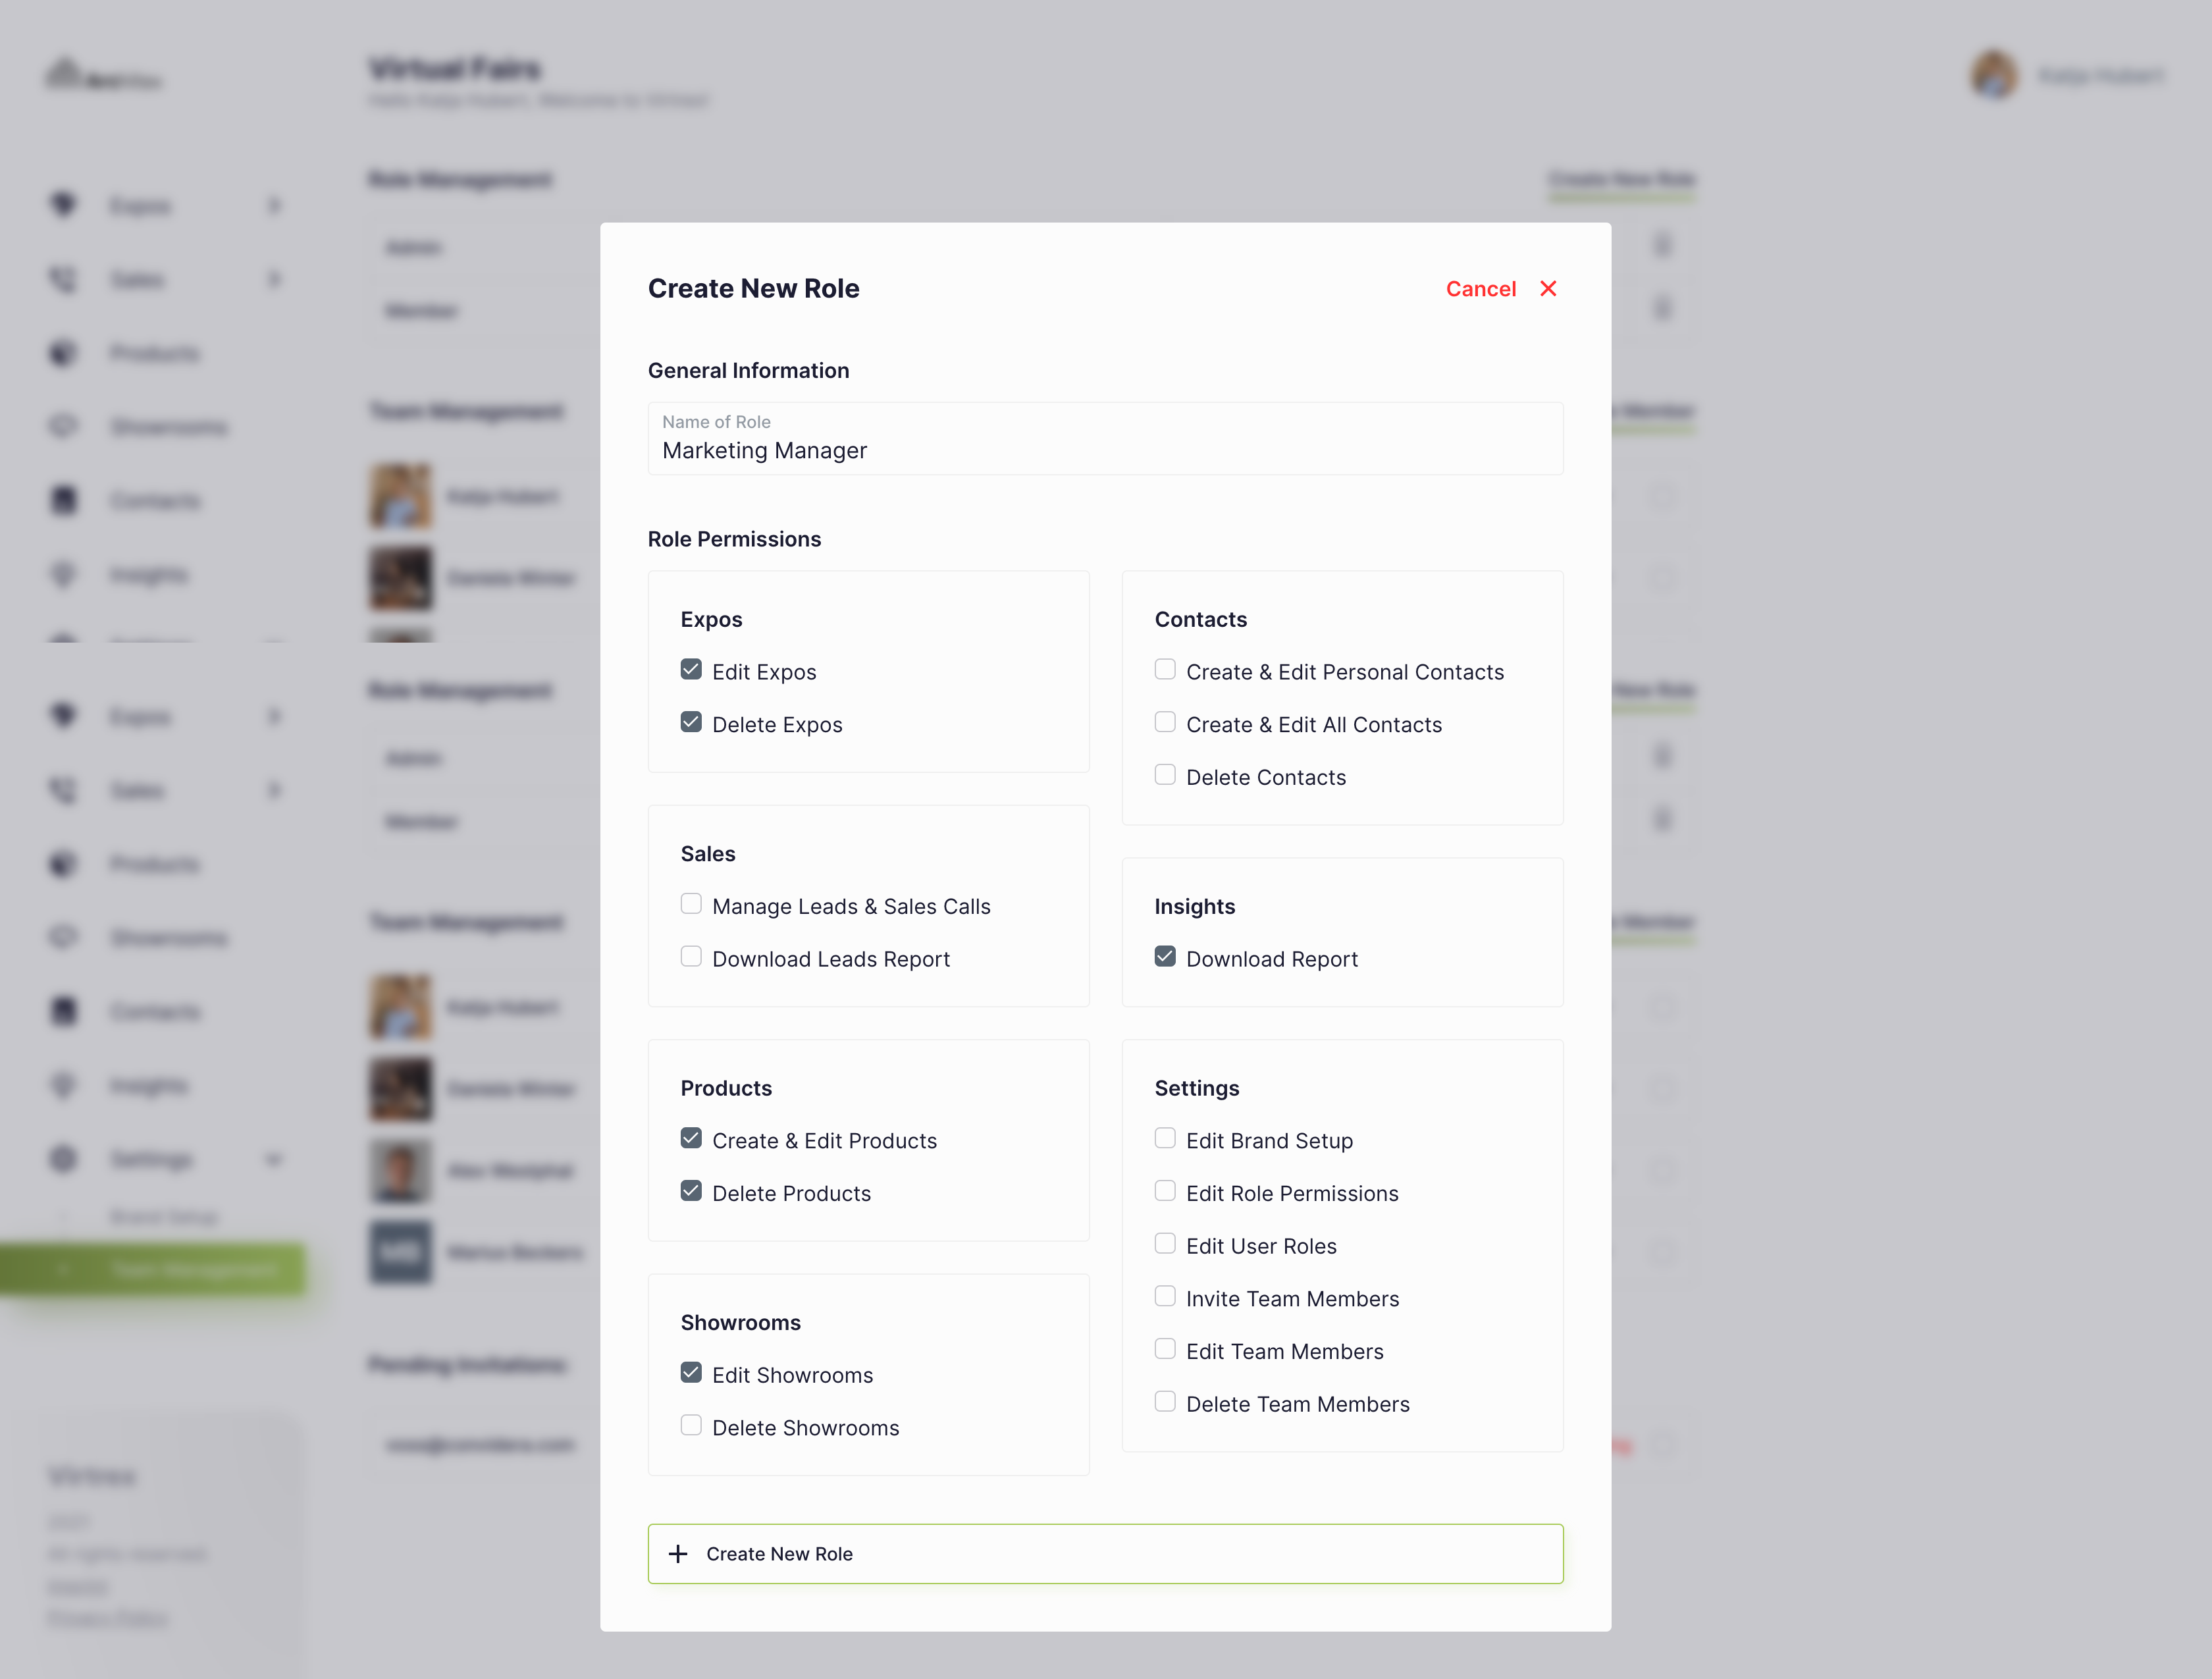
Image 3: Here you can see how to create new role.
Furthermore, you can click on a specific associate to be redirected to their overview page. Here you will see an image of the team member, their name, position and email address. If you are an admin, you can also change the team member’s permissions if needed.