Information page of your call
The information page of your call provides both your employees and your visitors with an overview of the details of a scheduled call.
1. Planning a call
As an employee: If you would like to schedule a new call, click on “View all scheduled calls” in the “Scheduled calls” section of your Admin Panel under “Sales” and then click on “Schedule new call”. First, select the preferred Expo, enter a title and optionally an invitation text and invite up to 5 participants. In addition to employees and contacts from your address book, you can also invite people who are not registered in Virtrex by entering their e-mail address under “Add visitors”. Then you can set the date and time and send the invitation (see below image 1).
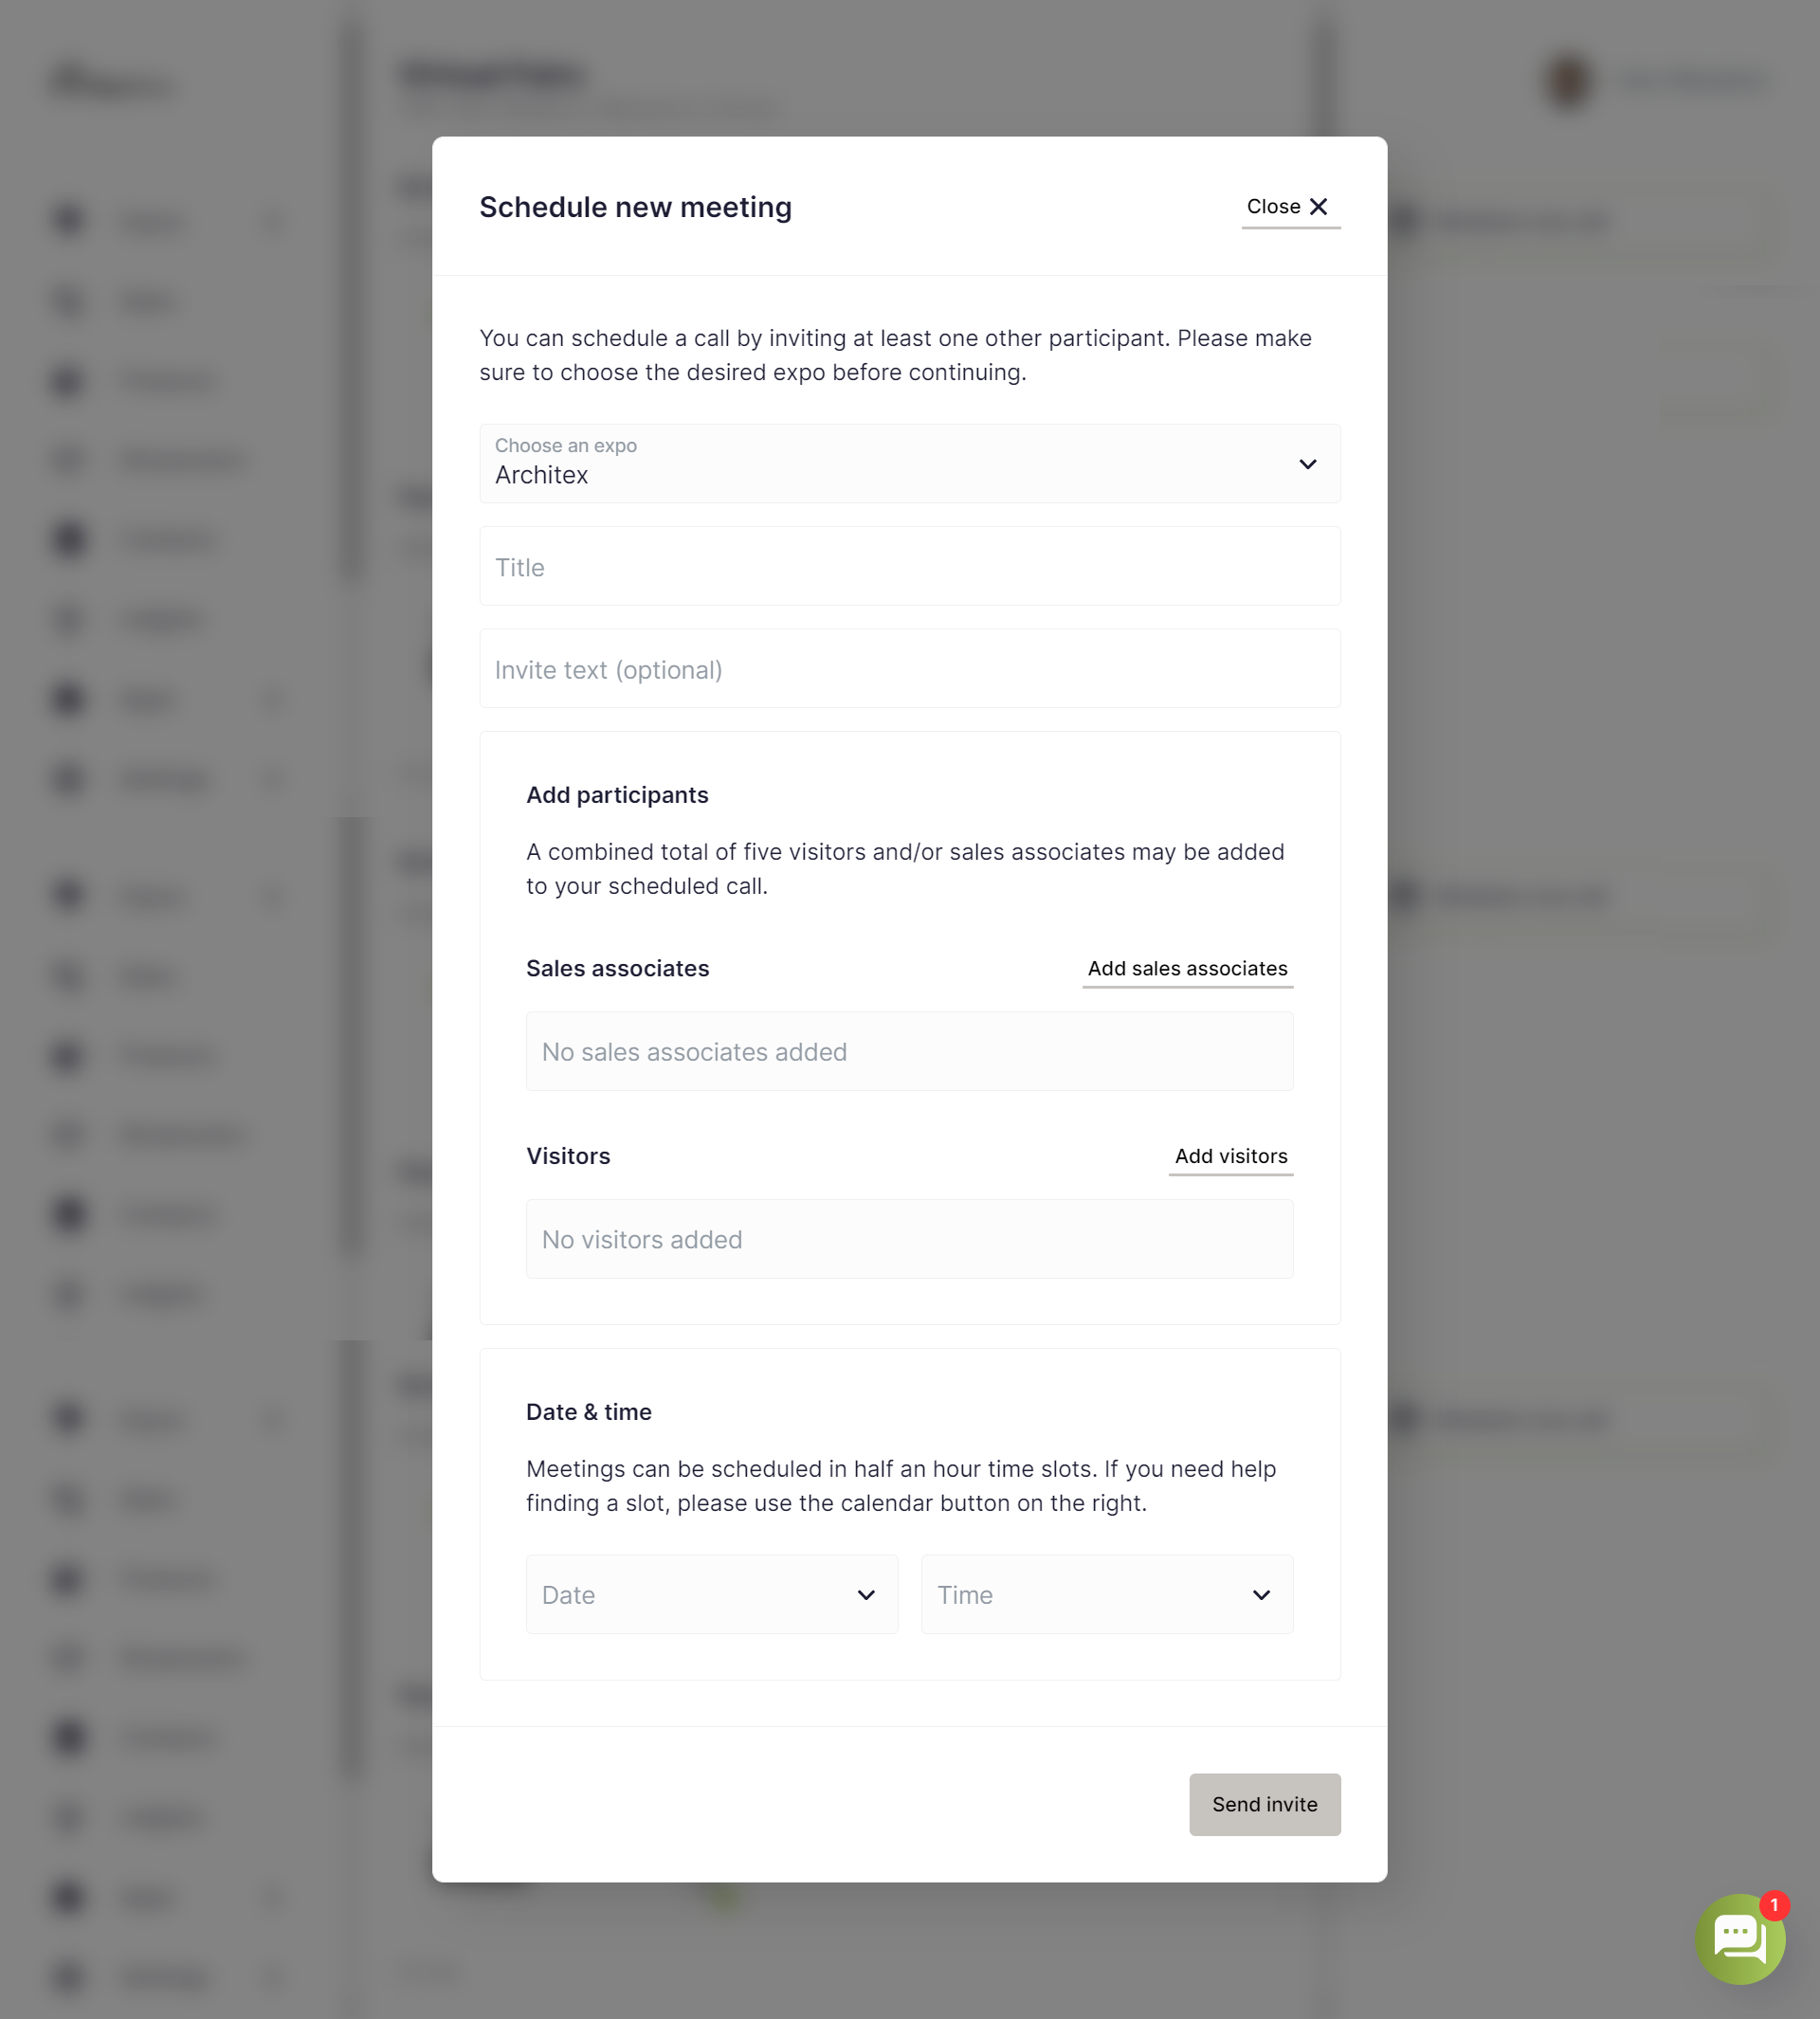
Image 1: Here you can see how to schedule a call as an employee.
As a visitor: If you want to schedule a call with employees, click on the button with the speech bubble next to the profile of the person with whom you want to schedule a meeting on the corresponding brand profile under “Your personal contact” or “Our experts”. You can then select whether you want to start a live chat, call the person directly, or schedule a sales call (see below image 2).
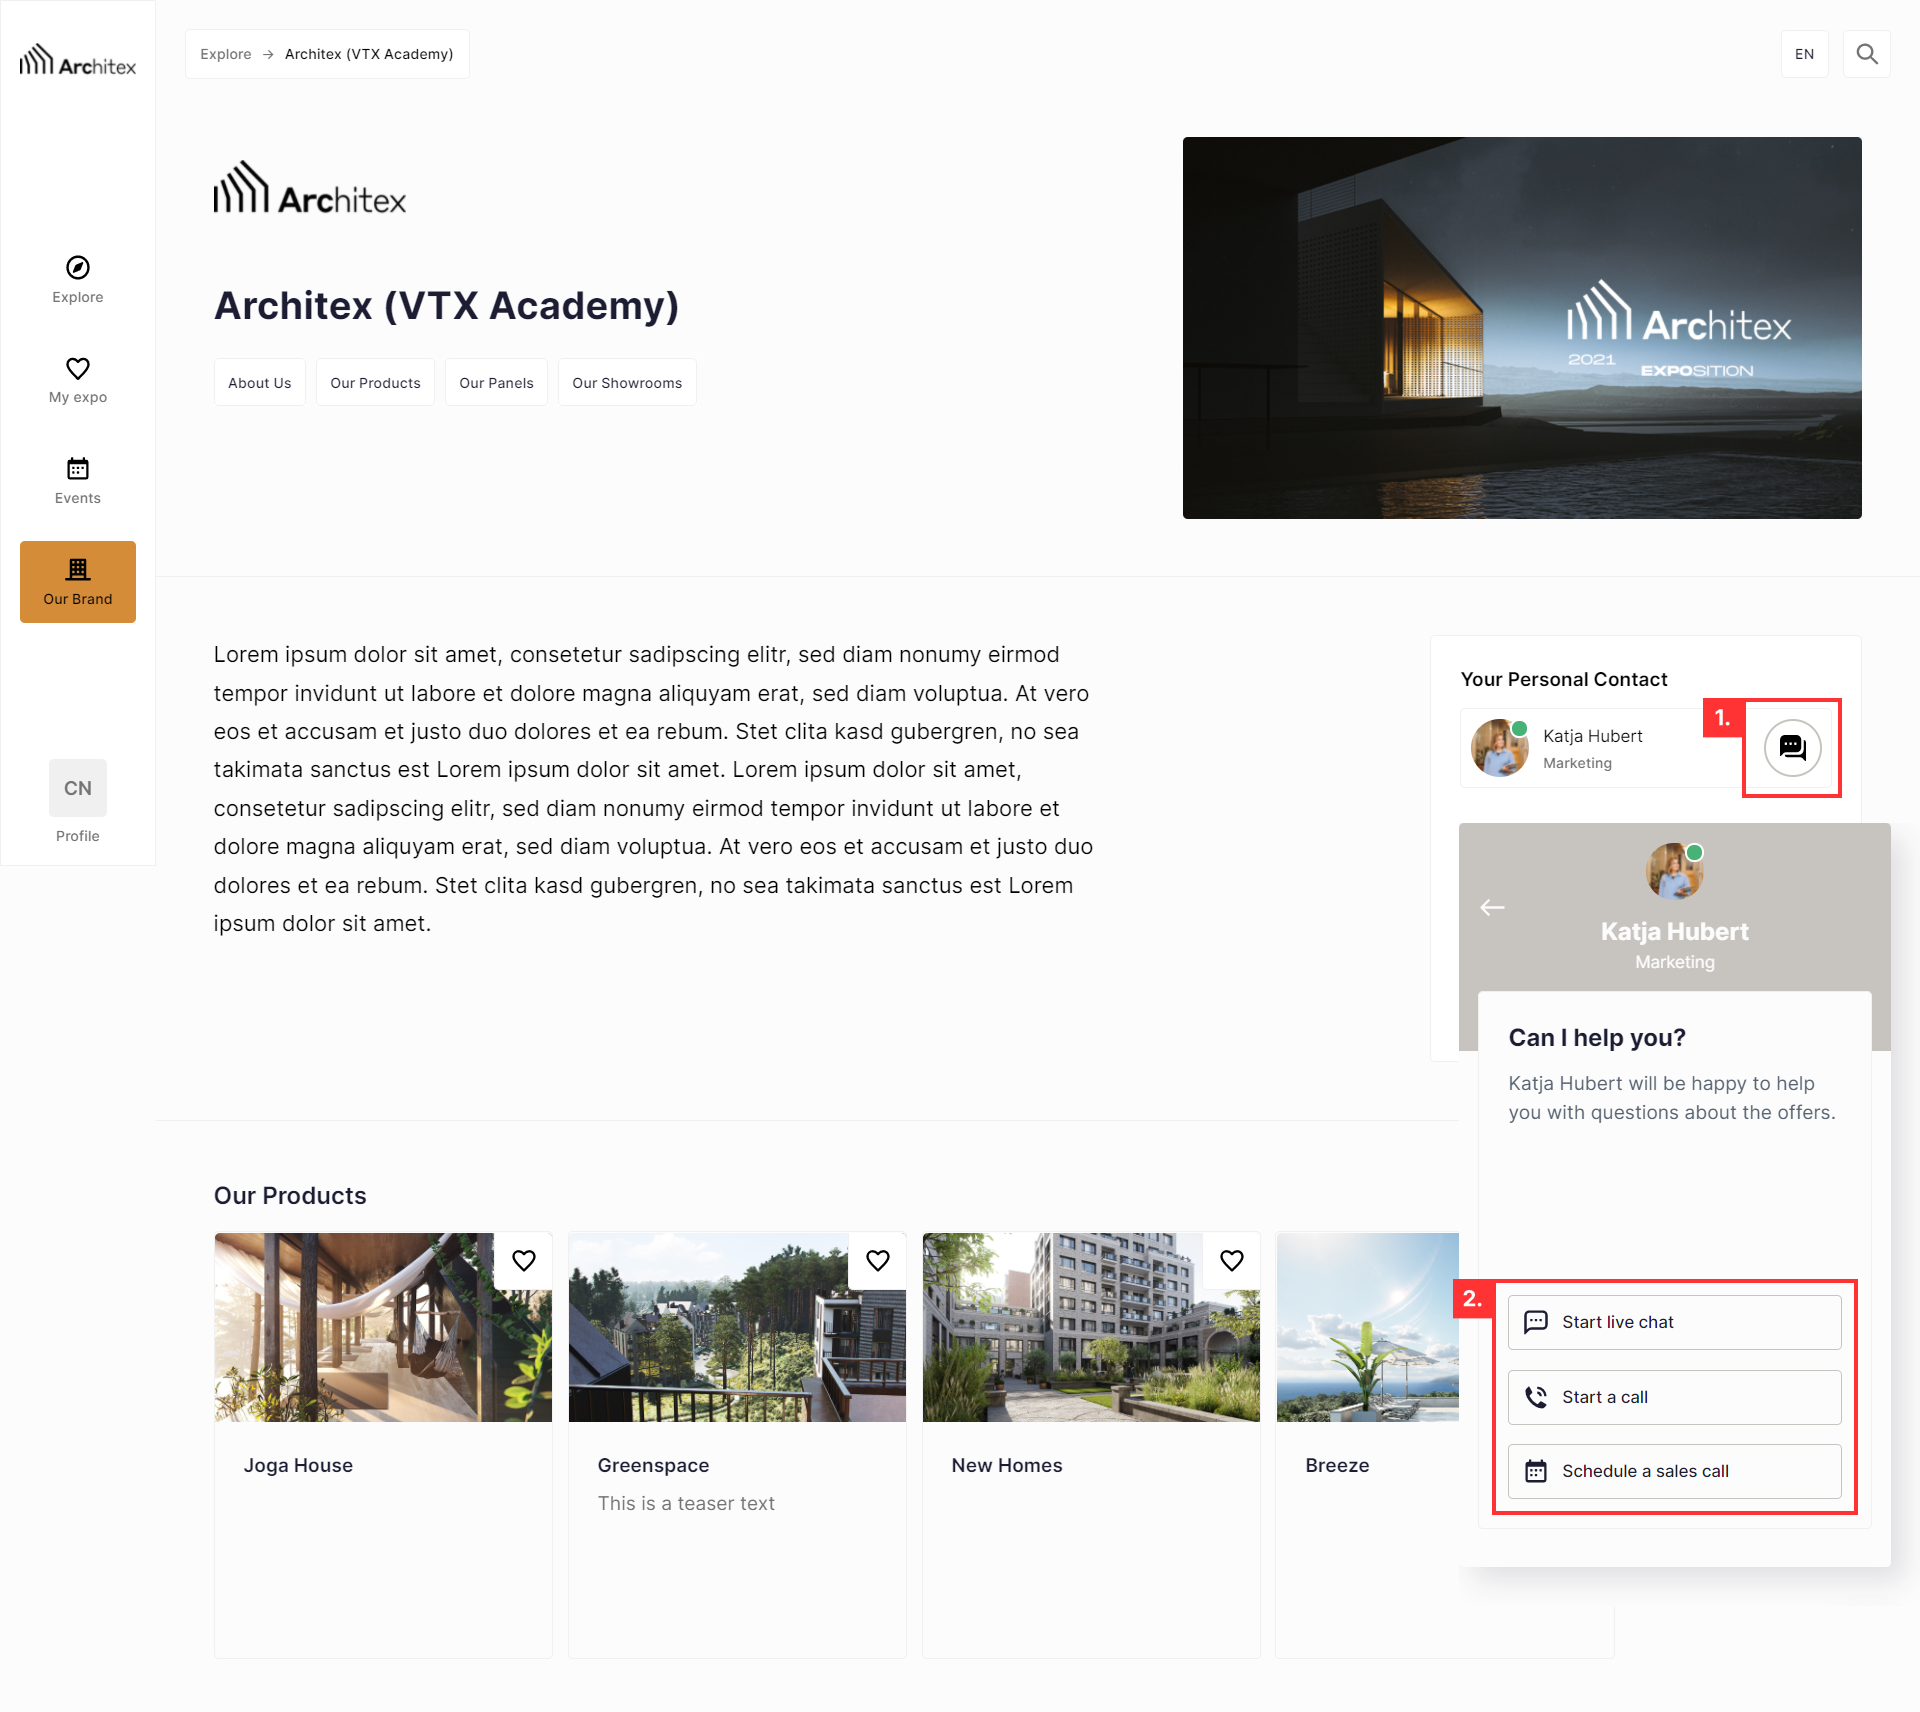
Image 2: Here you can see how to schedule a call as a visitor.
2. Information page of your call
On the information page of your call you will see the general data of a planned call. At the top of the overview, you will first see in gray the name of the Expo in which the call will take place. In the line below you can see the subject of the call or, if no subject was given, who organized the call. Subsequently, you have the option to either accept or decline the invitation to the call via the “Accept” or “Decline” buttons.
Note: You can adjust the status of your acceptance or cancellation at any time using the “Change” button.
Not only as the person who created the call, but also as the invited employees, you can edit call details such as title, invitation text, participants, and date and time via the “Edit meeting” button on the right, or delete the scheduled call via the trash can icon.
In the next section, in addition to the organizer, the date, the time and the introduction of the call, you will also see the invited participants, each with a status indicator. With the help of this you can see which participants have already accepted or declined the call or which participants are not available at this time (see below image 3).
2.1 Suggested products and files
In this section you can select products or upload files to be displayed to the participants of your call. The “Add products” button gives you the option to add more products to your selection or delete products that are already listed. You can also remove products from the display by clicking on “Delete” in the upper right corner of the respective product (see below image 3).
Note: You can only add products that you have previously created in the “Products” section.
After a call has ended, the content is still accessible to the participants on the call information page.
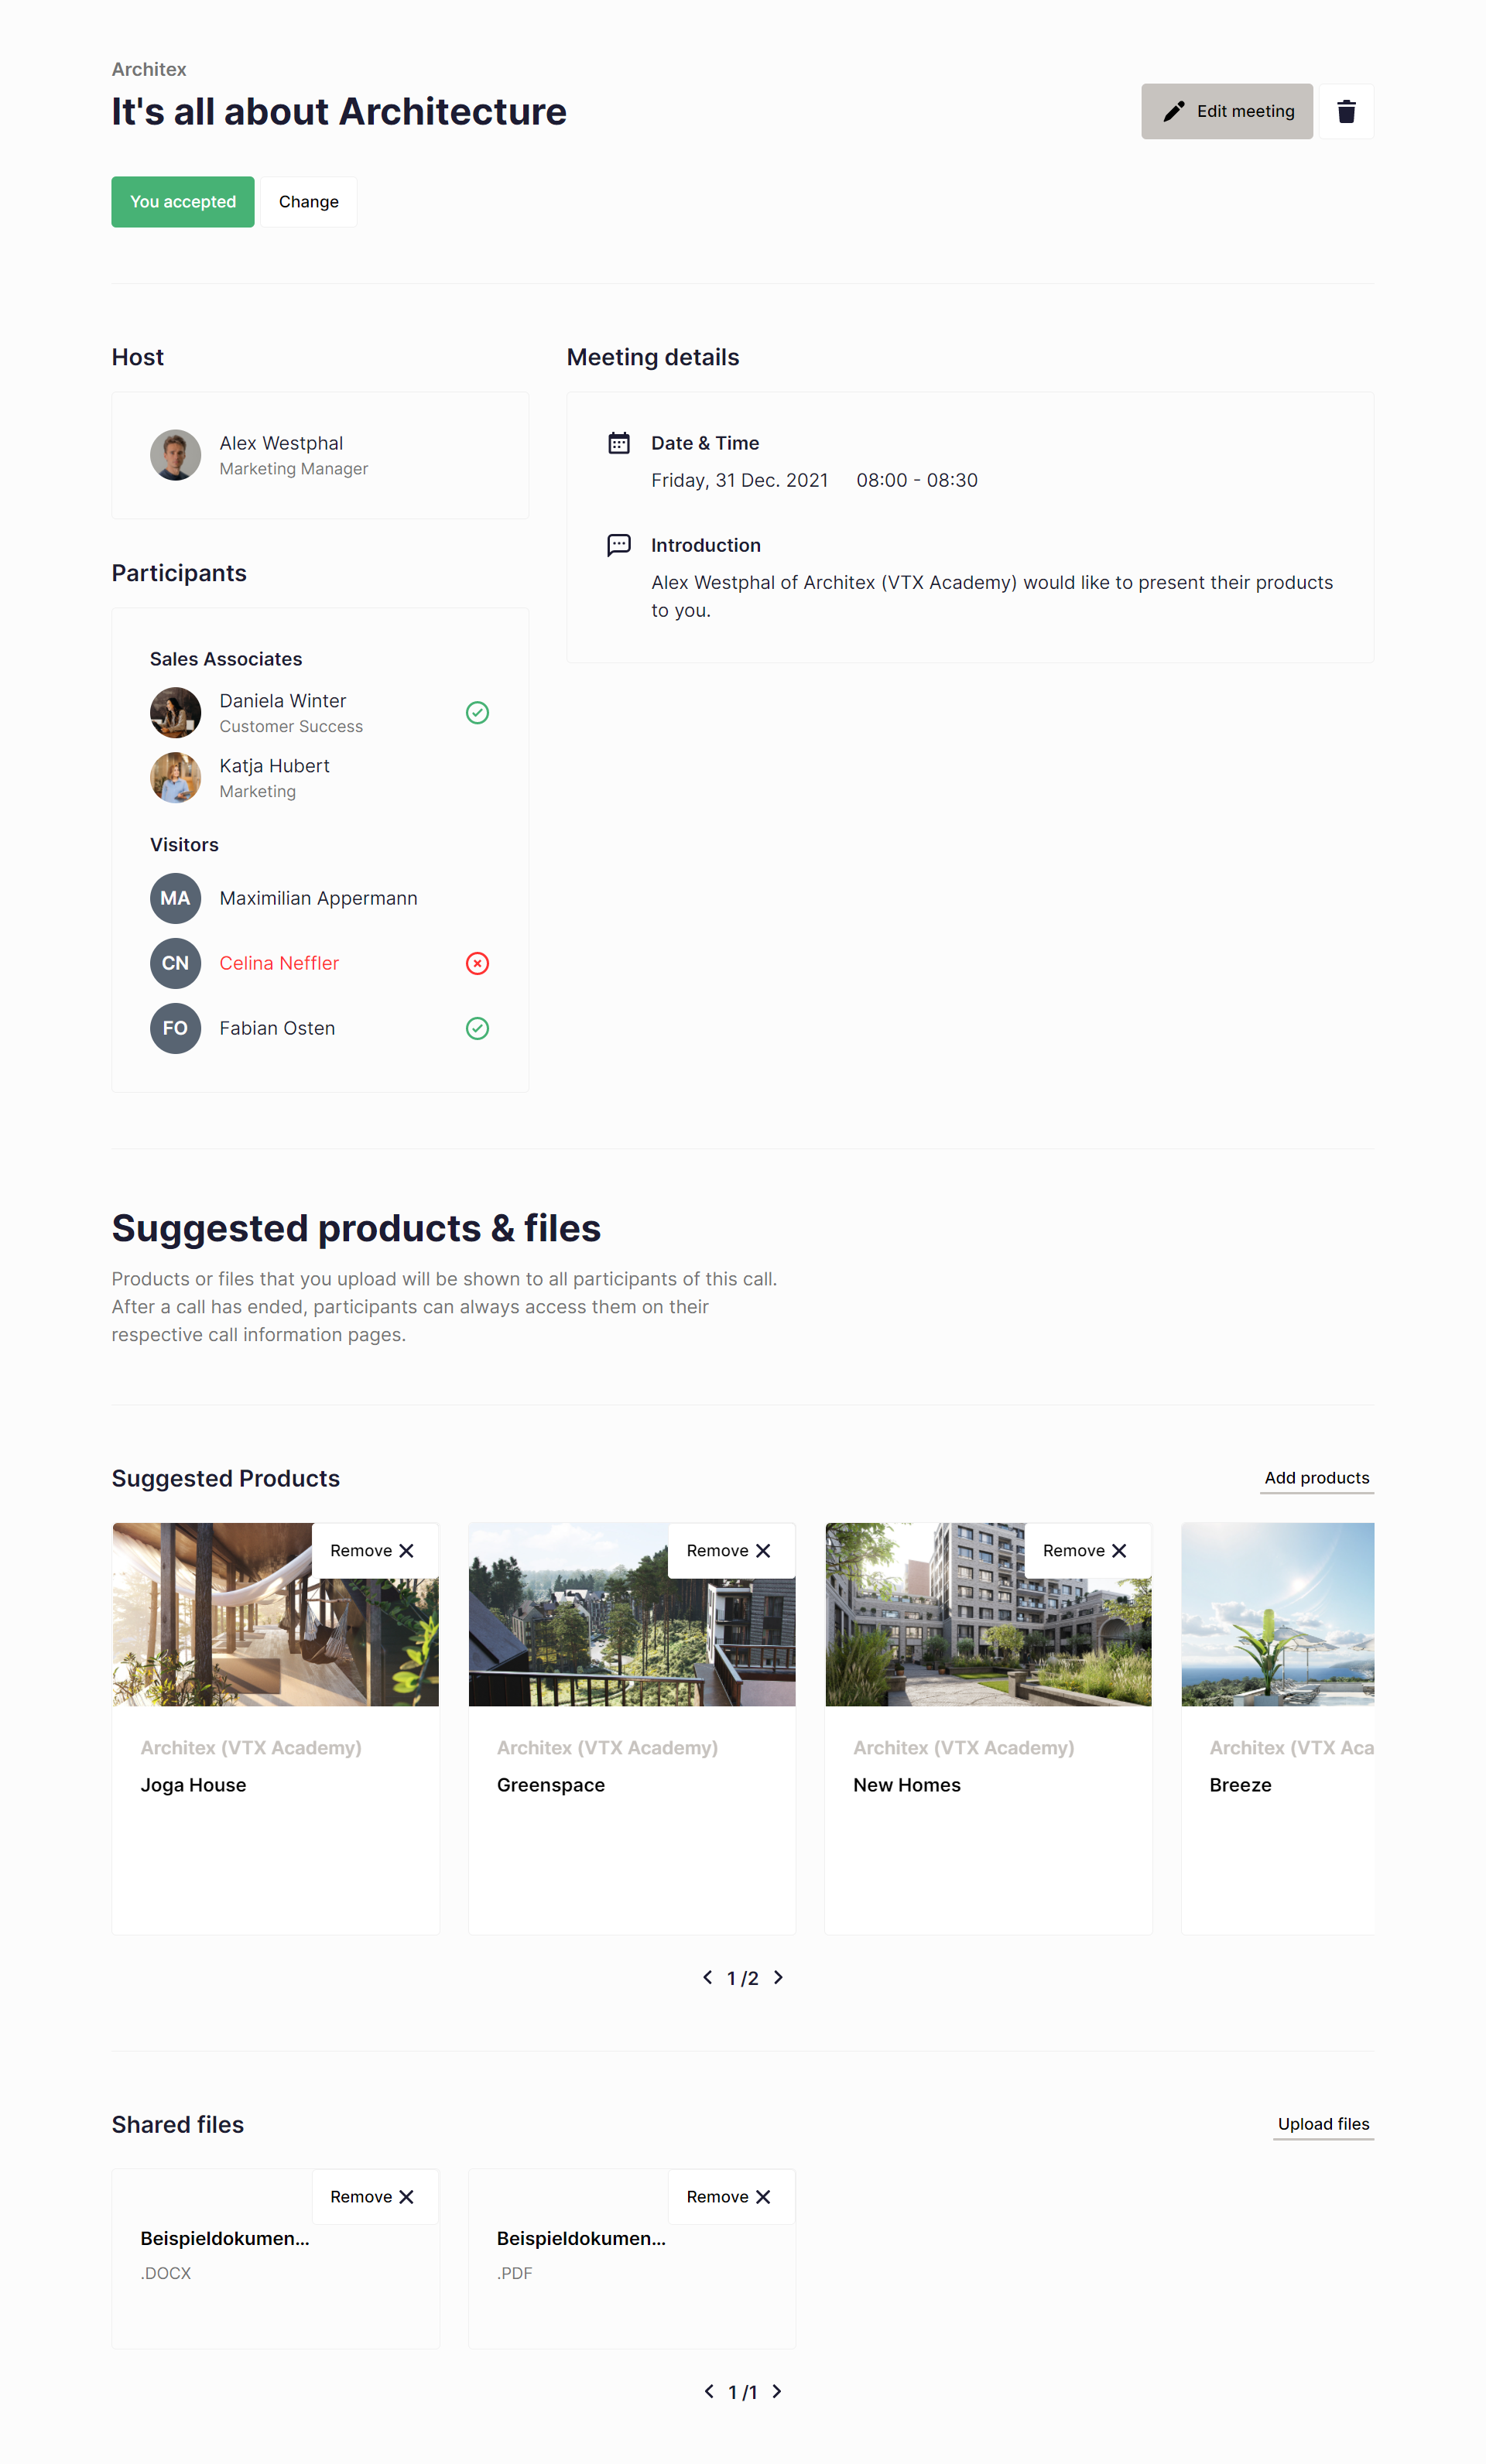
Image 3: Here you can see the information page of your call.