Products: Add and Manage
In this short video we show you how to add and manage products.
Products: Add and Manage
This article will guide you how to add and manage your product portfolio in Virtrex. To get started, click on “Products” in the menu located on the left. If you have already added products in the past, they will already be displayed here (see below image 1).
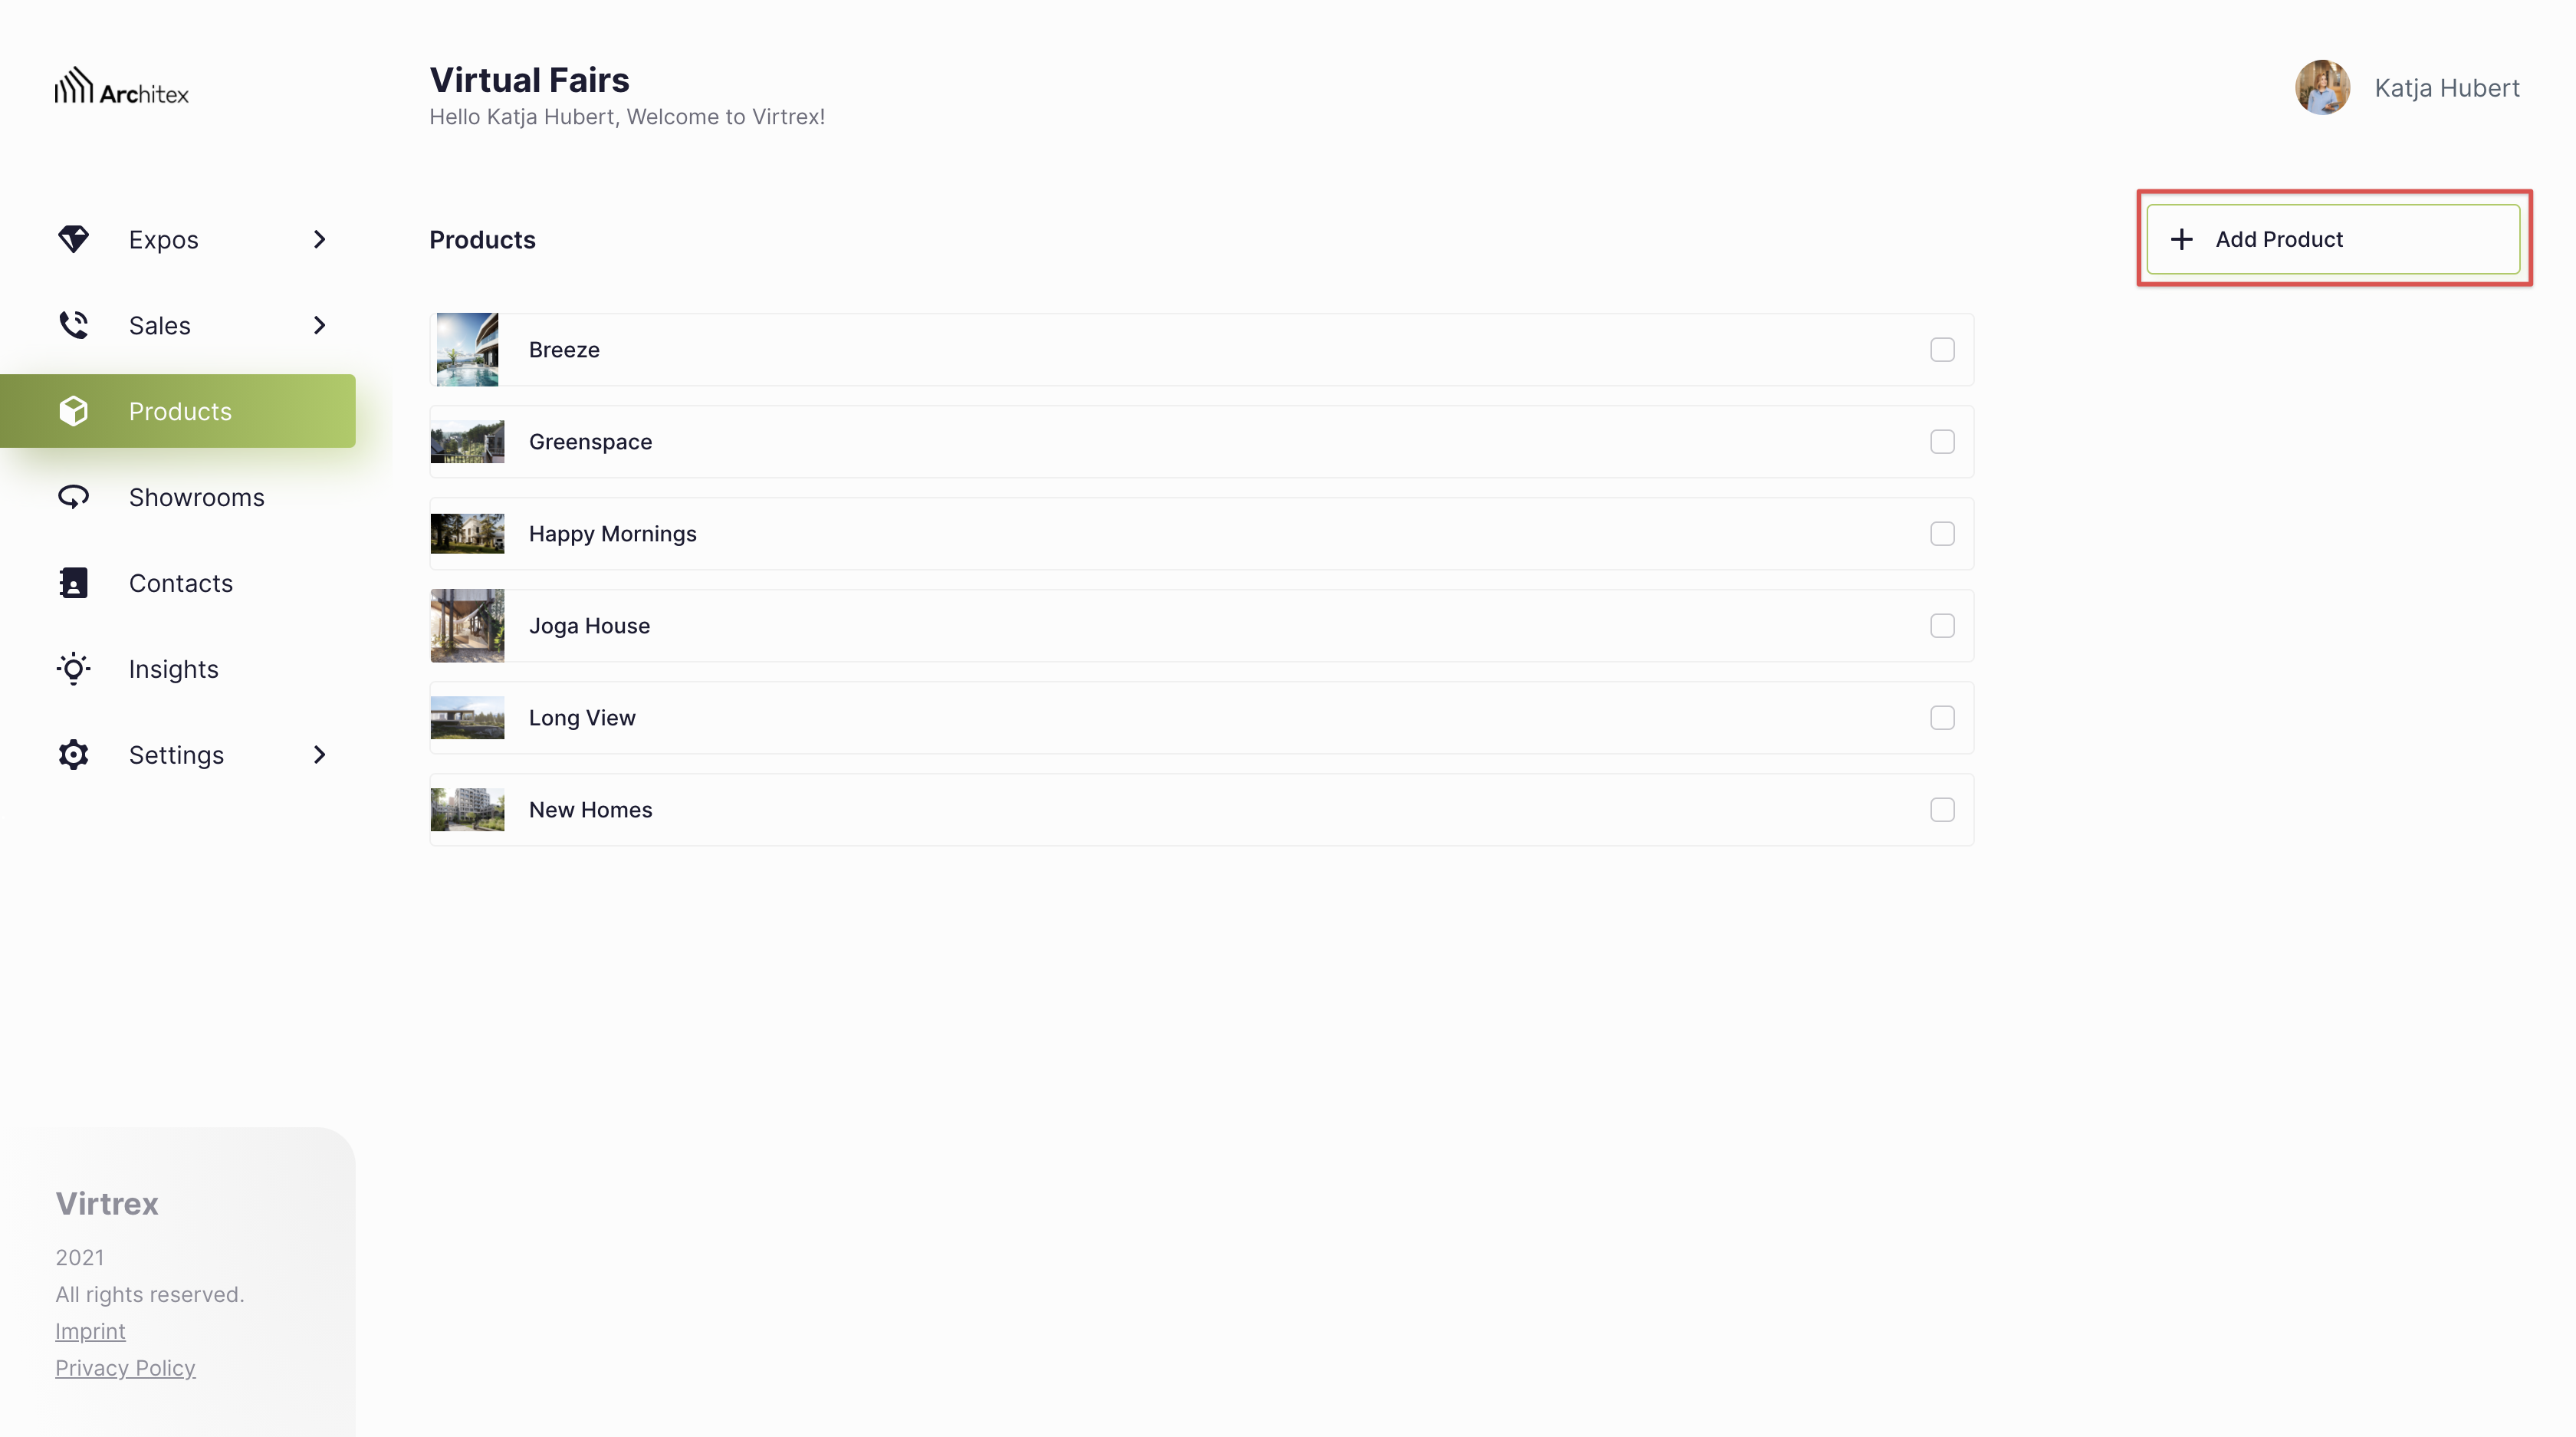
Image 1: Here you see how to add your product in the Admin Panel.
To add a new product click on the button in the top right-hand corner. After the pop-up comes up, you can enter the following information:
Name of the product
Description via WYSIWYG editor (You can edit text, add images by drag-and-drop (please not by copy-paste) and embed videos via link.)
Teaser description (This content will be shown alongside the product when it is showcased outside of the product overview page.)
Assignment of product experts
Preview image which is displayed outside the product detail page in the product preview. Please, make sure, that the image complies with the following standards:
Recommended resolution: 1920x1080 px
Recommended file size: < 1 MB
Recommended file format: .jpeg, .HEIC, .png
Image Slider (Here you can add multiple images for the product slideshow, they will be shown at the top of the product detail page. Please note, that the images will be displayed in the same order in which you upload them.)
Moreover, you have the possibility to create your product in multiple languages. You can create the information in all the languages you have defined in your brand settings.
If you want to edit a product, you can click on the product and directly edit the information that you would like to change. Under "Product variants" you also have the option of creating different versions of your product and thus presenting your product in different sizes, colors, for example. You can also add a 3D model of your product here. This allows visitors to view your product in 3D and AR mode. For this addition you need the following files:
3D image model of your product (file format .glb/ .)
3D AR object for iOS (file format .usdz) (To enable the AR feature on iOS devices, an additional .usdz file needs to be uploaded in the Admin Panel The augmented reality feature on the product page will appear directly when a .usdz file is uploaded. If only a .glb file is uploaded, this AR feature will work only on Android devices. A corresponding note is automatically added to the view on the product page.
In addition, you can make up to four documents available for download to the visitors of the Expo. Do not forget to click “Save changes” after finishing the customization (see below image 2).
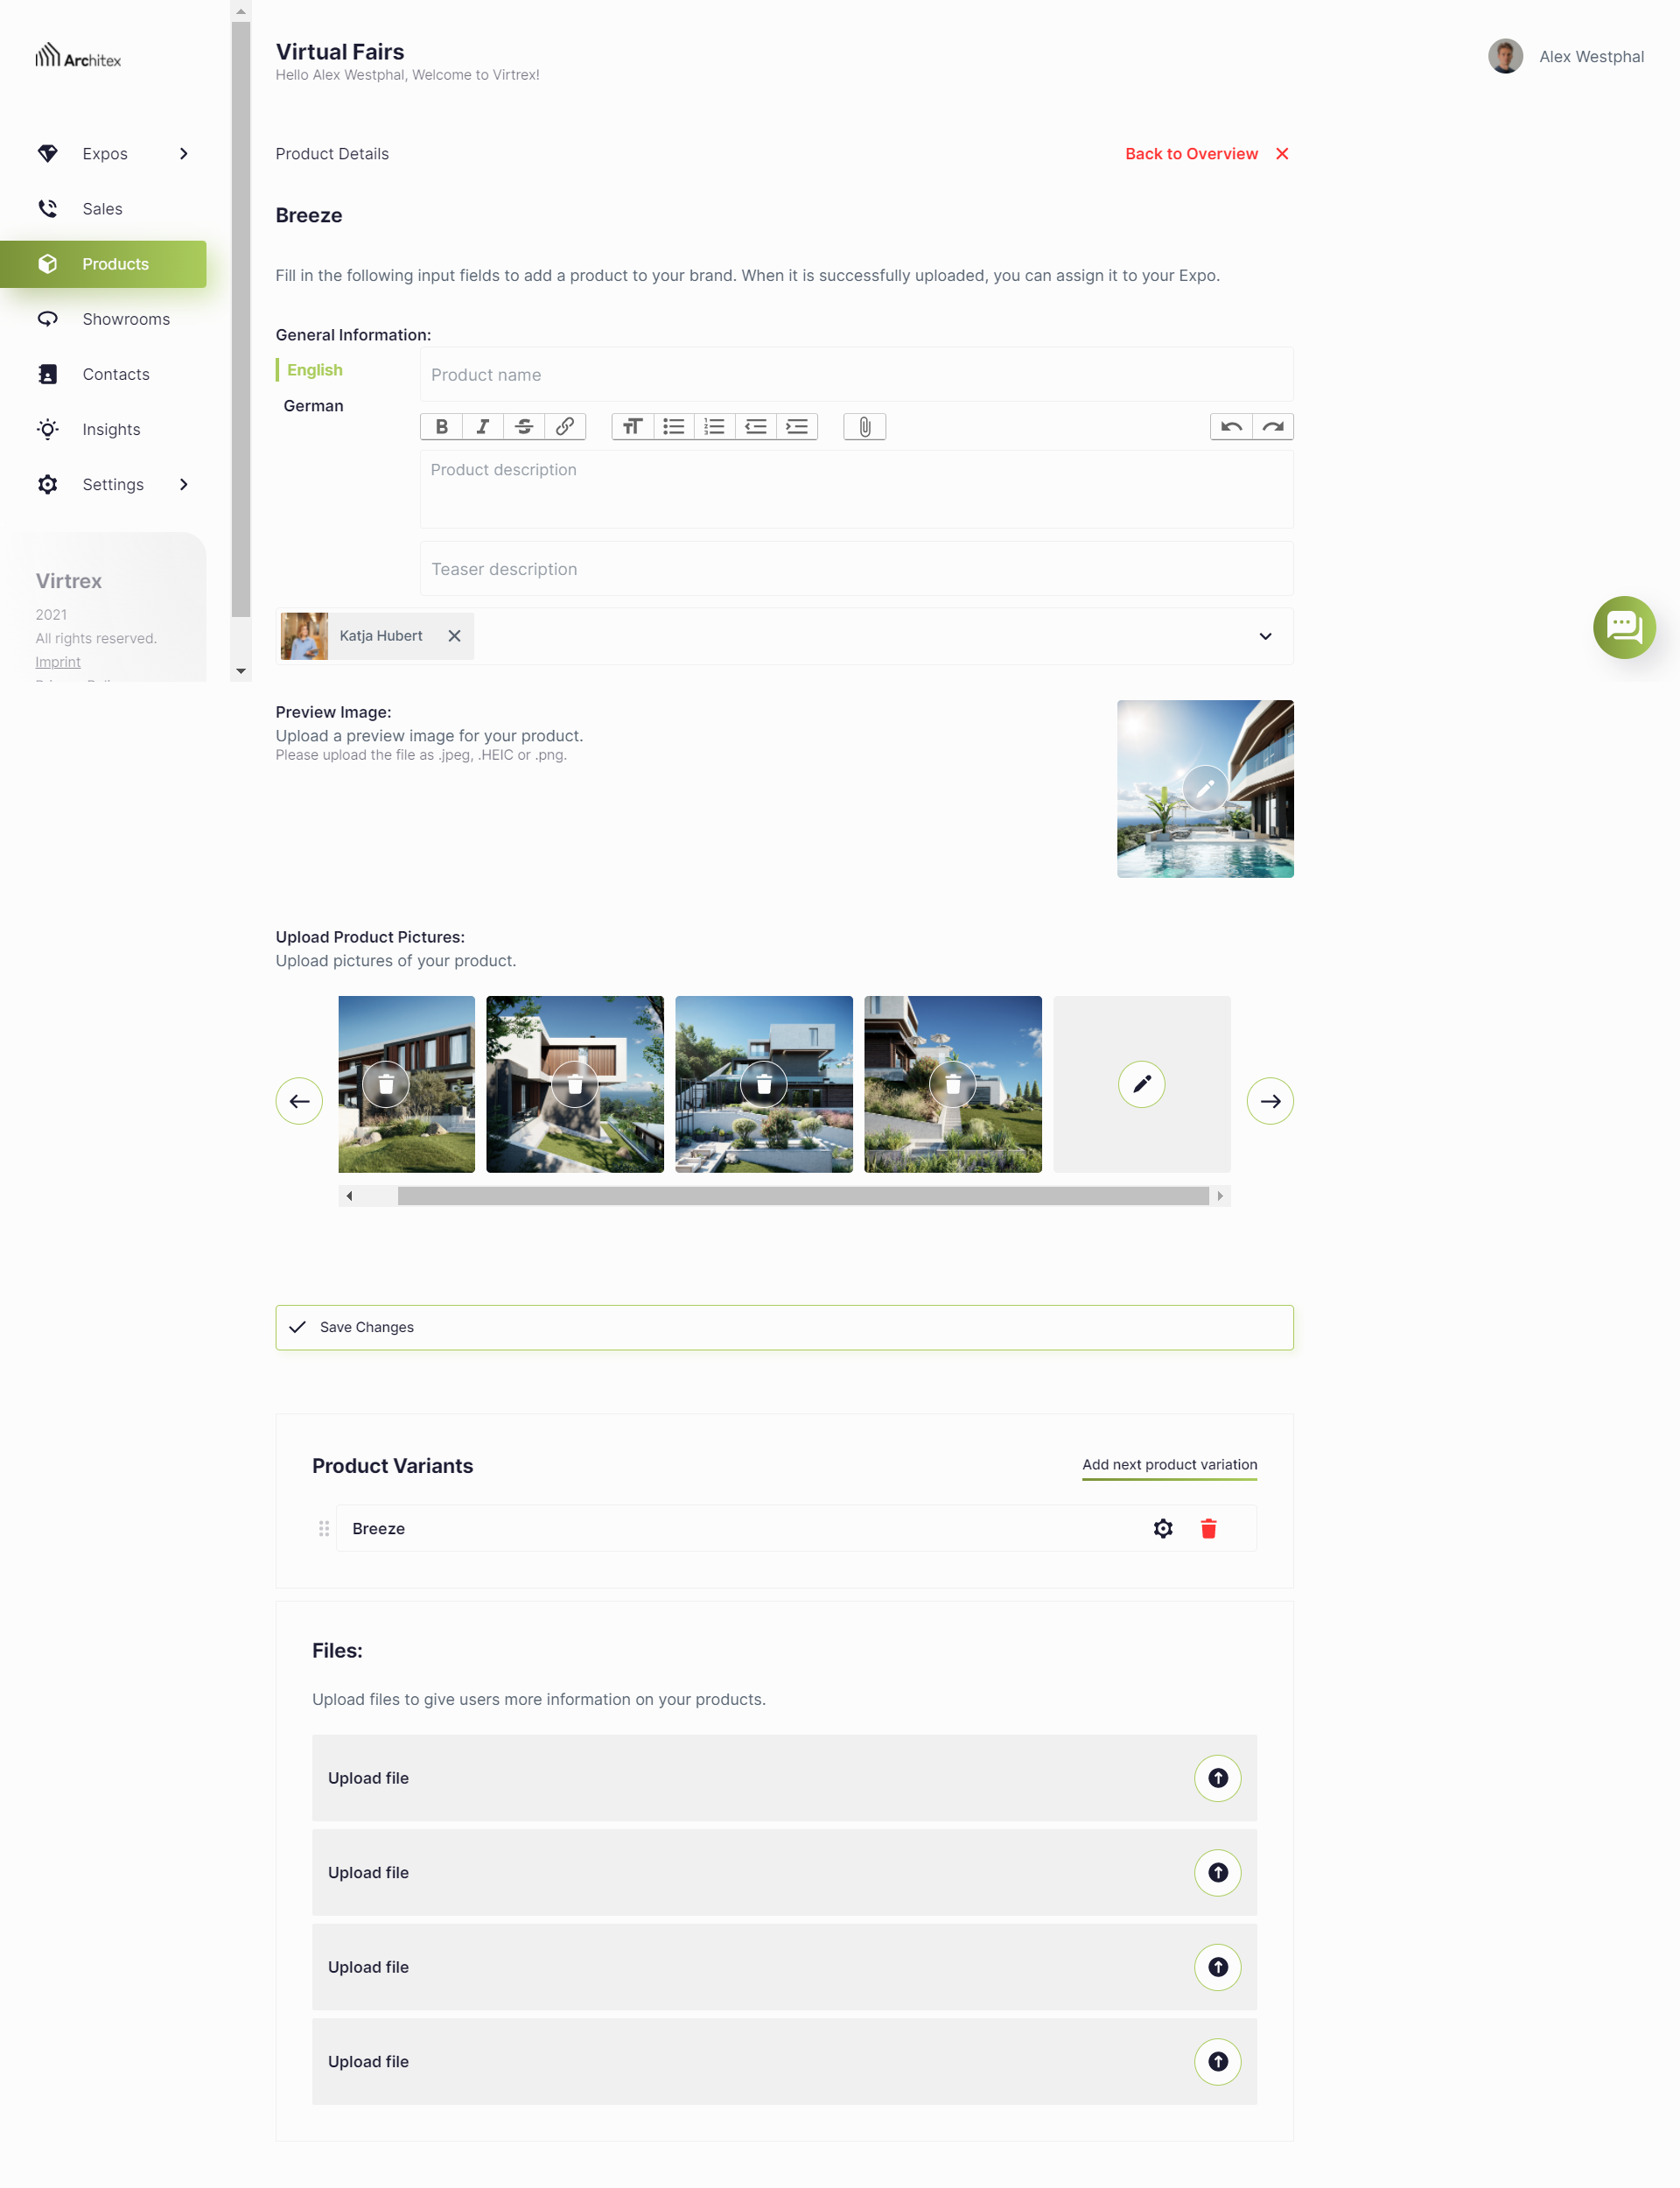
Image 2: Here you see how to edit your product.
Adding attached products to your Expo
After you have successfully created your products, you have to add them to your Expo so that they are displayed there. To do so, select the Expo you want to add the products to in the Admin Panel (see below image 3.1.). Via the buttons “Add Products” (see image 3.2.) and “Manage Products” (see image 3.3.), which have the same function, you will get to an overview of your previously created products. There is a distinction between products that have already been added to the Expo (“Attached Products”) and those that have not been added to the Expo yet (“Other Products”).
To add products to your Expo, click on the checkbox behind the wished products so that a checkmark appears. To remove products from your Expo, click on the red crossed-out link icon behind the corresponding attached products. Do not forget to save your changes.
Once you have added a product, it will be displayed in the languages that you or, in the case of a Multibrand Expo, the organizer of the Expo have specified.
When you are satisfied with your selection, you can drag the products into the preferred order you want them to display (see image 3.4.). To view the product pages again, click on the rectangular icon on the right of the product names (see image 3.5.).
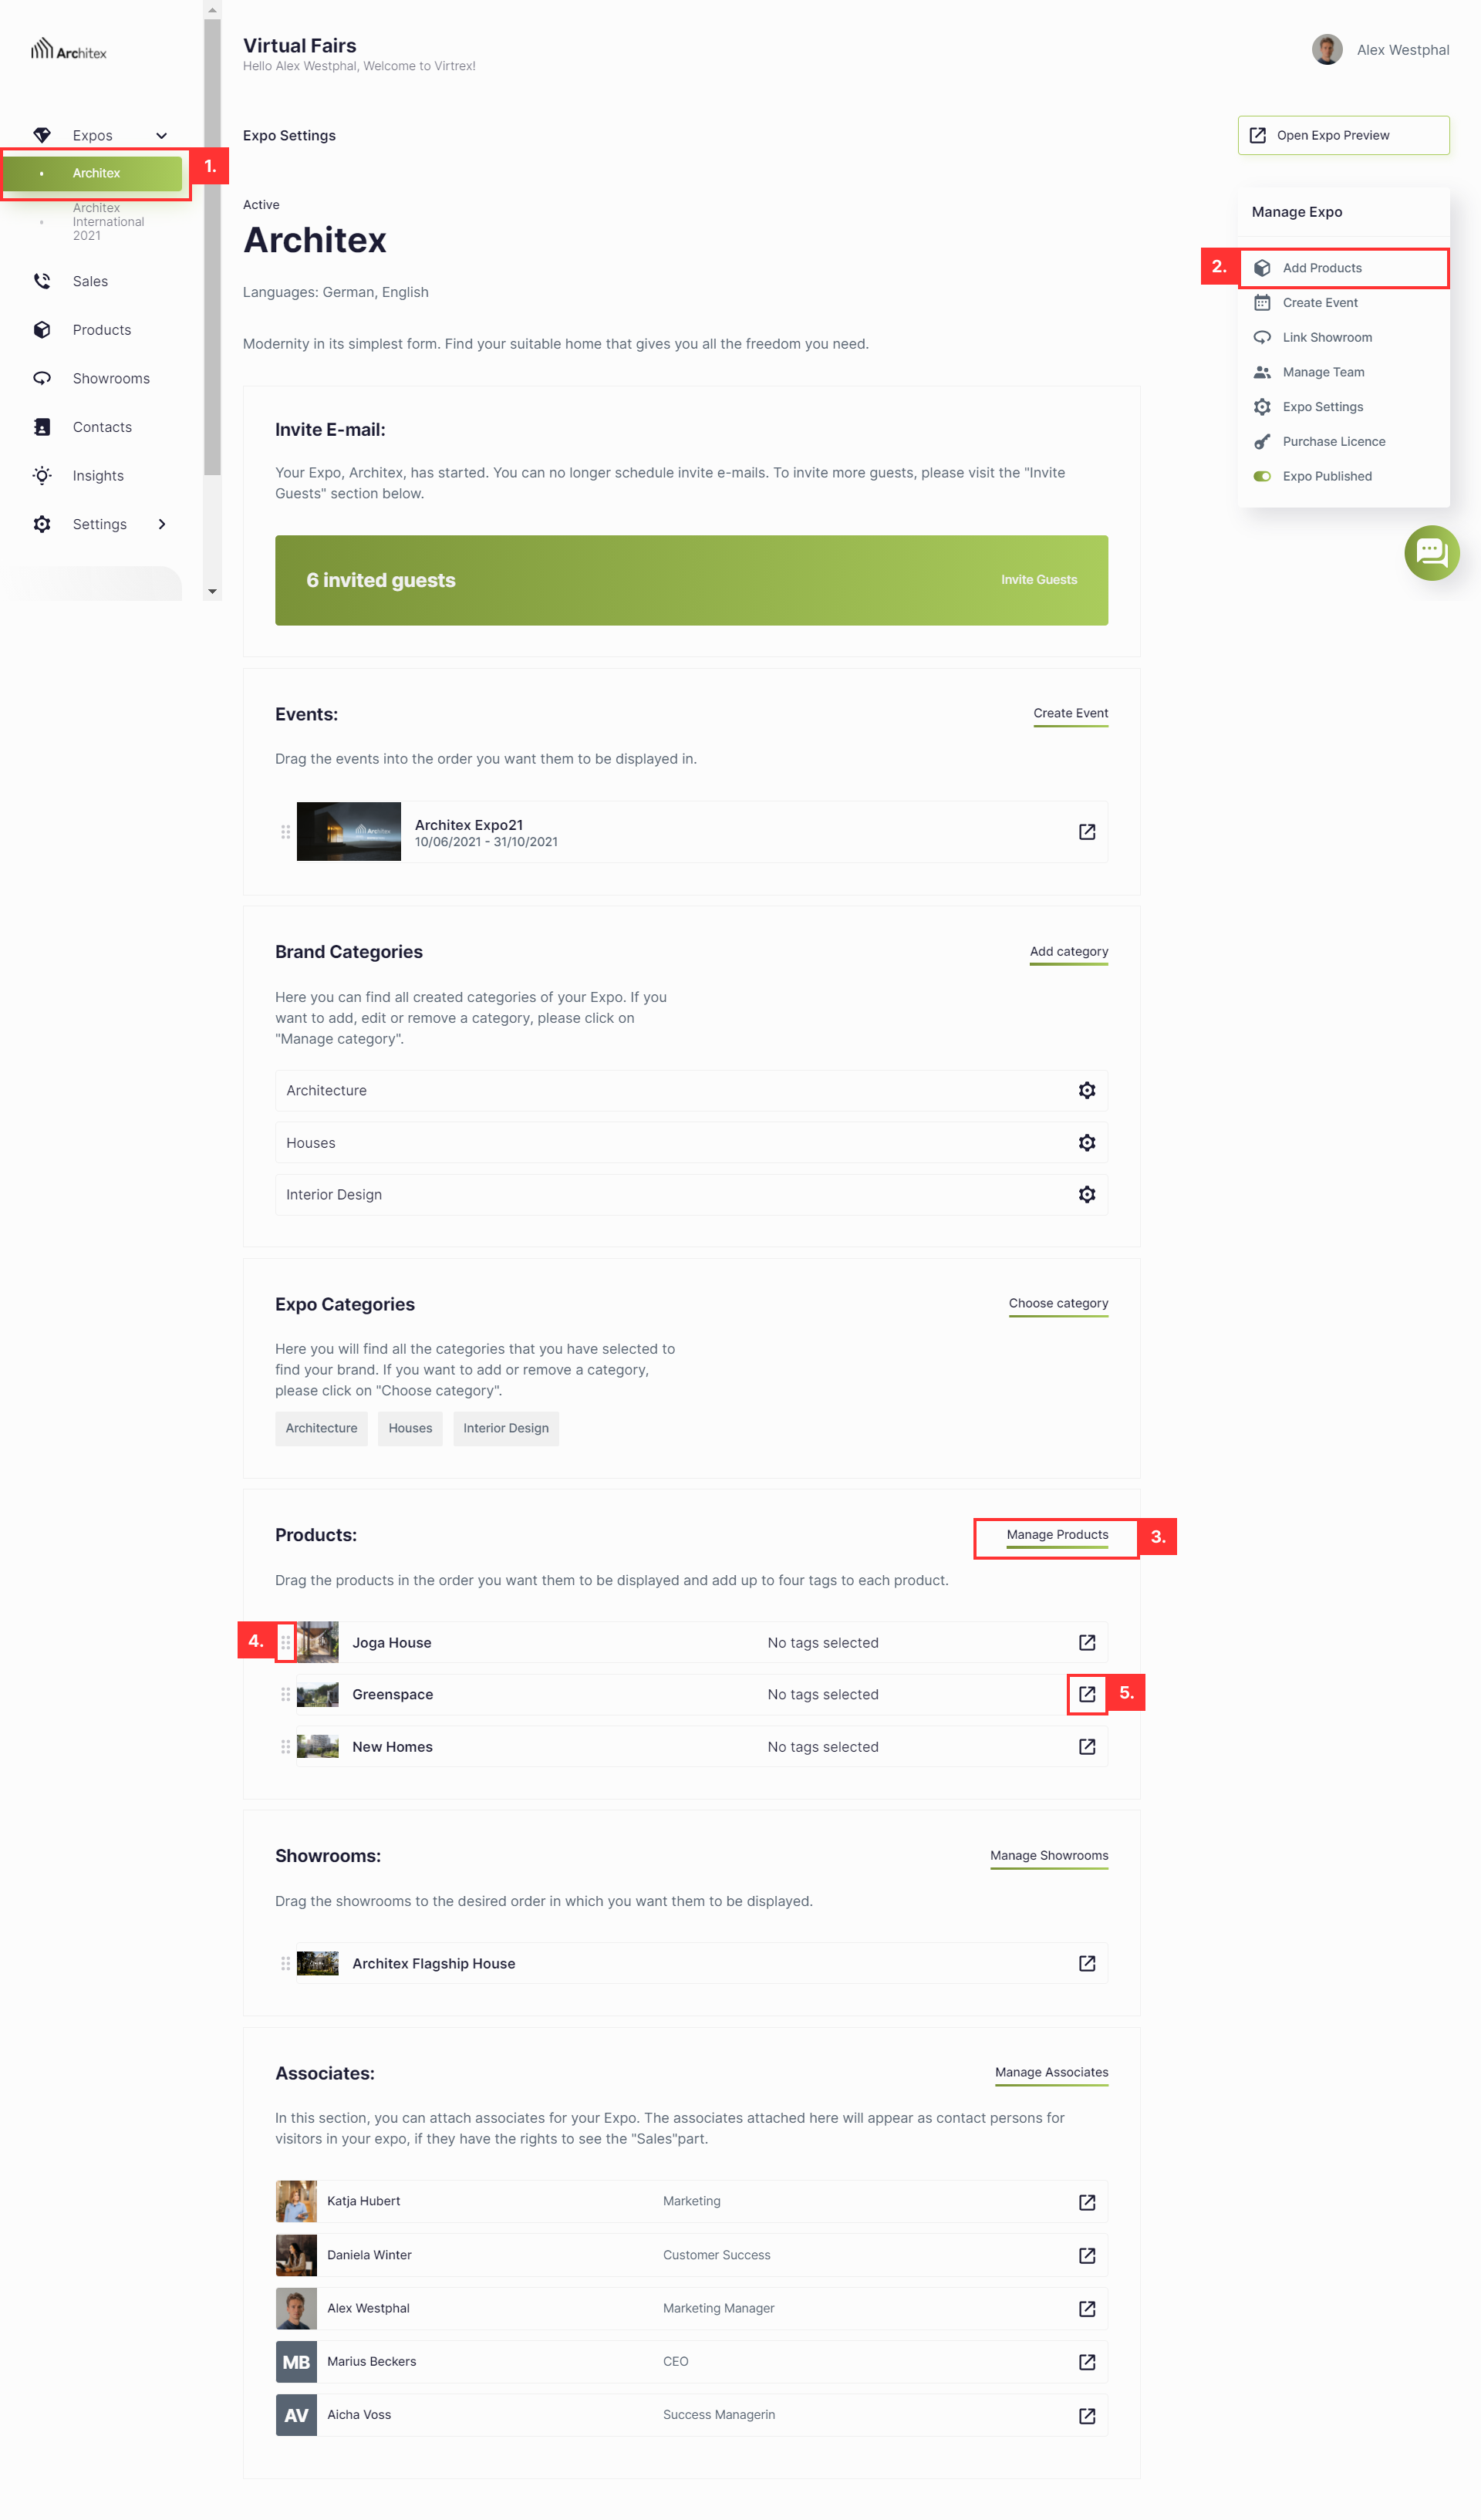
Image 3: Here you see how to add attached products to your Expo.