Create and manage events
1. Creating events
Events are a planned public appearance of your brand in the form of a livestream. These happen at a specific time and date, creating an opportunity to present your products while engaging with your audience in real-time.
To create an event, you firstly need to define which Expo the event should take place in. After selecting an Expo, you will see an area in the center of the screen titled “Events” (see below image 1). This area will show you a complete overview of all planned events and offer you the option to create a new one.
To add an event, you have to give it a name, add a description and select the starting and ending date. You have the possibility to add the name and the description of the event in different languages. There, the languages you have defined for the Expo under “Expo Settings” > “Languages” will be listed. Please note that you have to fill in all language variants to be able to create the event.
Note: If you are a participating brand of an Expo, the languages of the Expo cannot be set by you, but are determined by the organizer. You can edit the languages of your brand under “Settings” > “Brand Setup” and then save the description of your brand, your products as well as your showrooms in these languages.
In the last step, upload a preview image. You can always change the defined content by clicking the “Edit Event” button while on the specific event’s overview page (see below image 2.2.). This page also gives you the option to delete an event permanently (see image 2.3.).
Please make sure, that the preview image complies with the following standards:
Recommended aspect ratio: 16:9
Recommended file size: max. 1 MB
File format: .jpeg, .HEIC, .png
If you would like to change the order of the events or channels, you can use “Drag & Drop” by clicking on the icon with six dots (see below image 1). Please note that changing the order of events and channels can take up to 1 min to correctly appear on the visitor side.
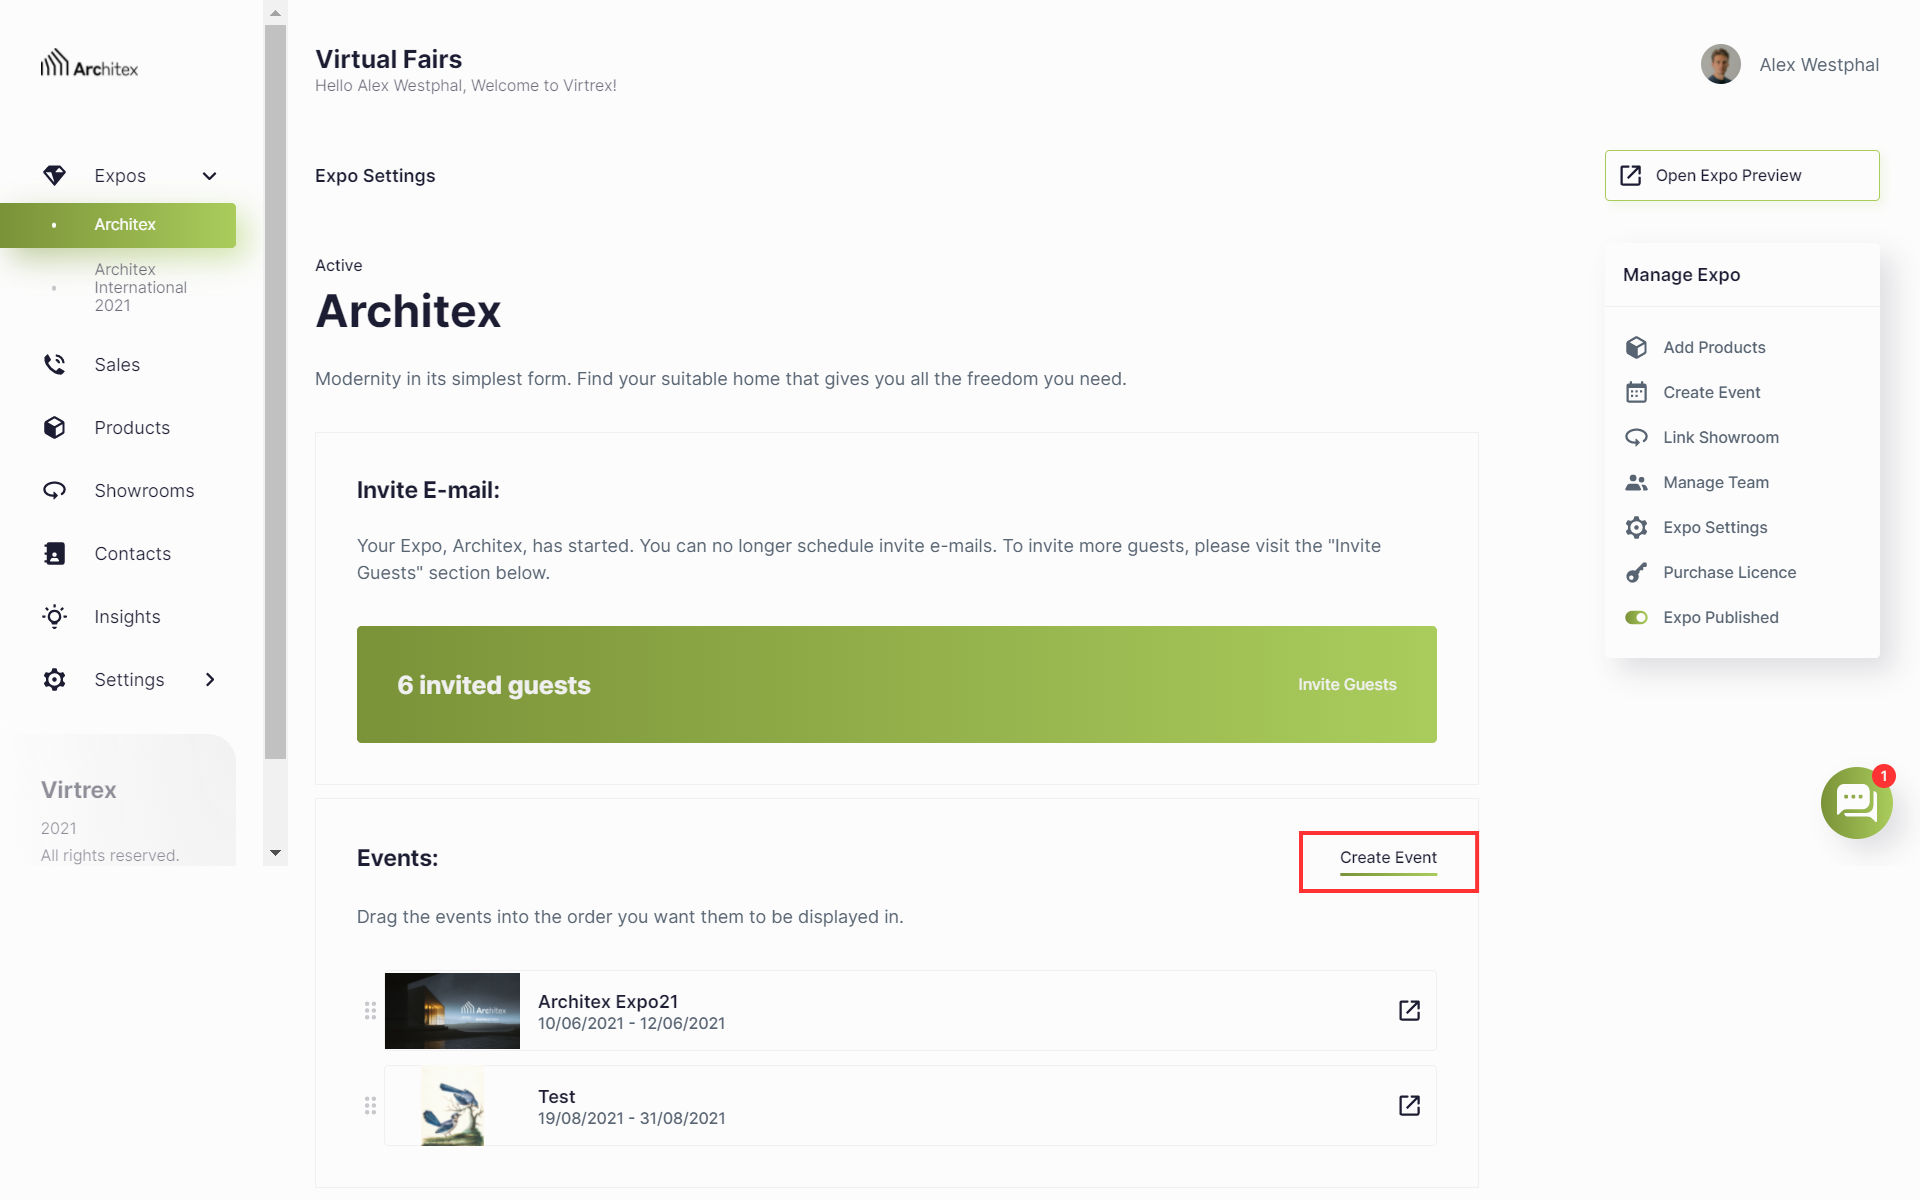
Image 1: Here you see the event overview of your chosen Expo.
2. Creating channels
Within an event, you can create channels. A channel is a virtual platform where panels are shown in chronological order. You can add multiple channels if you, for example, want to create different theme worlds or plan multiple panels at the same time.
Within an event, you can create channels. A channel is a virtual platform where panels are shown in chronological order. You can add multiple channels if you, for example, want to create different theme worlds or plan multiple panels at the same time. When opening an event, you will see an area in the center of the screen titled “Channels”. This area will display all created channels and offer you the option to create new ones by pressing “Add Channel” (see below image 2.1.). To add a channel, enter a name for each of the defined languages and upload a preview image. You can always change the defined content by clicking the “Edit Channel” button while on the overview page of a specific channel (see below image 3.3.). This page also gives you the option to delete a channel permanently (see below image 3.4.).
Please make sure, that the preview image complies with the following standards:
Recommended aspect ratio: 16:9
Recommended file size: max. 1 MB
File format: .jpeg, .HEIC, .png
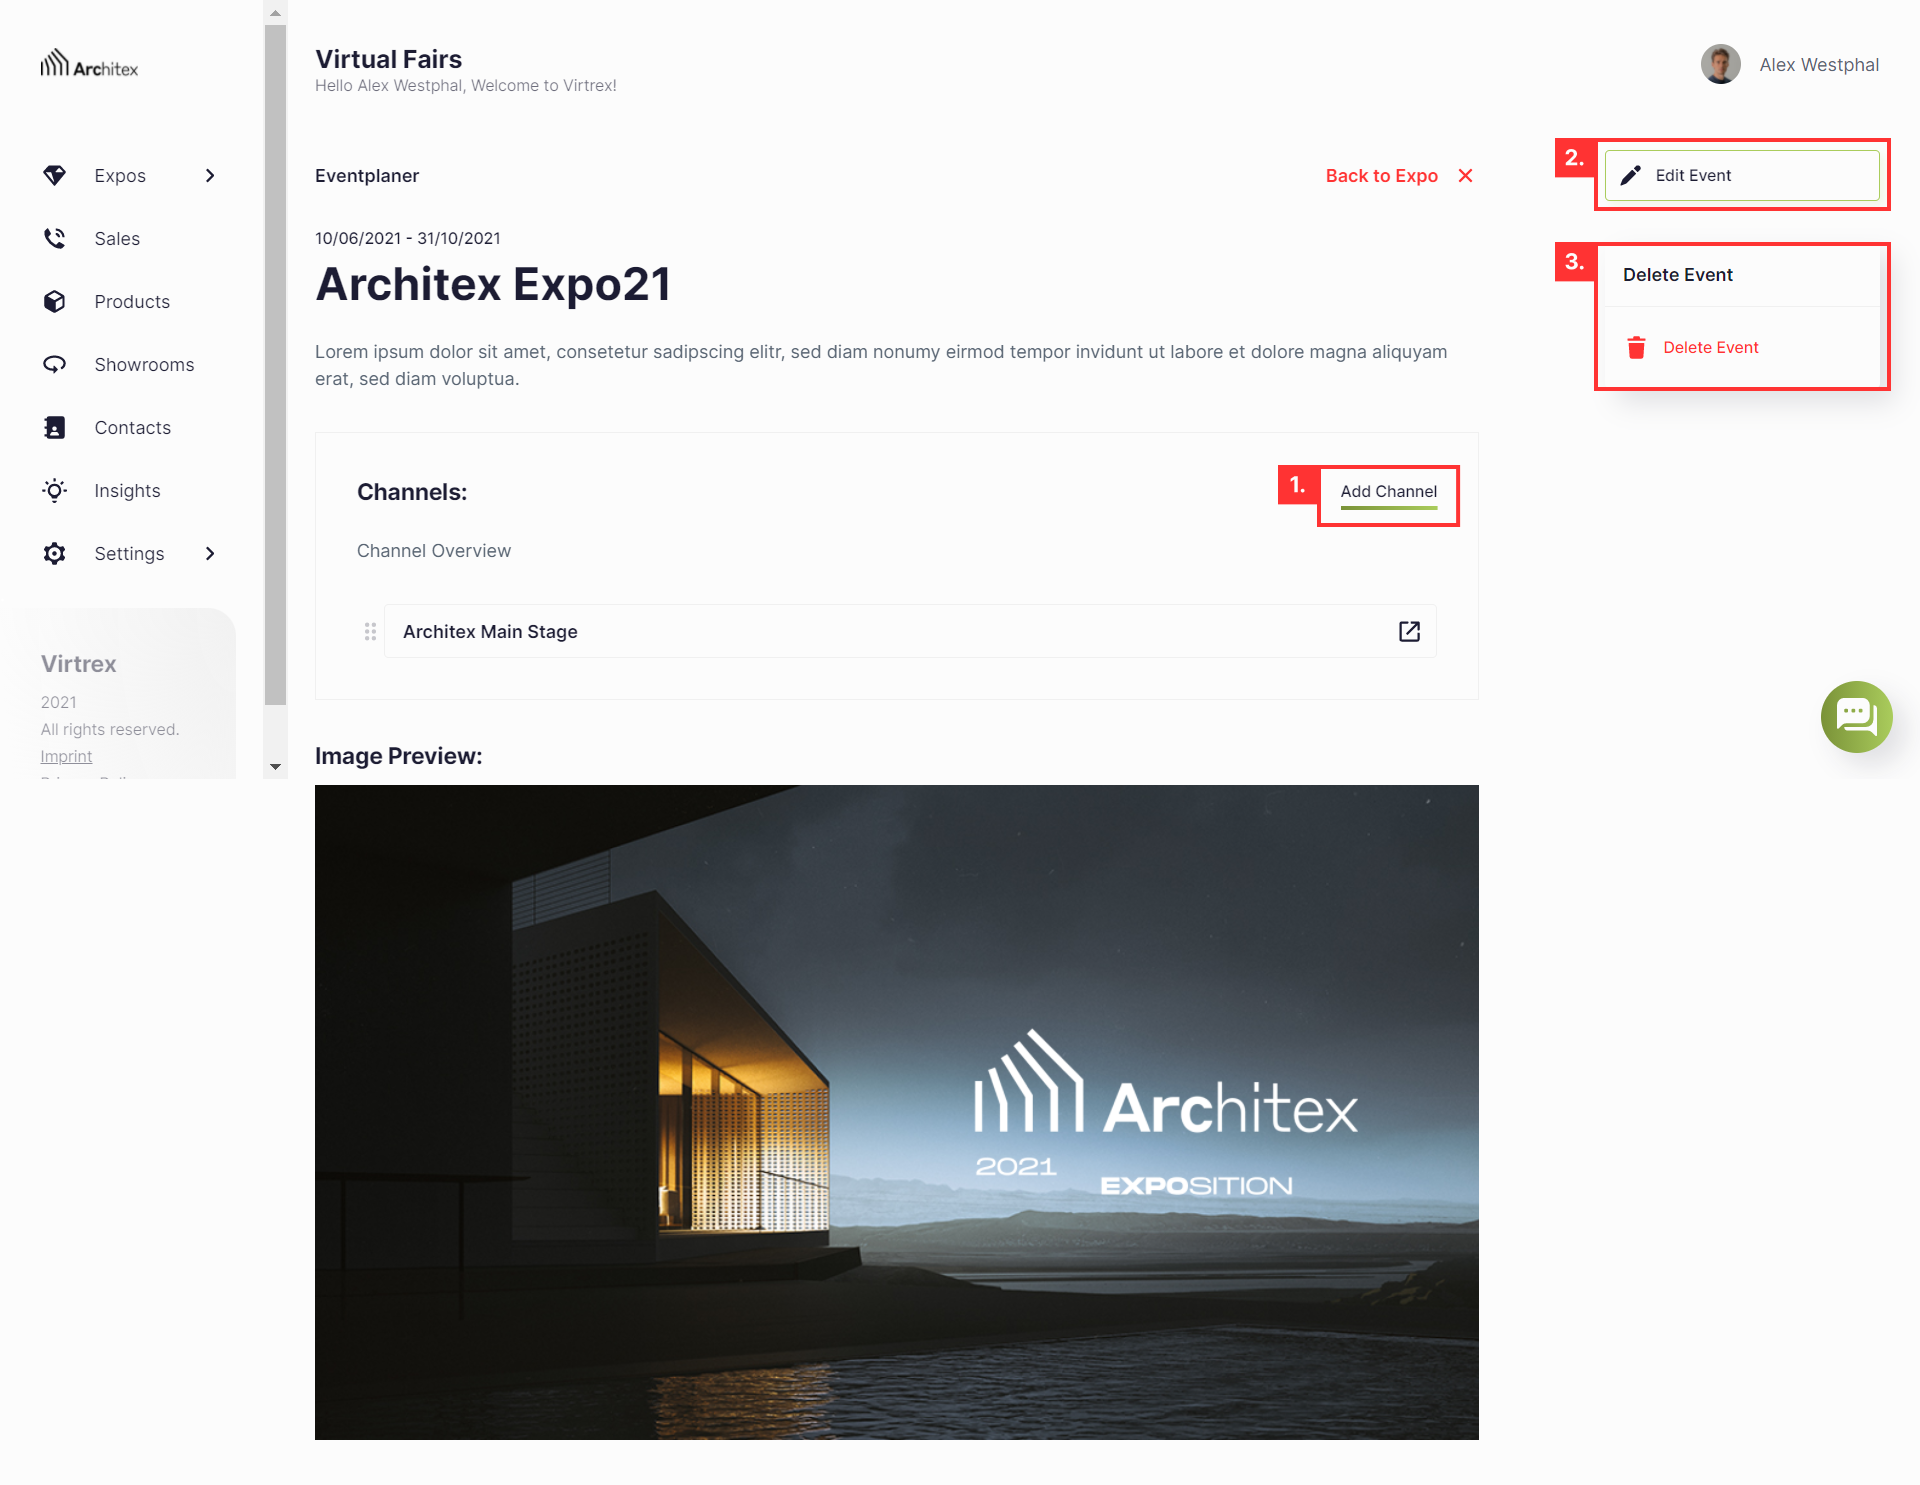
Image 2: Here you can see how to edit events and add channels.
3. Creating panels (Expo with one brand)
When clicking on a channel, you will see a complete agenda of the event. In this agenda, you will plan your upcoming panels. A panel is an individual presentation happening on a specific channel.
To add a panel, you first have to choose on which day the panel is supposed to take place, then click the “Create Panel” button (see below image 3.1.).
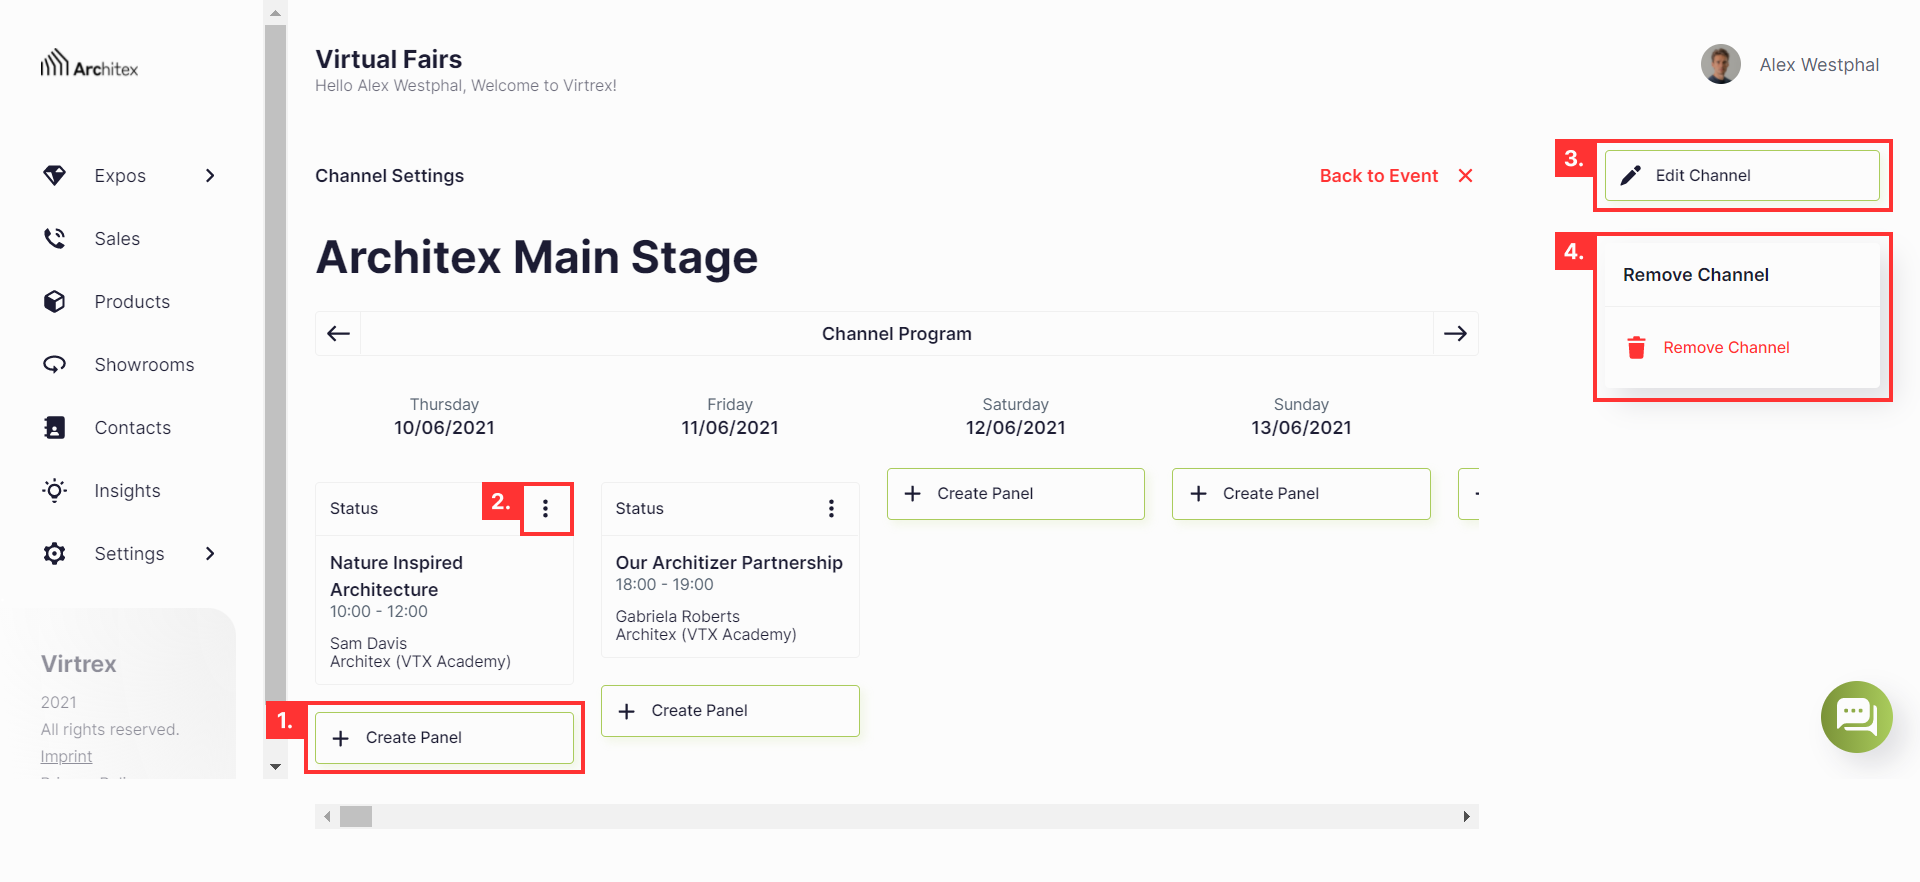
Image 3: Here you see how to edit panels and channels.
Start by selecting the language of your panel and then add a name as well as a description. Then, choose the time slot of the selected date where the panel should be scheduled.
Finally, you can showcase the speakers of the panel by sharing their names and adding a brief description. After creating the panel, you will see it appear in the agenda of the selected stage (see below image 4).
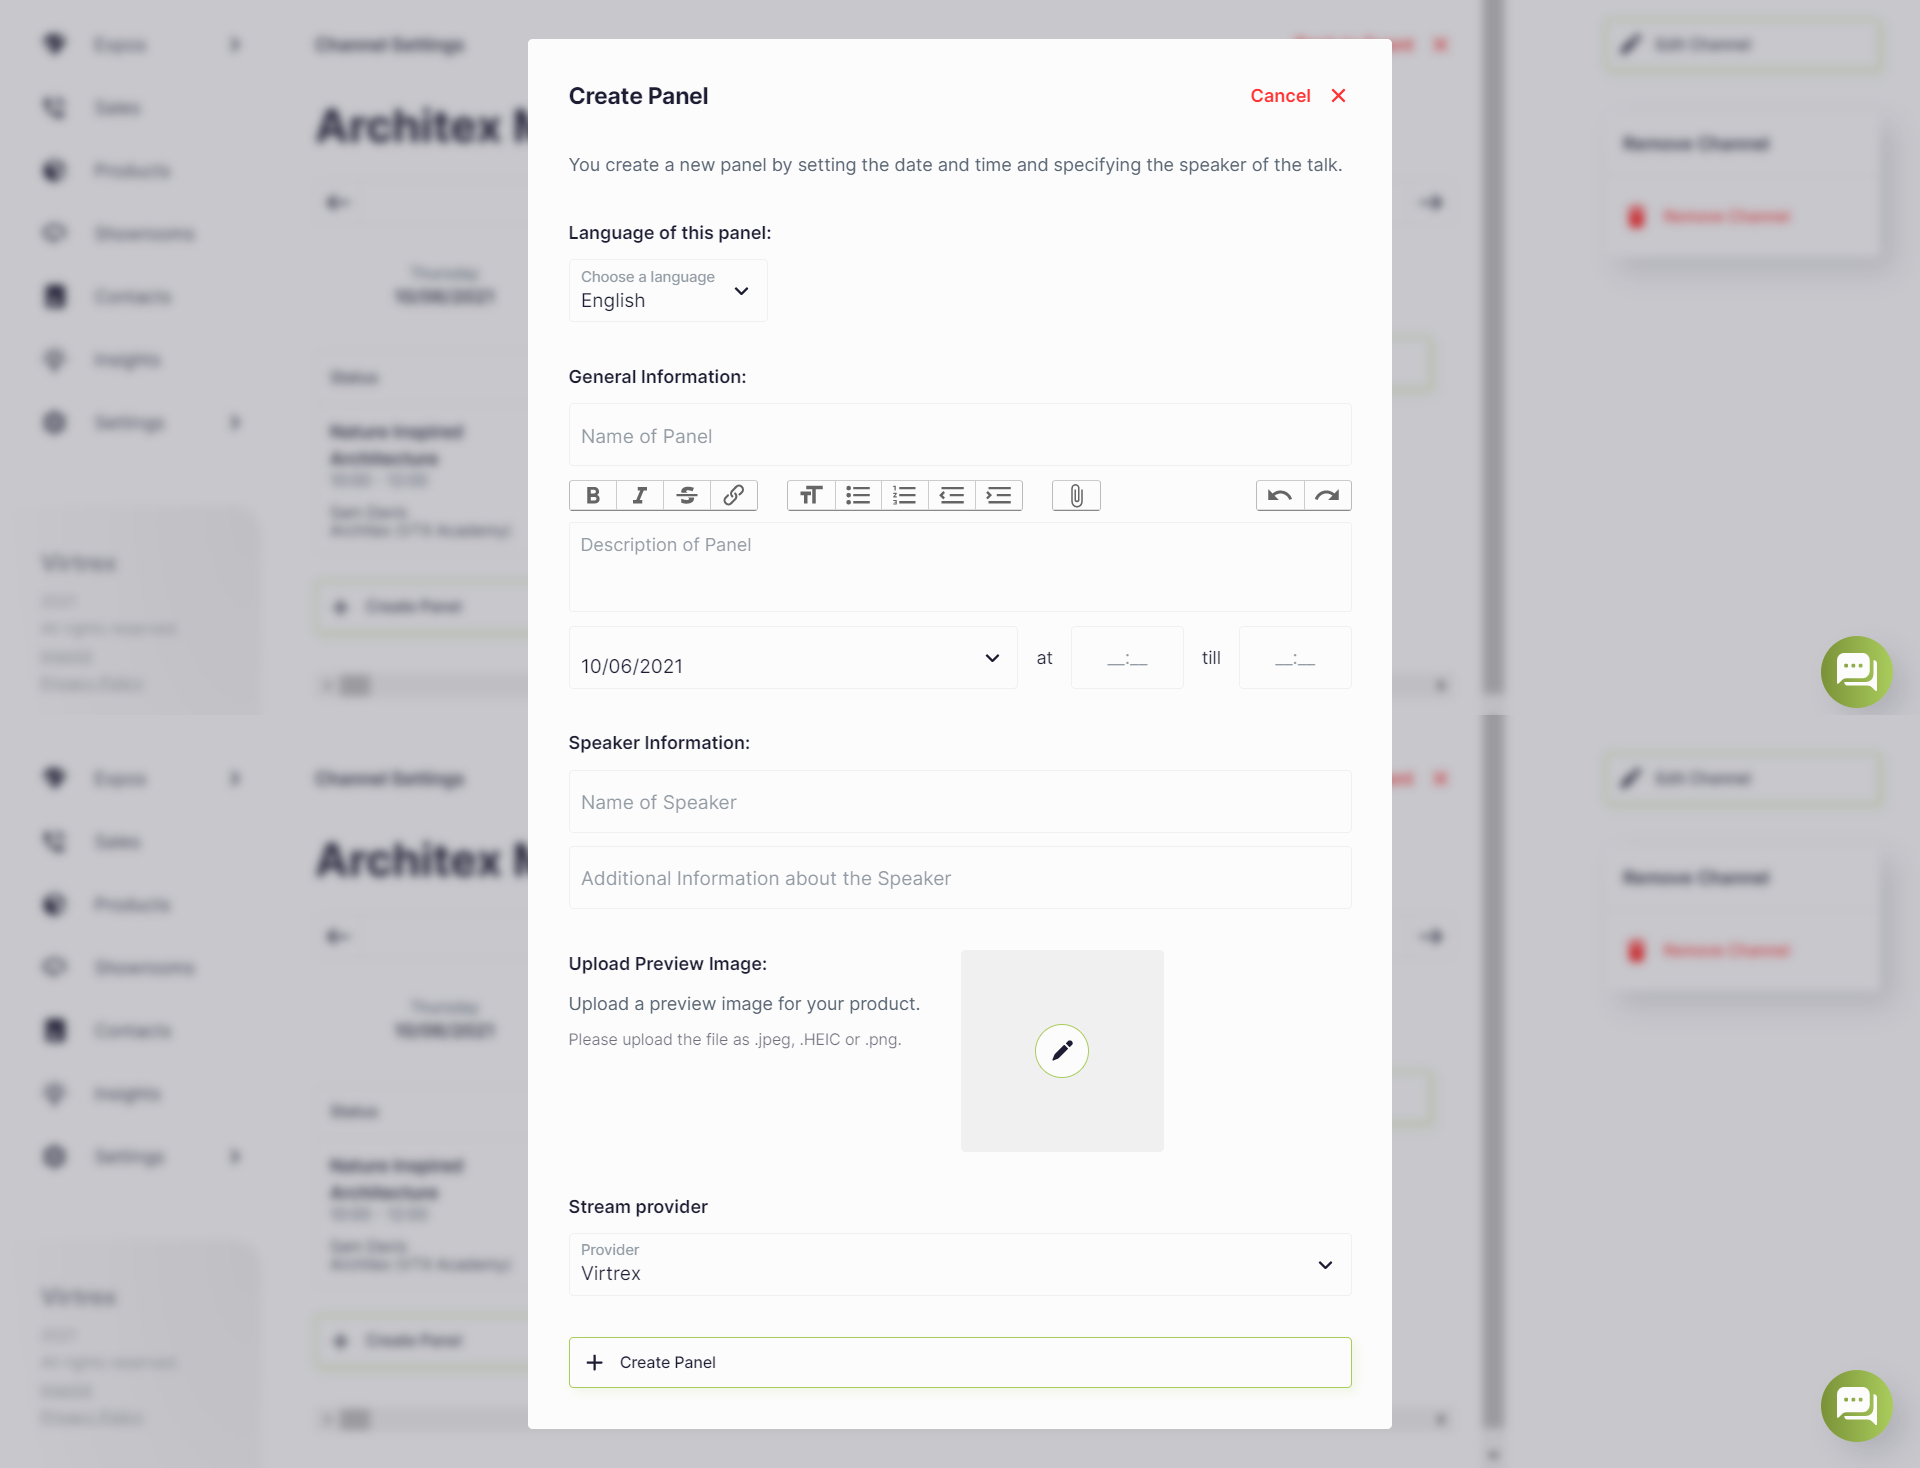
Image 4: Here you see how to insert your panel description.
We also offer you the possibility to link products directly to a panel. To do this, click on the selected panel to open the panel overview page. Towards the bottom of the screen, you will see an area in the center of your screen labelled “Products”. If you click the “Manage Products” button, you can link already created products directly to this panel to give visitors additional information about what to expect (see below image 5.1.).
The panel overview page also gives you access to the unique stream key and the panel’s server link. Please note, if you do not see the links, contact your organizer (see image 5.2.). These are used to set up livestreams successfully. After the event has passed, you can upload a video file of the panel livestream here to make it available for users to watch it in the archive (see image 5.3.).
Image 5: Here you see the panel overview page.
4. Creating panels (Expo with more partner brands)
In the multi brand environment, the panel creation step gets divided into 2 phases. Firstly, the Expo organizer needs to create a time slot for the panel. To do this, he or she has to choose on which day the panel is supposed to take place and click the “Create Panel” button (see above image 3.1.). Afterwards the time slot of the selected date when the panel should be scheduled needs to be chosen. Then the organizer needs to define which brand is responsible for the panel. Only the responsible brand is later able to define information such as title, description, and speakers (see below image 6).
Once the panel has been created, the assigned brand will be able to edit the panel’s information. To do this, you have to click the 3-dot icon on a panel card and select “Edit” from the dropdown menu (see above image 3.2.). A pop-up will open and allow you to give your panel a name, describe it in more detail, add a teaser text, and give the visitors some information on the speakers.
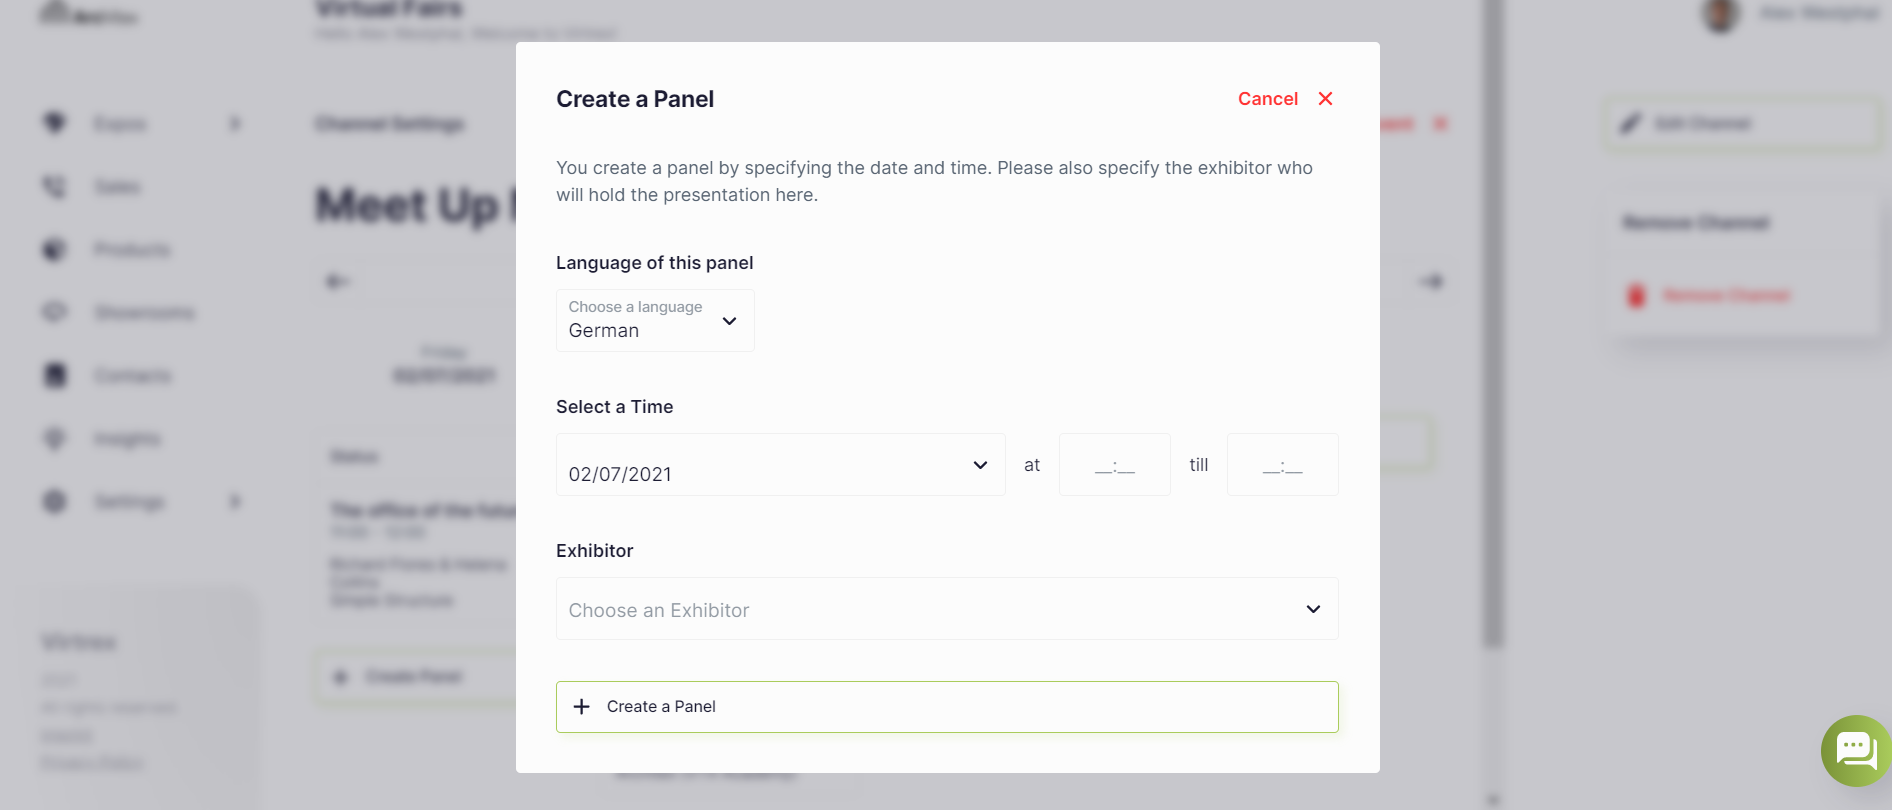
Image 6: Here you see how to edit your panel information.