The multilingualism of your Expo
1. Which languages does Virtrex offer?
Virtrex offers you the possibility to create your Expo in different languages. You can enter the different languages directly in the “Expos”, “Brand settings”, “Products”, etc. sections (read section 2). There are two categories of languages: system languages and supported.
1.1. System languages
The system language (see below image 1) is available for all components within Virtrex. Accordingly, the entire interface can be displayed in this language. Currently, Virtrex has the following system languages:
German
English
1.2. Supported languages
The supported languages (see below image 1) are available for all content you enter on your brand profile and product pages. The platform navigation is displayed in English regardless. The supported languages include:
French
Spanish
Italian
Dutch
Polish
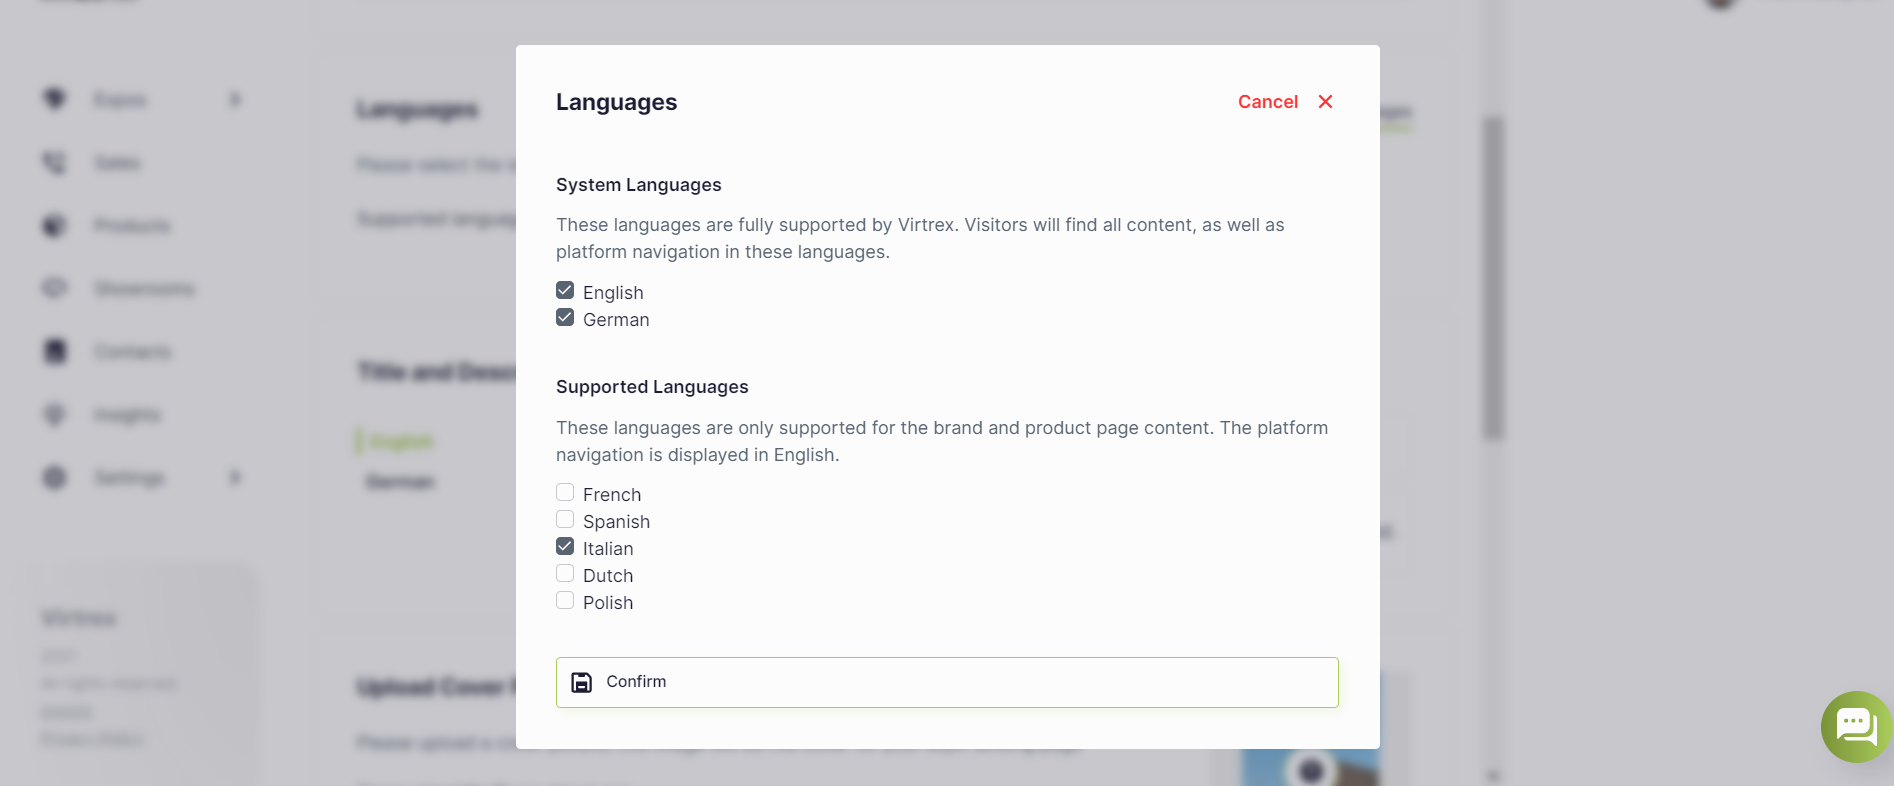
Image 1: You can choose from seven languages.
2. How to store several languages
You have the option of linking language variants in individual areas of your Admin Panel. The core of this is your brand profile (see section 2.1).
2.1. Brand settings
The brand profile presents your brand. Therefore, in this area you also determine the languages in which your products, showrooms and brand profile are displayed. To do this, select the desired languages under “Settings” > “Brand Settings” (see below image 2). You can then add your brand description and the settings for the imprint and data protection in the corresponding languages.
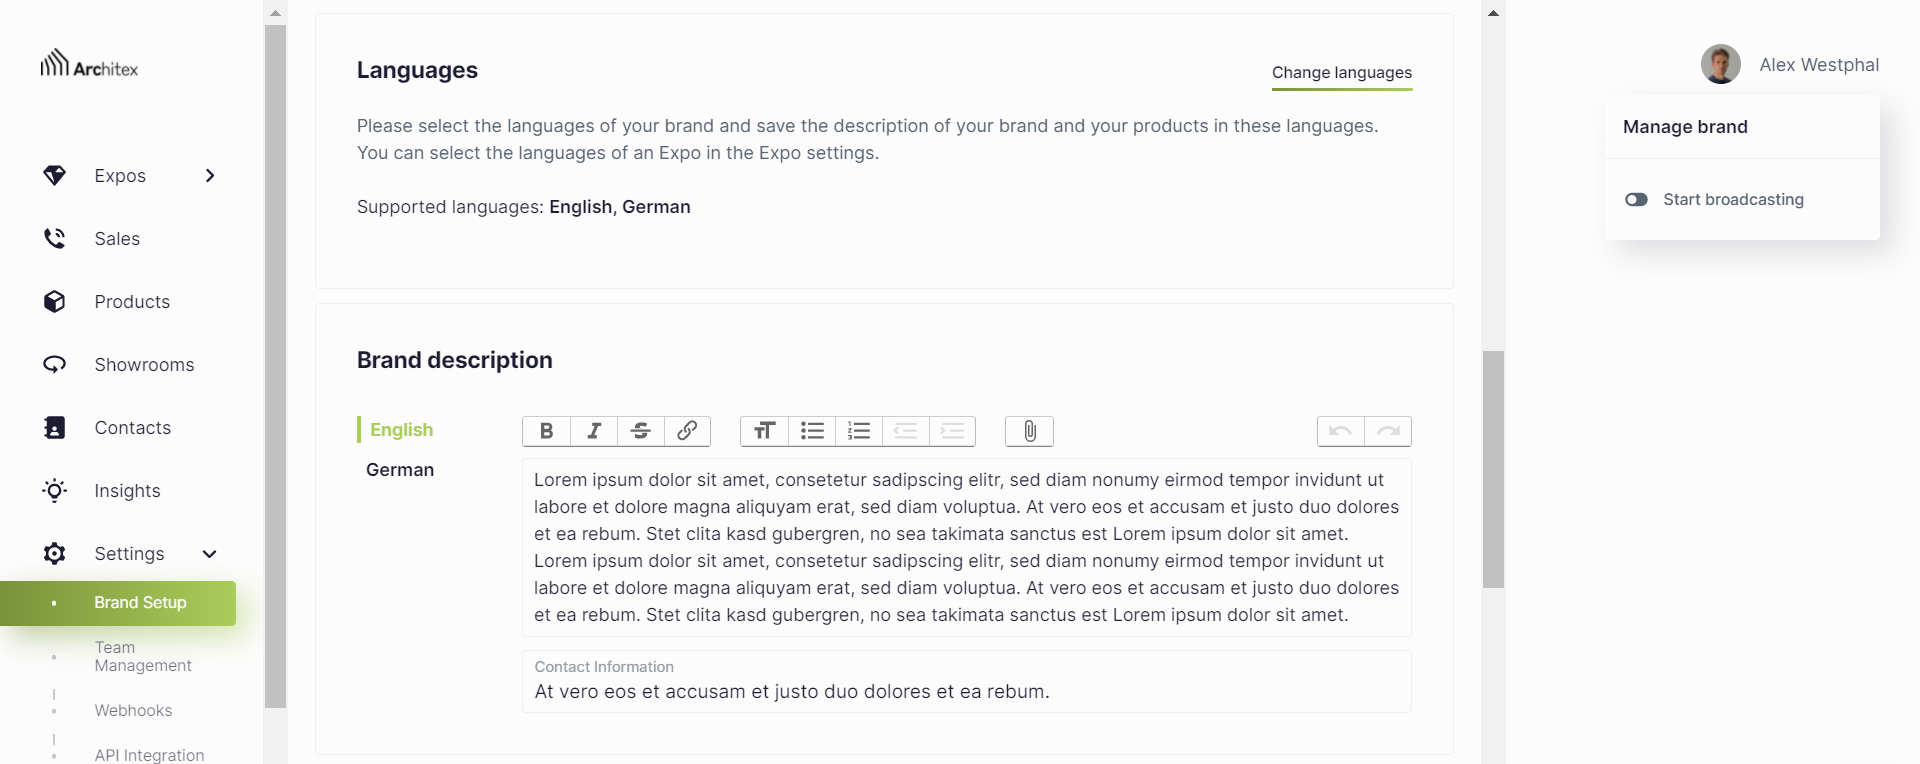
Image 2: Add information about your brand according to the selected languages.
2.2. Products
After you have defined the language of your brand, you can also link your products to the respective languages. All languages that have been stored in the brand settings are displayed under “Products” > “Add product”. You can then add the corresponding content there. Please read our Academy article on “Products: Add and manage”.
2.3. Showrooms
Similar to adding products, you can also add the information of your showrooms in all languages of your brand. To do this, select the desired template under “Showrooms” > “Add showroom”. The pop-up for creating your showroom then gives you the opportunity to enter the title and description in the different languages. Please read our Academy article on “Add showroom and managing 3D products”.
2.4. Event information
If you want to create a live program and have defined several languages for the Expo, you must add information such as the title and description of events, channels and panels in all selected languages. You can determine the language of the panel itself when you create it. Please read our Academy article on “Creating and managing events”.
2.5. Create Expo
Once you create your Expo, you can customise the languages offered for each Expo. For example, if you are planning an Expo specifically for the Spanish market, you may want to serve only a Spanish-speaking audience here. Please note that you can select multiple languages. You can adjust the selected settings afterwards if necessary.
Please also note: If you add a language to your selection but do not fill it with content, visitors will be offered the language selection but will not see any content.
Once you have created your Expo, you need to fill it with content. Please read our Academy article on “Set up your Expo”.
3. Note for participating brands
If you are a participating brand of an Expo, the language of the Expo cannot be determined by you. The organiser sets the language. You can see the set languages under the title of the corresponding Expo (see image 3 below).
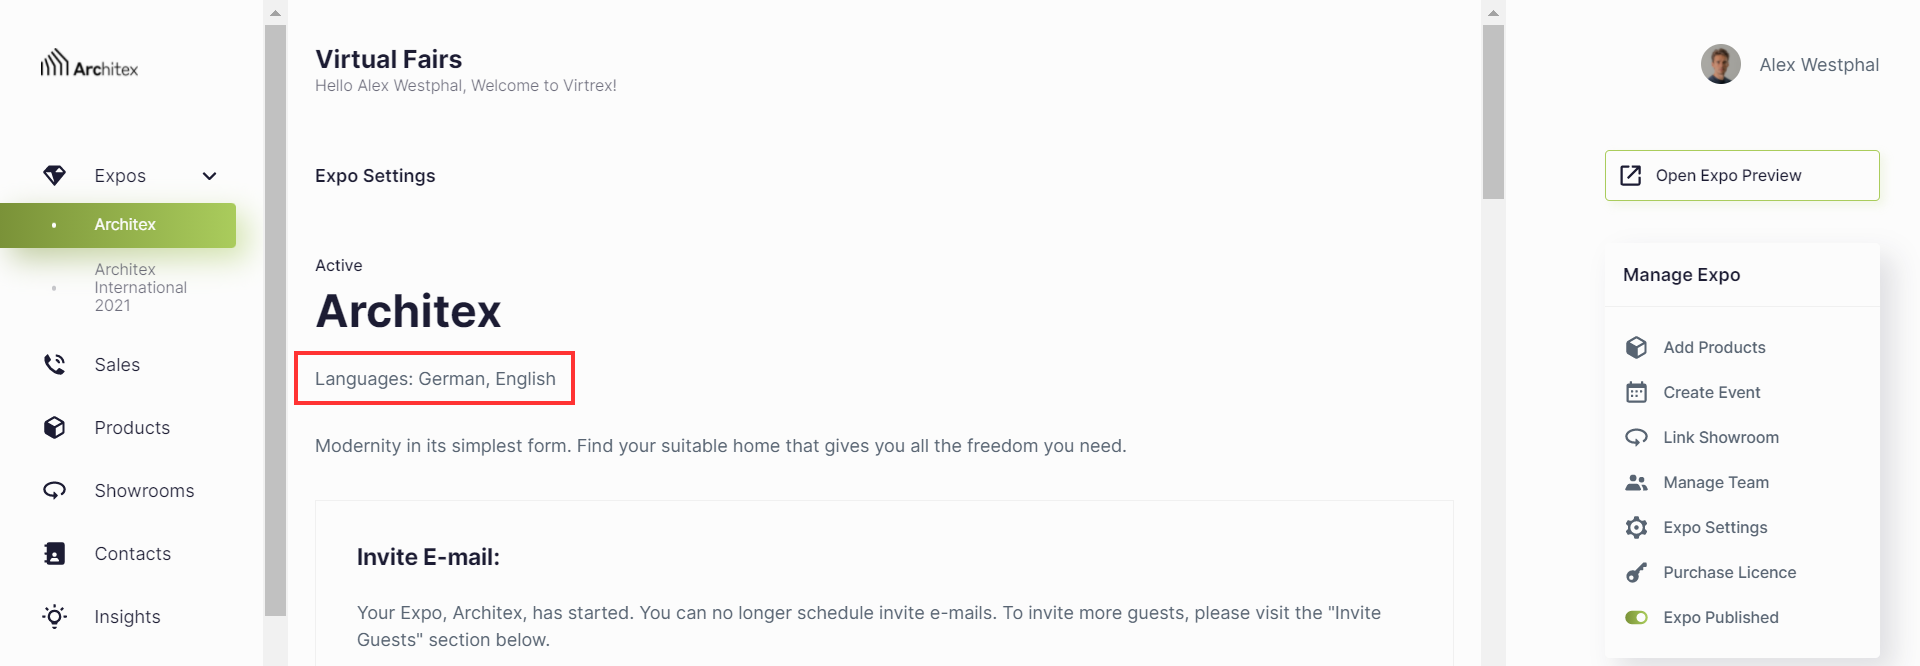
Image 3: As a participating brand, you will see the set language under the corresponding Expo.