Set up your Expo
1. Why the Expo must be filled
Virtrex offers you the possibility to have multiple Expos running in parallel. Therefore, your uploaded content is not automatically assigned to an Expo. You must therefore make the specific assignment before the Expo can take place.
Please note: If you do not make these settings, only your brand profile will be visible to visitors. In addition, you need to invite your visitors; adding them in the address book alone is not sufficient.
2. Settings in the “Expo” area
When you open your Expo in the left menu bar, you will find various setting options. In addition to the general settings for your Expo (see below image 1), you will find:
Your invitation management to plan and send your invitations to the visitors.
Your event area to create and edit events.
Categories or theme filters of your Expo for better orientation for the visitors.
Products you want to present.
Showrooms if you want a representation in 3D.
Team that can interact with visitors at the Expo.
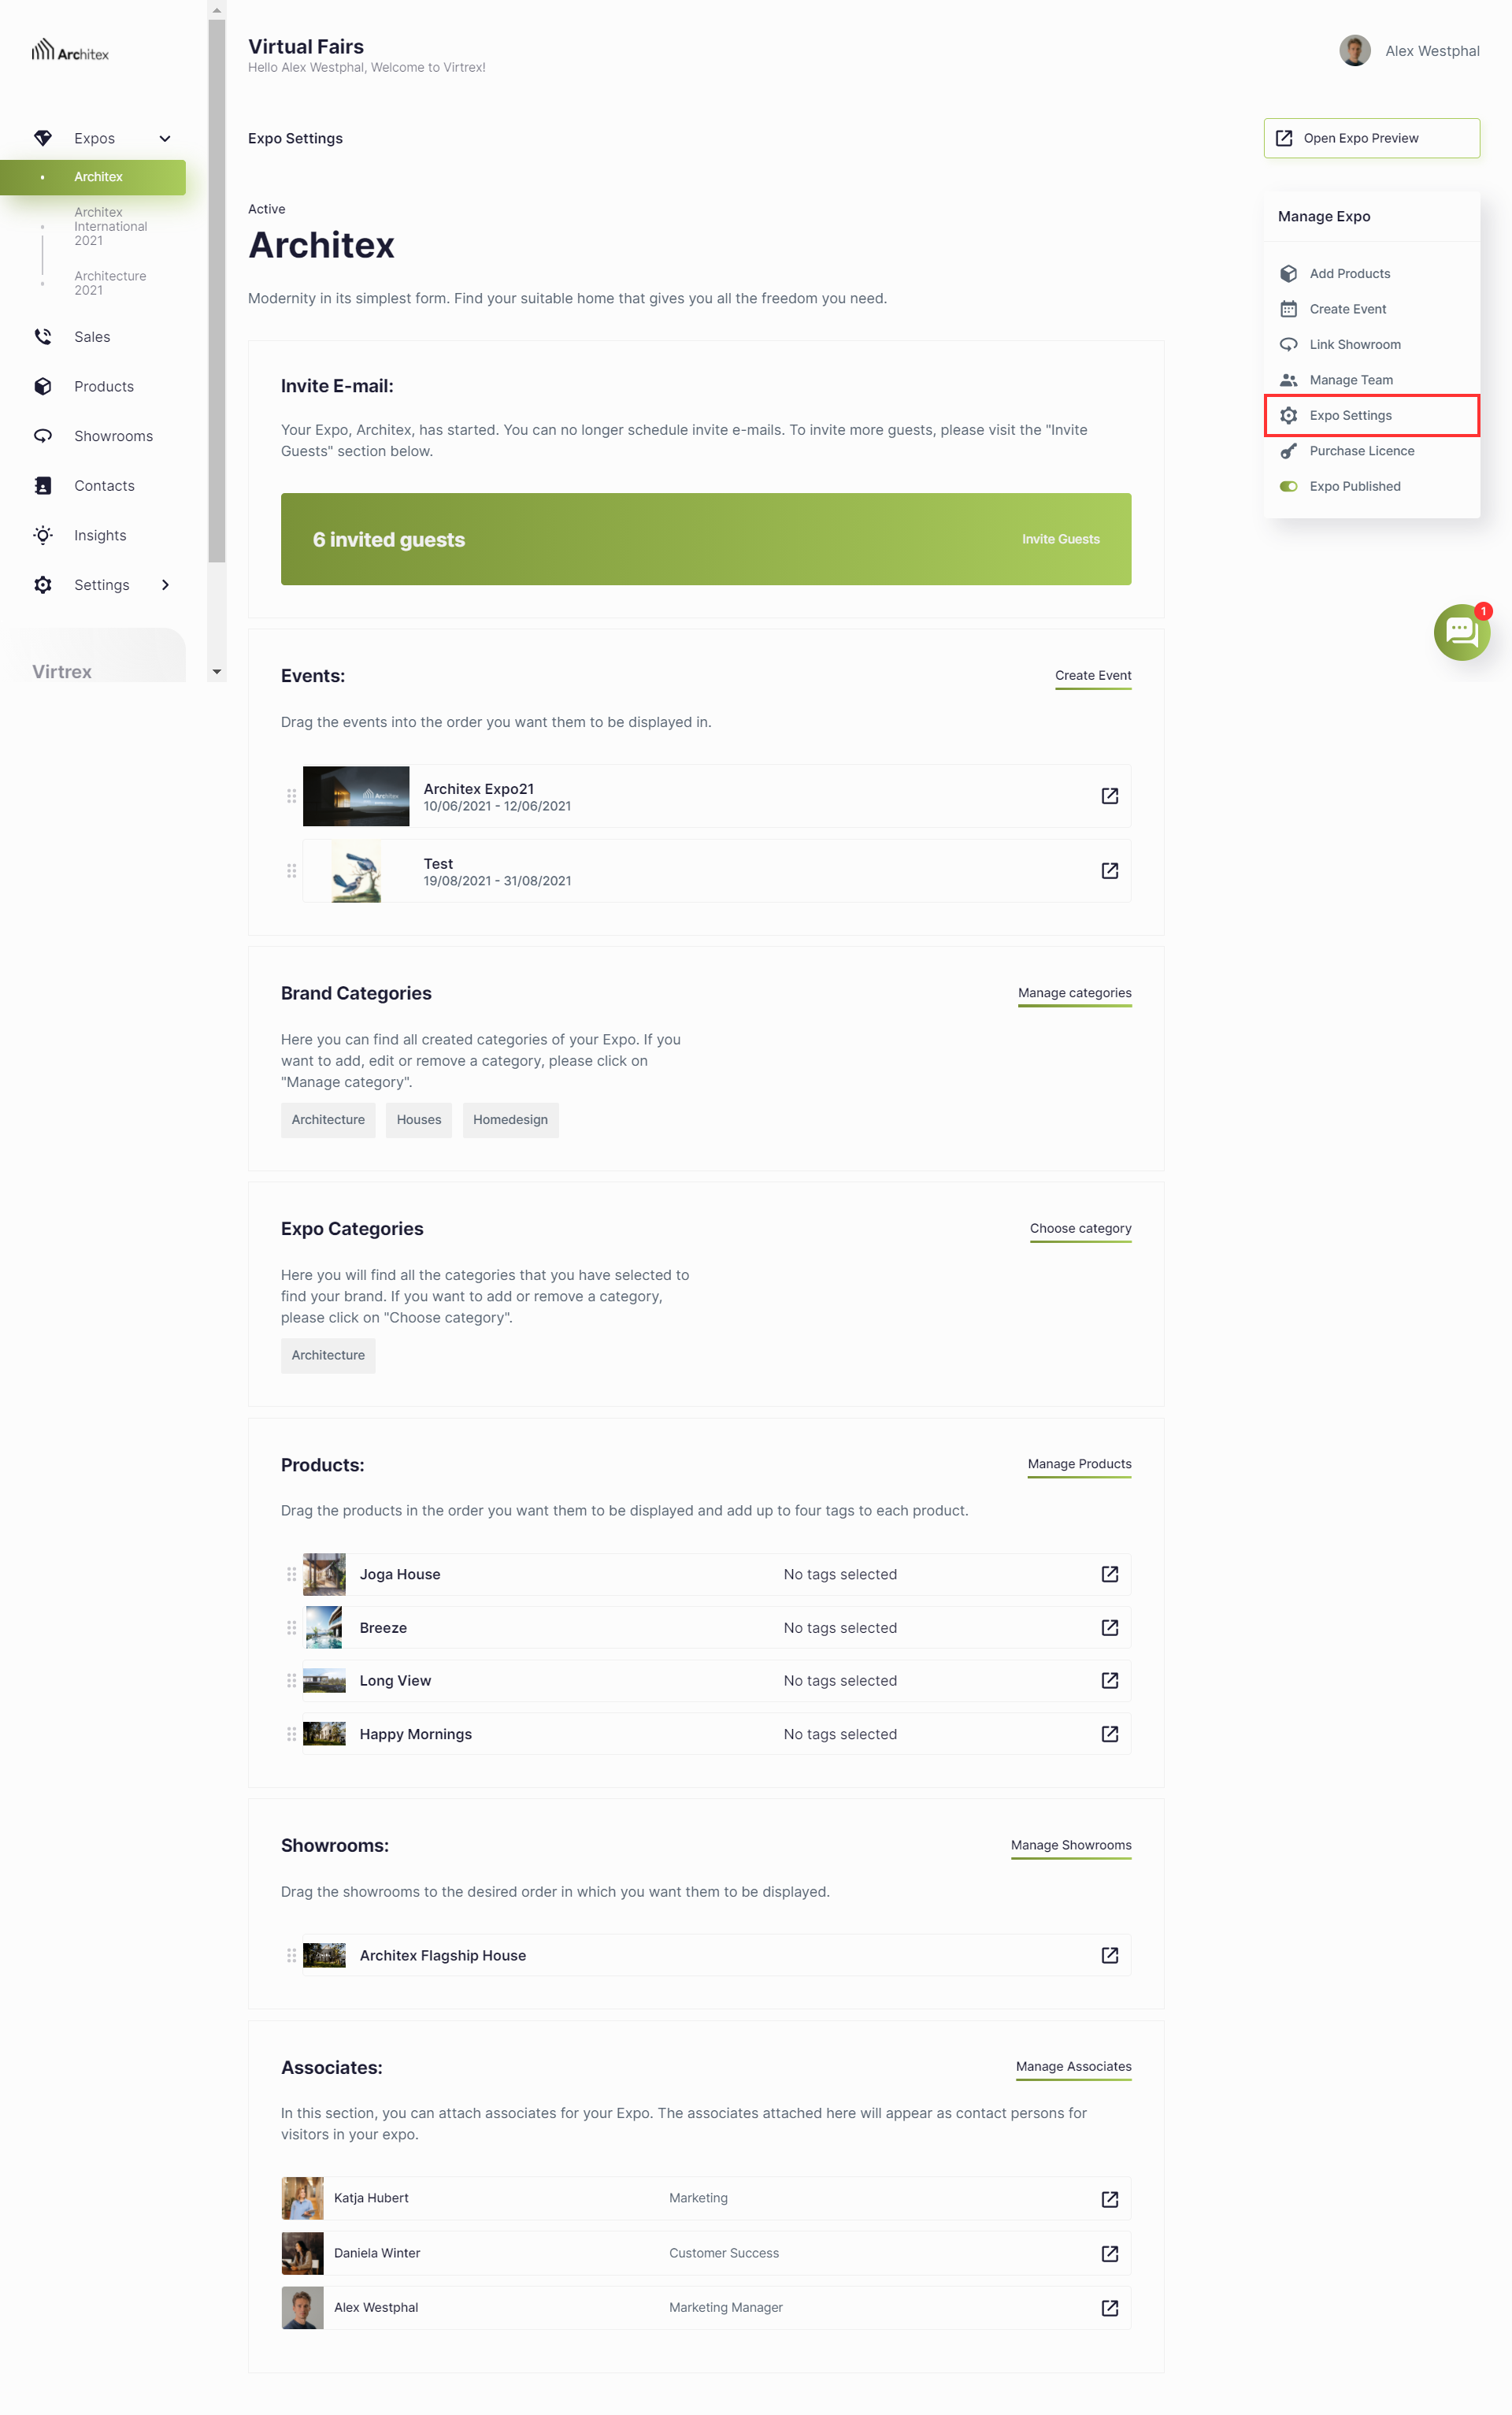
Image 1: Here you can see where to find the general settings of your Expo.
If you are an organizer of an Expo, you will also find (see below image 2):
Area for inviting brands that will participate in the Expo.
License packages for the brands that will participate in the Expo.
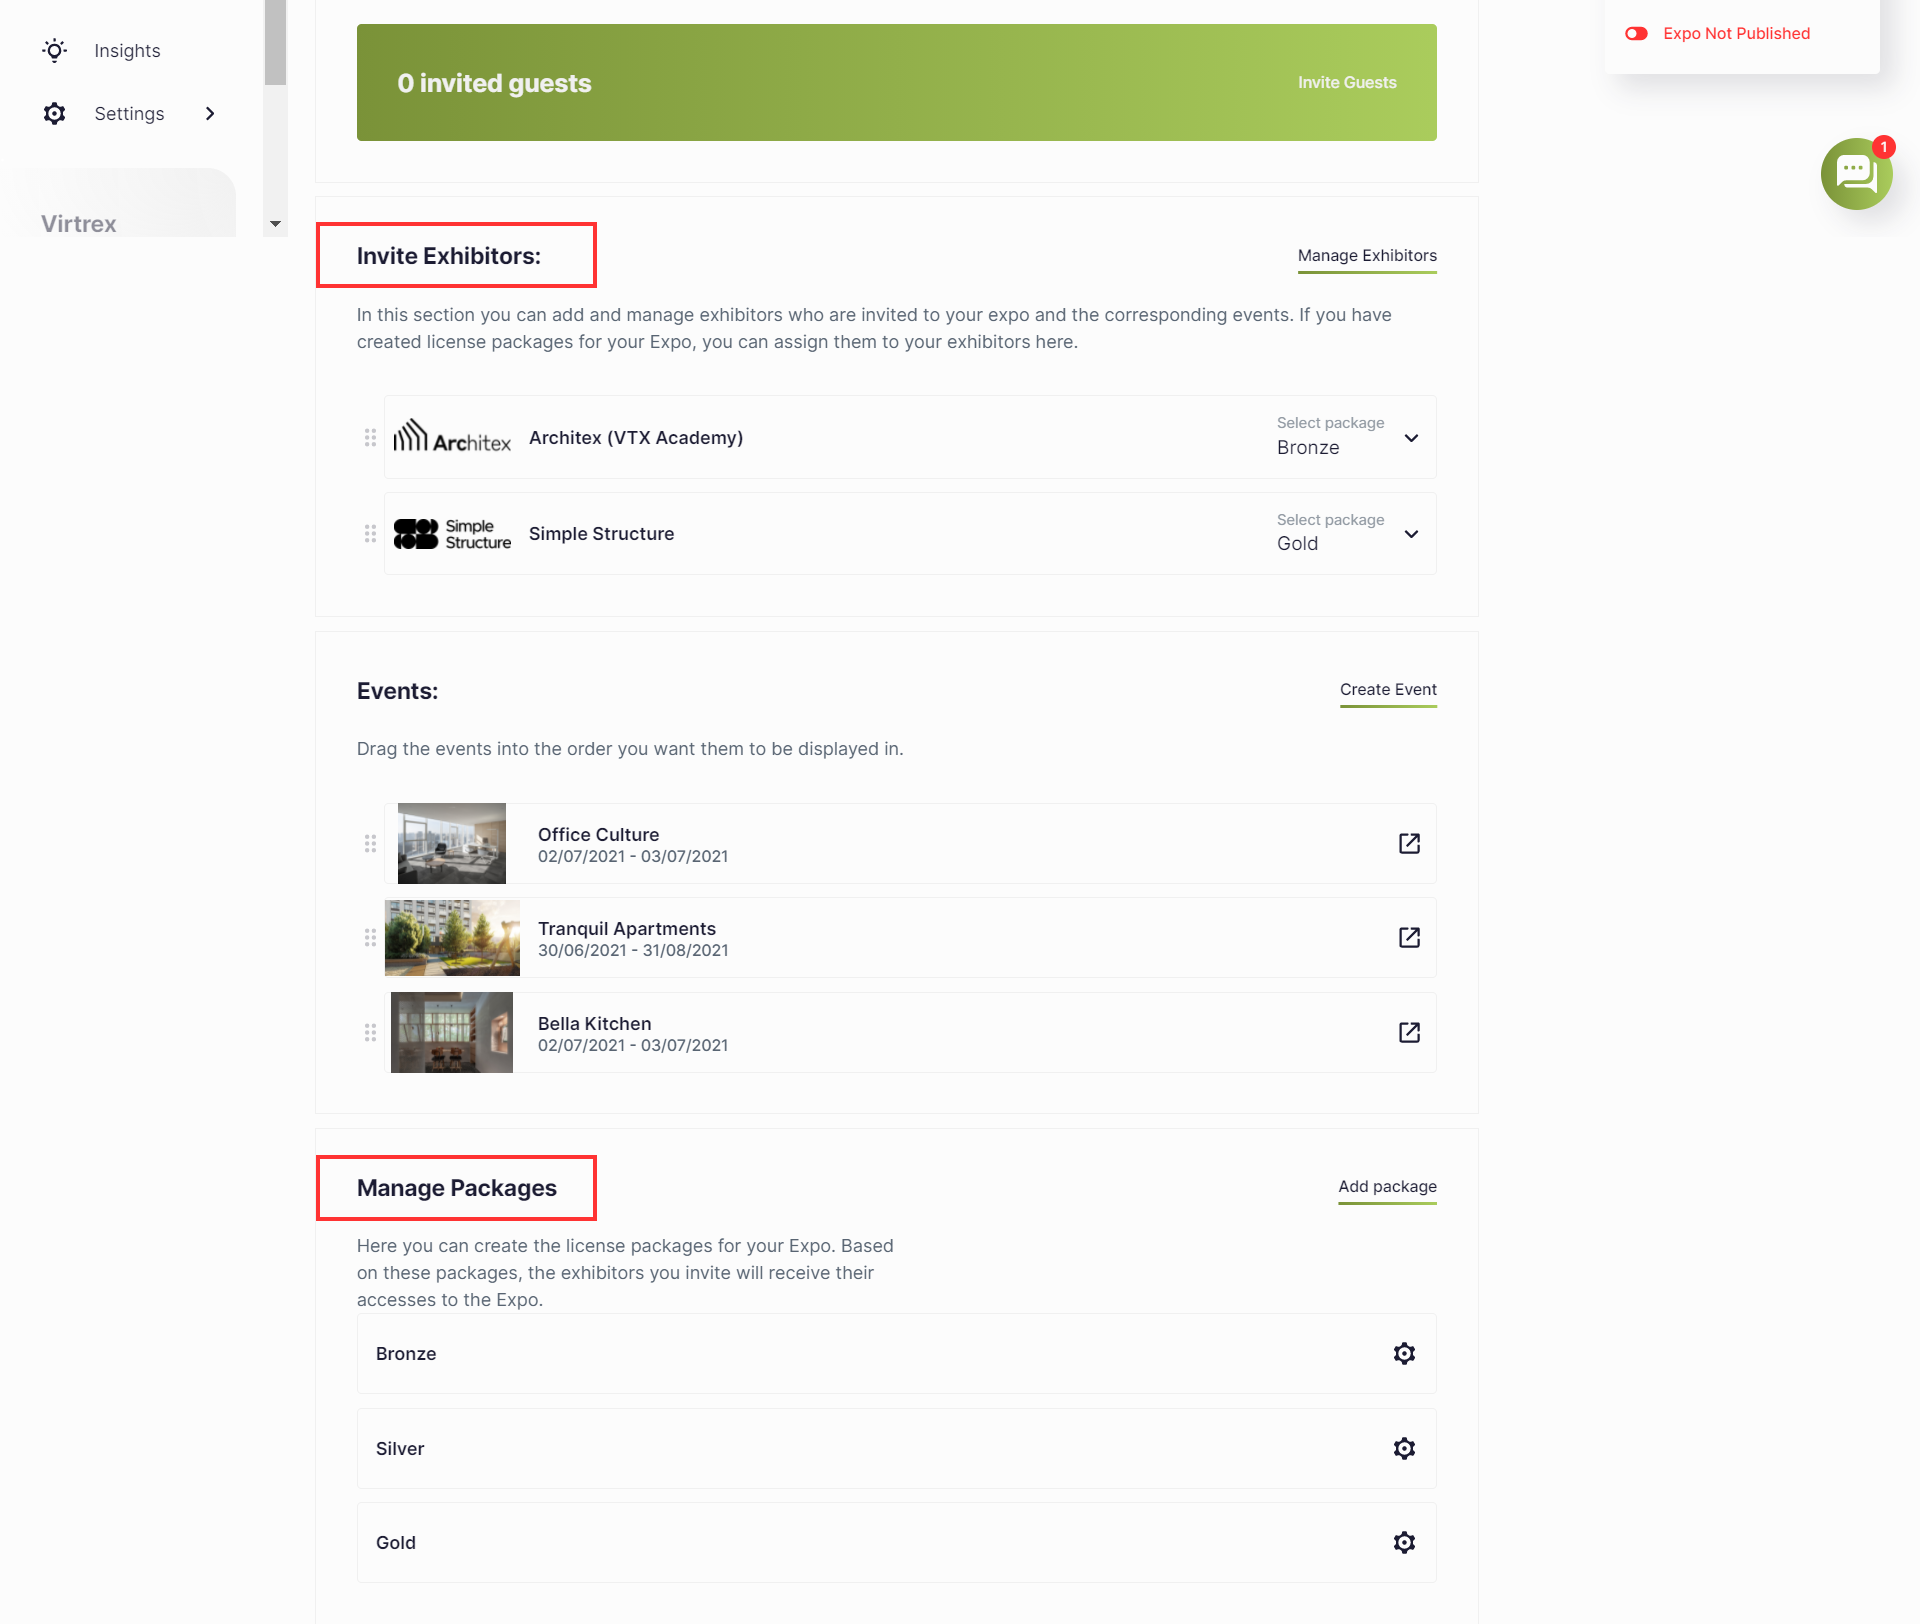
Image 2: Here you can see the Expo overview with participating brands & licence packages.
3. Add content to your Expo
As you work towards your Expo, you will need to populate the different sections on the left menu bar of your Admin Panel (see below image 3).
3.1. Preparation of your content
Ideally, to prepare for your Expo, you will fill in the relevant sections of the Admin Panel. These are:
Products,
Showrooms,
Contacts,
as well as the “Settings” area, where you can create your brand profile and manage your team members.

Image 3: Overview of the left menu bar of your Admin Panel with the expanded “Settings” section.
Once you have added the content, one more important step remains to make your Expo successful. You need to determine what content you want to present at each Expo.
3.2. Take content to the Expo
To add content to an Expo go to the specific Expo within your Admin Panel. To do this, select “Expos” from the left menu bar and select the preferred Expo. Here, make the selection of your content as described in section 2.
3.3. Invite visitors
Please note that you need to invite your visitors to the Expo. For this purpose, Virtrex offers you the possibility to schedule the sending of the email invitations (see below image 4).
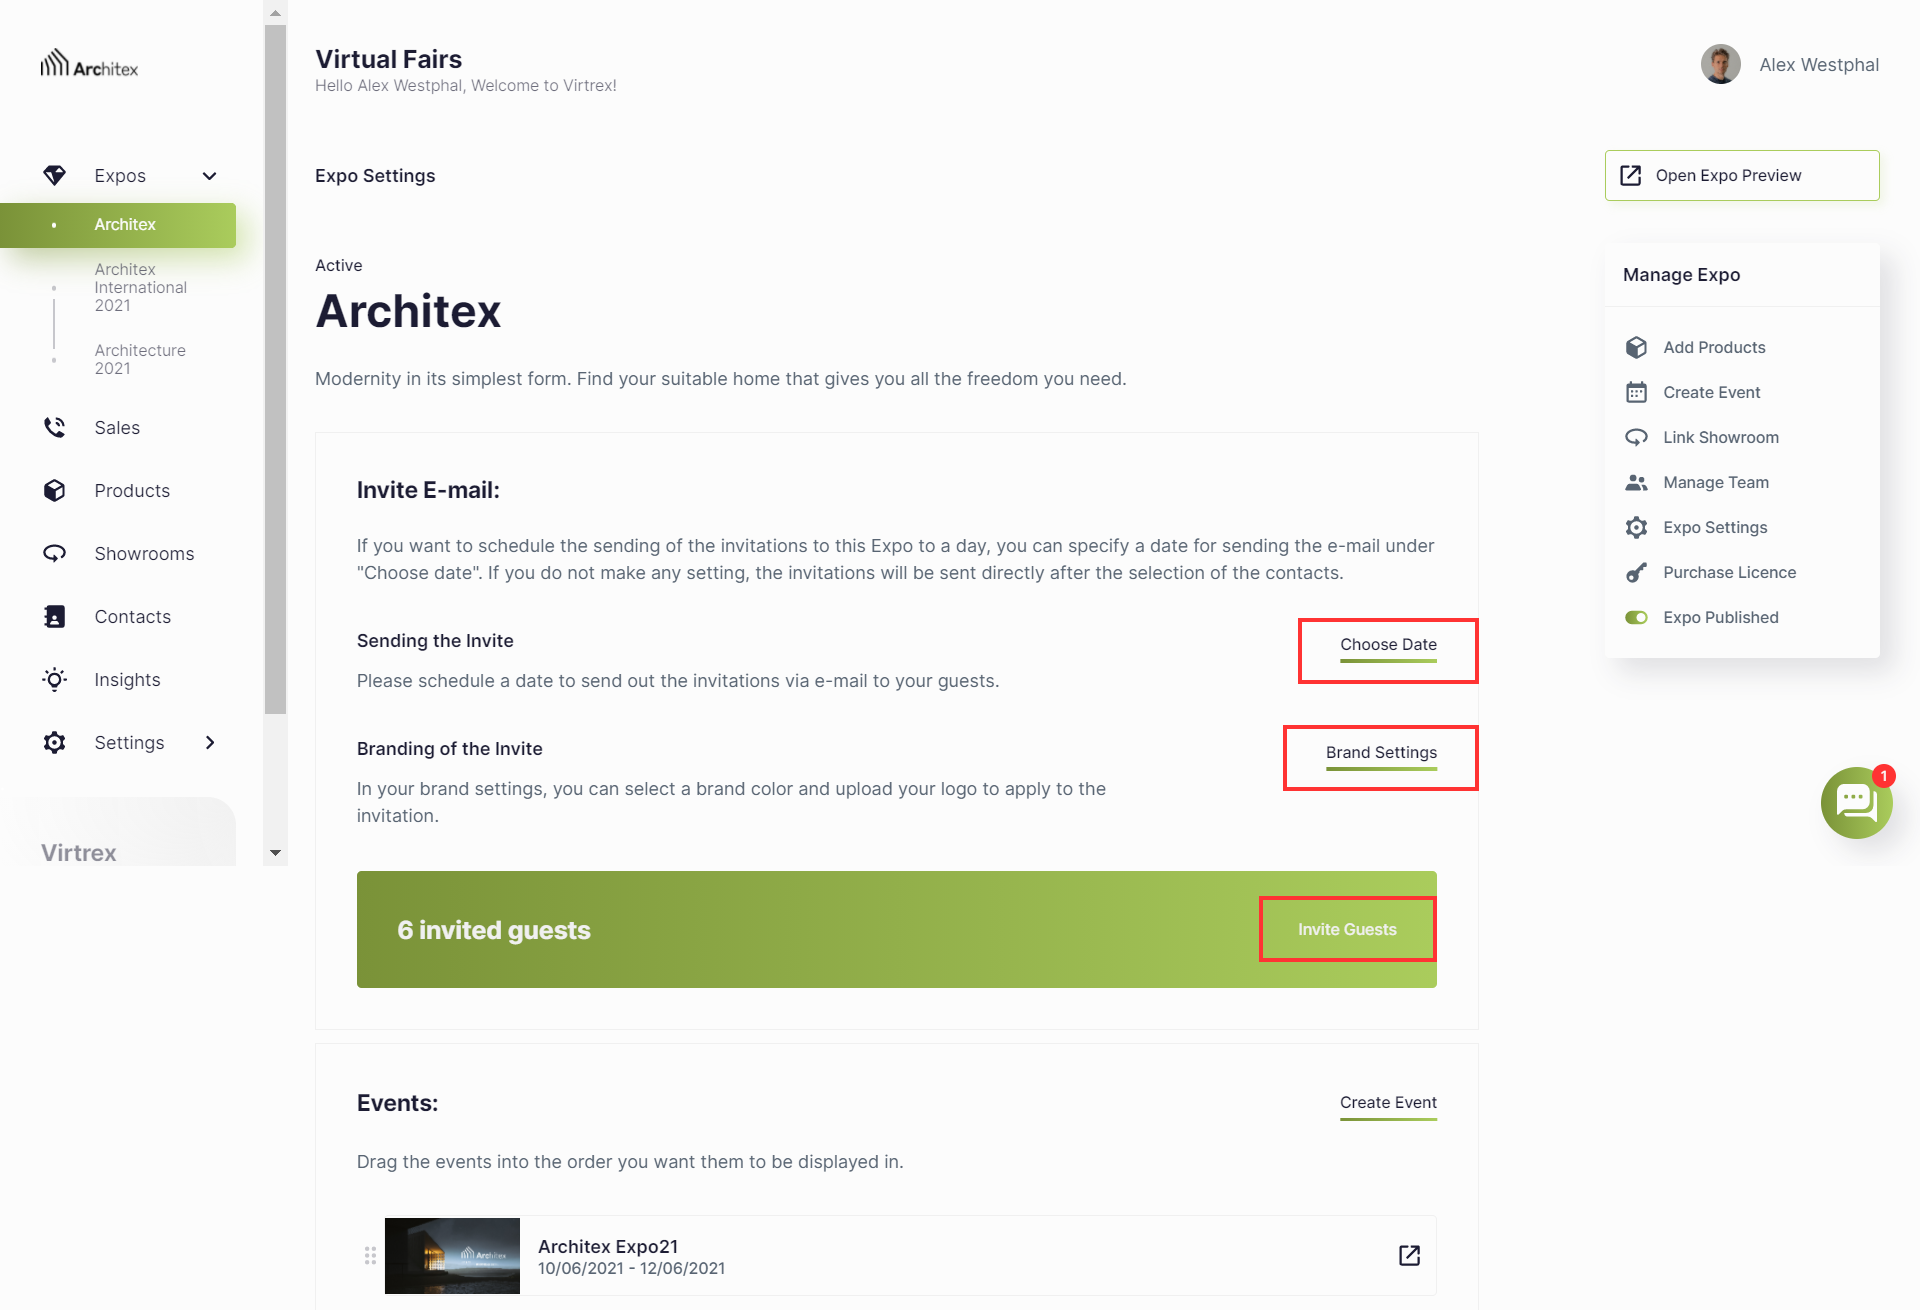
Image 4: Here you see the overview of sending invites to the visitors and scheduling emails.
If you have already made settings for your brand, your brand logo and primary brand color will automatically be included in the invitation. To schedule the invitation sending, you have two options. You can either use “Select date” button to schedule the mailing and add the specific contacts afterward. Alternatively, you can use the “Invite guests” button to make your selection of contacts and send invitations directly at the bottom of the window or start scheduling the dispatch here.
Please note that only scheduling the invitations is not enough to send the emails. You also need to select the contacts for sending.